Creating a Flip Book in Photoshop - Quarto Knows
←
→
Page content transcription
If your browser does not render page correctly, please read the page content below
Creating a Flip Book in
                           Photoshop®
Now it’s time to learn how to create a flip book using Adobe
Photoshop®.                                                                                       Materials
                                                                                            .
For this exercise, I’ll reuse the bird’s flying cycle (check out page                 . A printeArcoanmdpuatescranner
61 of Flipping Out!) and then enhance and color the drawings,                          or an all-in-one pr
add an opening title, and line test the animation in Photoshop.                           . Paper or cardinster
                                                                                     . Binder.clScipiss soorrsa stapler
There are two ways to animate with Photoshop: frame animation
and video timeline. This exercise uses frame animation.

                                                      1
                                                     Scan your drawings at a resolution
                                                     of 300 dpi, and save them to your
                                                     computer.

                                                                                            2
                                                                                          Open Adobe Photoshop, and select File
                                                                                          > Scripts > Load Files into Stack. Then
                                                                                          select the scanned files, and click OK. This
                                                                                          will open all of the drawings in different
                                                                                          layers of a Photoshop file. If necessary,
                                                                                          rotate the drawings by selecting Image
                                                                                          > Image Rotation > 180° (or another
                                                                                          rotation).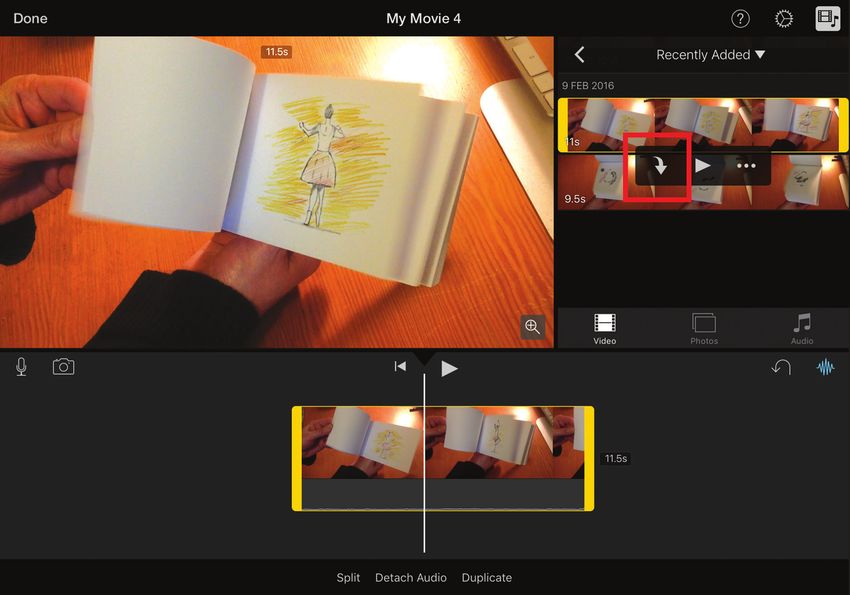
3
Adjust the image levels by selecting a
layer of the picture. Then select Image >
Adjustments > Levels. In the dialog box,
check Preview, and move the Input Levels
cursors until the image has the right
black-and-white tonality. Use the same
Input Levels number to adjust the levels
for the rest of the images.

                                                 4
                                                The drawings’ sequence should line
                                                up. Go to the Layers window, and
                                                deselect the layer visibility for all of the
                                                drawings except for two consecutive
                                                ones. Then select the top drawing’s
                                                layer, and change the master opacity
                                                to 50% or lower. If you need to move a
                                                drawing because its sequence doesn’t
                                                align, select the layer, and go to Select
                                                > All. Then click on the Move tool, and
                                                move the drawing using the keyboard
                                                arrows.

                                            2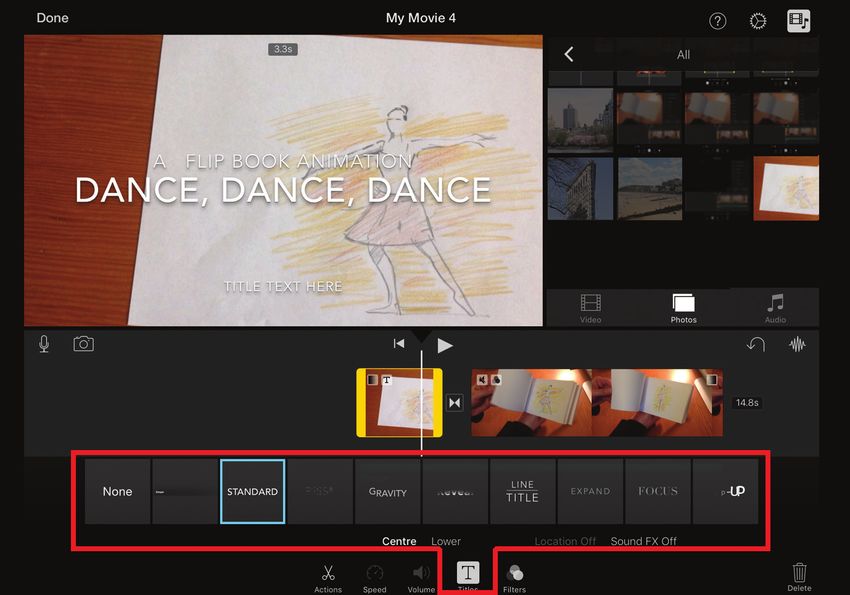
5
Now test your animation.
Select Window > Workspace
> Motion. Click Create Frame
Animation, and the first frame
containing the first layer will
appear in the timeline.

                                         6
                                      To add the drawings on the
                                      different frames of the timeline,
                                      select all of the layers, and click
                                      the tab on the right side. Then
                                      click Make Frames From Layers.
                                      This adds all of the layers to the
                                      timeline.

                                  3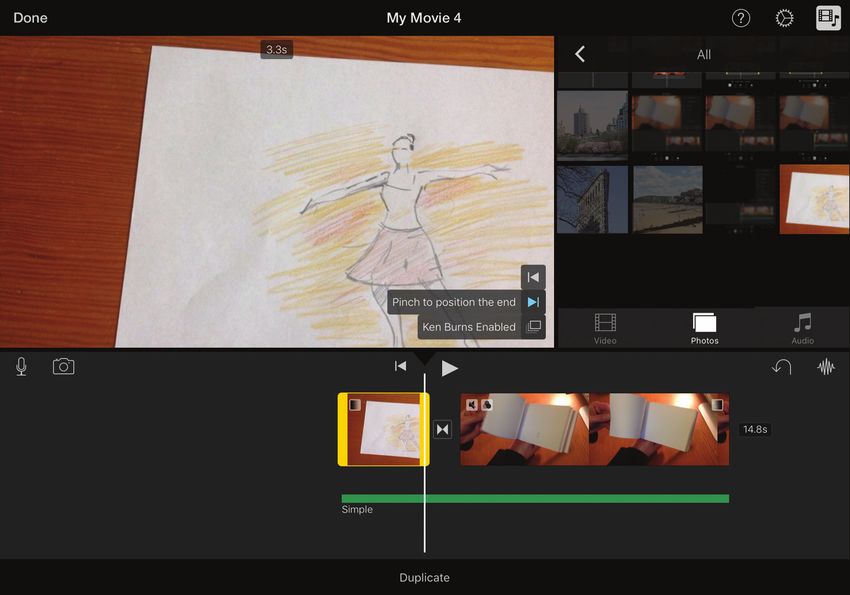
7
Press the space bar to see
your animation in motion.
Check the animation, and
make corrections to the
drawings if necessary.

                                   8
                                 Create a new layer at the
                                 bottom of the layer list, and
                                 add text using the text tool.

                             4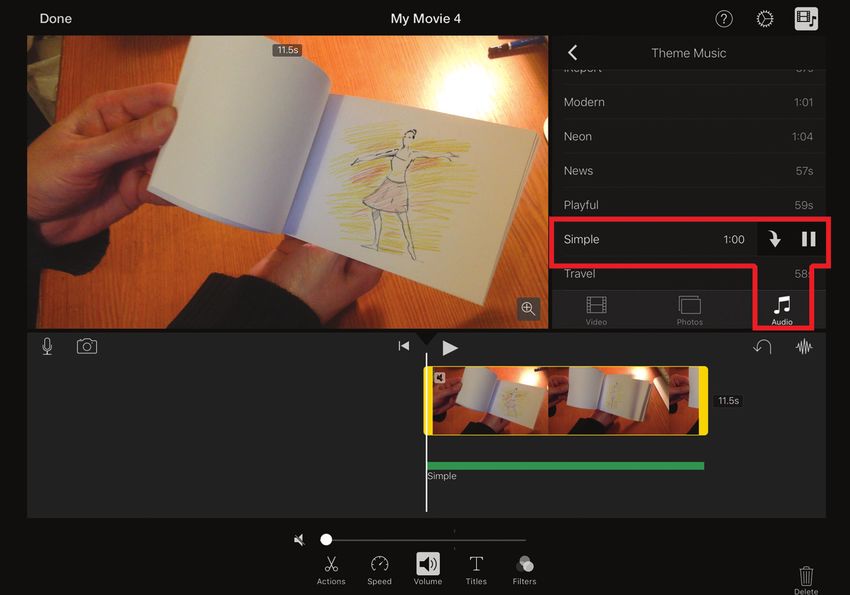
9
To add color, create a new layer,
and place it on top of the picture
that you want to paint. Then
select the layer, and set the Blend
Mode to Multiply. The Blend
Mode options appear on the
tab at the left side of the Layers
window. Now paint over the new
layer. You can still see the pencil
lines in the picture below. Repeat
the process with the rest of the
drawings.

                                       10
                                      Add a frame, which you will cut
                                      around after the pictures are
                                      printed. Create a new blank layer.
                                      Choose the Rectangular Marquee
                                      tool, and drag a rectangle to cover
                                      the whole picture. Then select
                                      Edit > Stroke, and choose a stroke
                                      width and a color, and click inside.
                                      Keep this layer visible at the top
                                      of the other layers’ list.
11
Now you can print all of the
pictures. Keep only the layers
that you want to print visible:
the pencil drawing’s layer, the
colored layer, and the frame
layer from the previous step.
Print every picture three times.

                                       12
                                       Cut around the pictures, and put them
                                       in order. Bind all of the pages of the
                                       flip book together with staples or a
                                       clip, and test your animation!

                                   6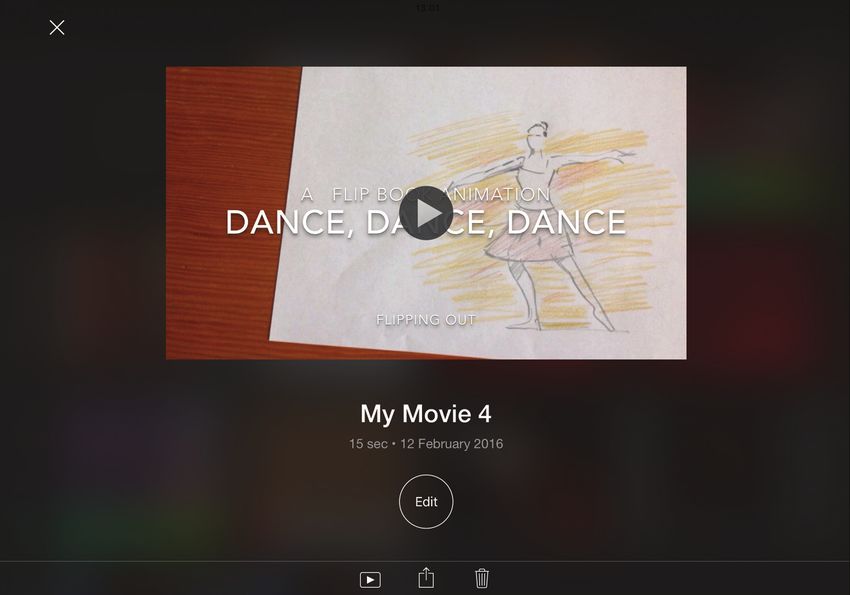
Preparing Your Flip Book for the Web
Now that you have created an animated flip book, you might want to share it with the world! It’s simple to
do: Just use your camera, smartphone, or tablet to make a video of your animation, and upload the clip to
your website, blog, or favorite social media platform.

To add titles, music, or sound effects, or to edit your video, you will need to use video-editing software. There
are plenty of programs and apps available, many of which share some basic features and capabilities. Try a
free or cheap one at first.

In this chapter, you will learn how to edit an animated flip book using the iMovie app for iOS. iMovie is easy
to use and allows you to upload your edited video to the web in almost no time.

 1
Ask someone to flip the pages of your completed flip book while you film. Hold the camera close to the flip book or zoom in until the pictures look
clear, and record a video. Take a picture of one of the frames in the flip book to use as a background image for the opening title.
2
                                             Open the iMovie app, go to
                                             Projects, and click on the “+”
                                             button to start a new project.
                                             In the pop-up window, select
                                             Movie to create a new movie
                                             project. iMovie allows you to
                                             pick a theme for your movie;
                                             choose Simple.

  3
You should now see iMovie’s three
main windows: the viewer window on
the upper-left side, the media library
window on the upper-right side, and
the timeline window at the bottom of
the screen.

                                         8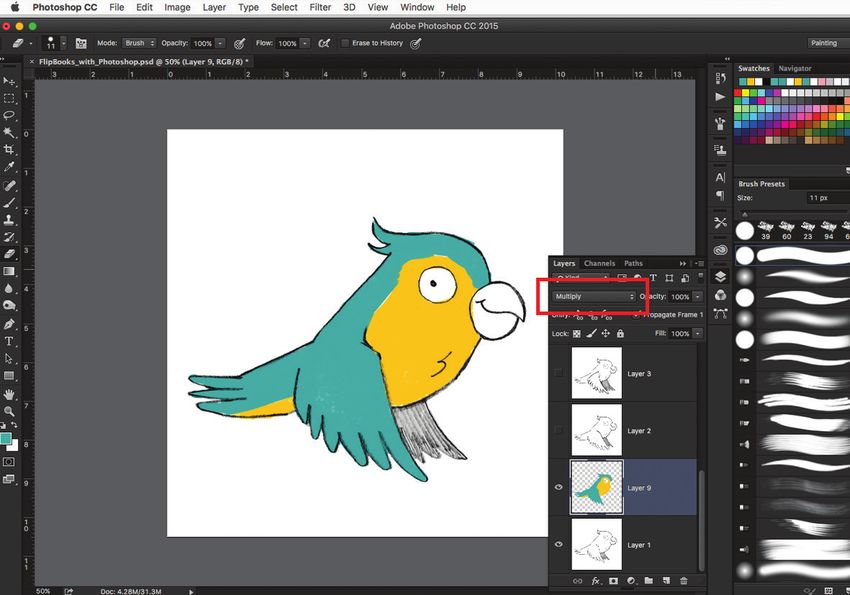
4
                                                In the media library window,
                                               you can select videos, photos,
                                               or audio. Choose Video. Then
                                               find and select your video.
                                               Notice that the selected clip is
                                               highlighted yellow and that
                                               three icons pop up below it. Click
                                               on the arrow icon to bring your
                                               video to the timeline. To edit the
                                               video’s length, click on the sides
                                               of the clip, and drag left or right.

  5
To add music or sound effects, select
Audio in the media library window.
Several options will appear; you can
add music and sound effects from your
device or from the iMovie library. For
this exercise, I select Theme Music and
choose the “Simple” tune. Click on the
arrow icon to bring the audio clip to
the timeline. If you wish to delete your
video’s background sound, click on
the Volume button located below the
timeline, and change the volume to 0.

                                           9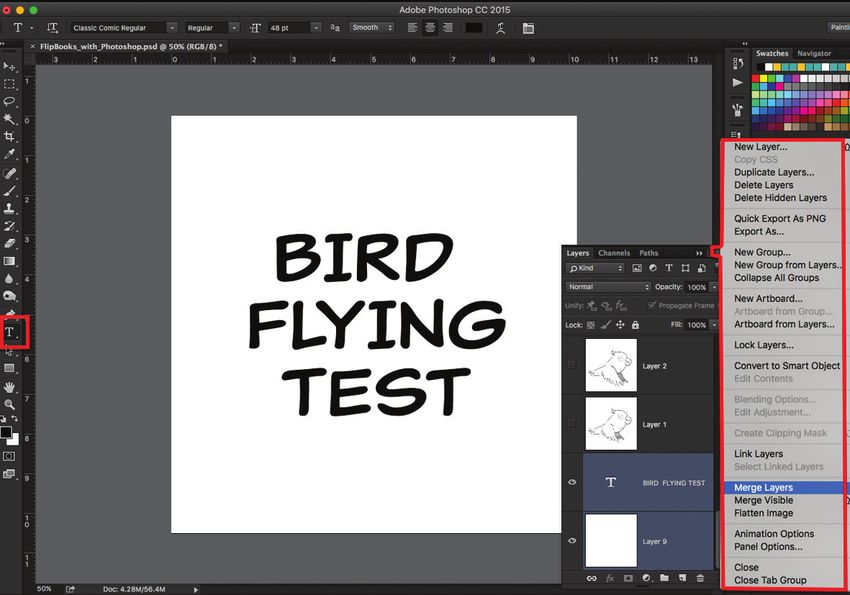
6
                                                 Find Project Settings by
                                                 selecting the gear icon. This
                                                 window allows you to add a
                                                 filter to your video, create fade-
                                                 in and fade-out transitions, and
                                                 change the audio’s pitch.

  7
To add an opening title, you will need
an image or a clip for the background.
Use the picture from Step 1. To add a
picture to the timeline, select Photos
from the media library window, and
find and select your picture. When you
click on it, iMovie automatically adds
the picture to the timeline preceding
the video clip. To put the picture behind
the clip, move the timeline cursor to the
end of the clip, and click on the picture
you want to add.

                                            10
8
Select the clip for the opening
title. Then click on the Title
button below the timeline,
and different titles will appear.
Choose one; it will display in the
viewer window over the picture.
Click on the title text, and add
the name and details of your
movie. When you have finished
editing your movie, click Done
on the upper-left side of the
screen to save your project.
9
Your movie is now finished! iMovie
saves your movie to Projects, so you can
come back and edit it at any time.
1110 The last step is to upload your flip book animation to the Internet. Click on the Upload icon. iMovie allows you to share your video directly with
several popular social-media and video websites. You can also save your video to your device and upload it to other websites.
12You can also read