SLINGSHOT-2 Polaris Slingshot 2 Speaker System - SSV Works
←
→
Page content transcription
If your browser does not render page correctly, please read the page content below

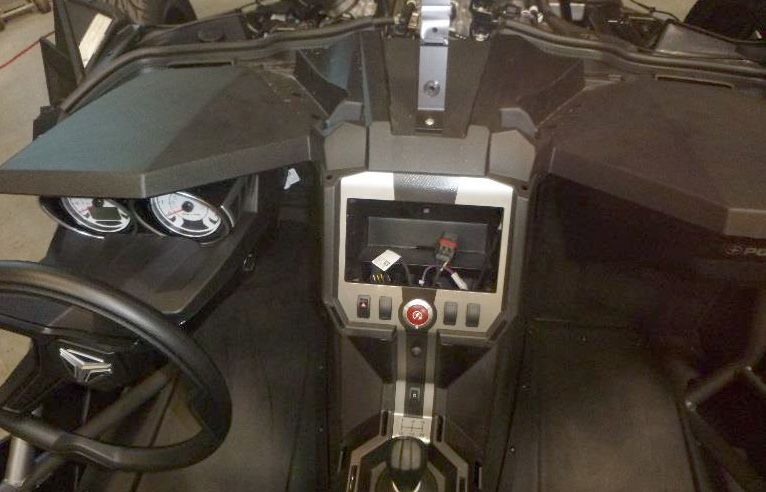
SLINGSHOT-2
                                                                                                                            Polaris Slingshot
           SSV WORKS, 201 N. Rice Ave Unit A, Oxnard, CA 93030
    www.SSVworks.com | Phone: 818-991-1778 | Fax: 866-293-6751
                                                                                                                           2 Speaker System

WARRANTY INFORMATION:
                                                                                                                Please read and understand these

                                                                                                     !
All SSV Works enclosures are covered by a limited lifetime warranty against defects
                                                                                                                instructions completely before
in material or workmanship. All SSV Works Electronics are covered by a limited 1 year
                                                                                                                installation to avoid possible injury, or
warranty against defects in material or workmanship. All SSV Works Speakers are
                                                                                                                damage to the accessory or vehicle.
covered by a limited 1 year warranty against defects in material or workmanship. Labor
for replacement of defective components is not covered. Contact SSV Works for further
warranty information.

  TOOLS NEEDED FOR INSTALLATION                                                     PARTS LIST
   - 13mm Socket Wrench             - Drill with Drill bits                          1. SS-FKP652 (1 pair)              4. Audio Input Kit

   - T25, T40 Torx Wrenches         - 1.75” Hole saw (for MRB2                       2. SSV Works 6.5”                  5. Amplifier Wiring Kit
                                      flush mounting)                                   Speakers (1 pair)
   - Wire Crimpers                                                                                                      6. Amplifier Mounting Board
                                    - #2 and #3 Phillips Screwdriver                 3. Amplifier
   - Wire Strippers
                                    - Panel Removal Tool

  PARTS LIST IMAGES

         1. SS-FKP652 (1 pair)              2. SSV Works 6.5” Speakers                   3. Amplifier                     4. Audio Input Kit
                                                     (1 pair)

          5. Amplifier Wiring Kit          6. Amplifier Mounting Board

  INSTALLATION NOTES
    The use of a thread locker is recommended on all screws to prevent loosening due to vibration. The detailed installation instructions for the SS-
    FKP652-U speaker pods can be found in the individual box they are packed in. If you are using the MRB2 Bluetooth Receiver as your source, the
    detailed wiring instructions can be found in that box. Reading all the instructions before beginning the installation is recommended.
A B
A. Remove the three T25 screws that secure the windscreen, lift B. Remove the mirrors using the 13mm socket
and slide the windscreen out of the 2 slots on the bottom of
the dash and set aside
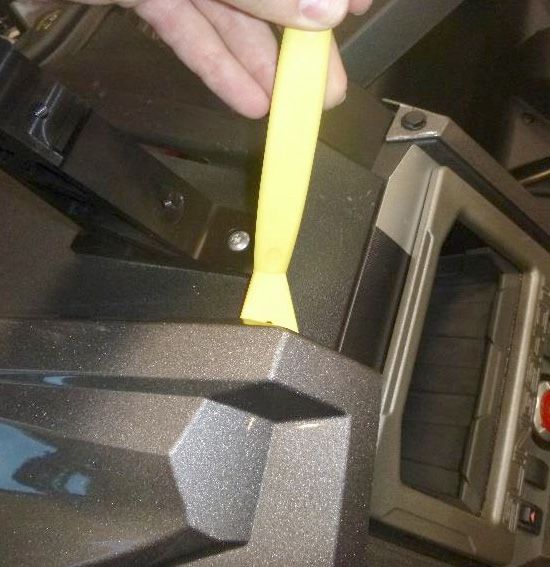
C C
C. Using a panel removal tool, unsnap the 2 painted trim panels on the top center of
the dash
D D D
D. Remove the two T25 screws and the two panel clips from the underside of each plastic panel on the sides of the dash, remove
panel and set aside
SLINGSHOT-2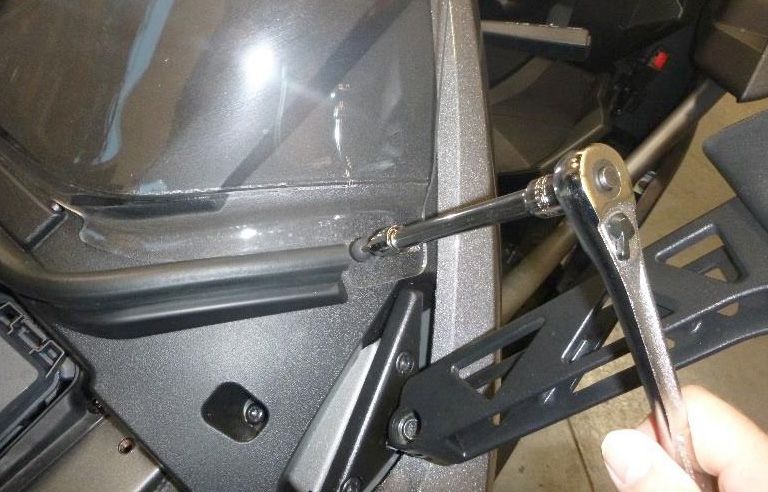
E                                                                                       F
E. Remove the factory pocket by pulling up and toward the                               F. On either side of the starter switch are 2 panel clips inside the
   back of the vehicle, lift the pocket slightly to release from the                       dash opening, remove these using the panel removal tool
   bottom of the panel

                                                                 G                                          H                                            H
G. Remove the two panel clips from the top of the center console       H. Starting at the back of the console, lift the panel up and out. These panels are
   side panels                                                            installed with double sided tape, using the panel removal tool will help break the
                                                                          tape loose

                                                                 I                                           J                                            J
I. Remove the eight T40 Torx screws from the front of the dash         J. Carefully lift the sides of the dash over the mirror brackets and remove the dash
                                                                          from the vehicle and set aside

                                                                                                    SLINGSHOT-2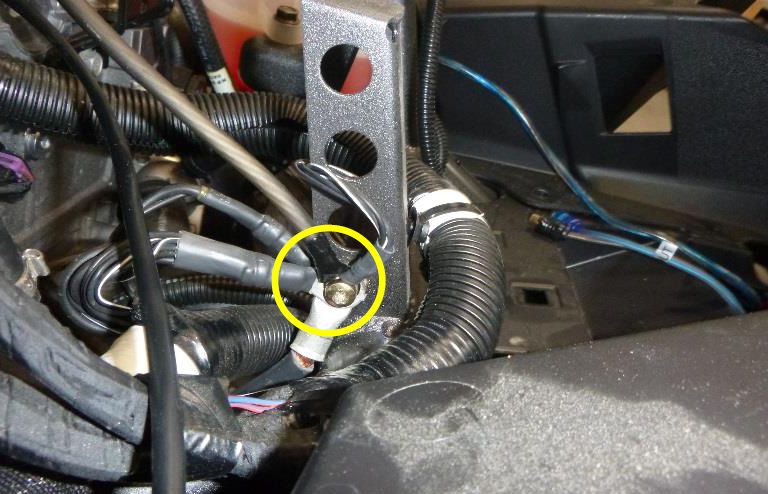
K                                                                                   L
K. From the exterior of the vehicle, remove the battery cover by                     L. Remove the positive battery clamp from the battery, remove
   unscrewing the two T40 Torx screws from the lower panel,                             the battery from the compartment and set aside
   remove the 2 panel clips from the upper panel using the panel
   removal tool

                                    M                                           M                                                                  N
M. Route the amplifier power wire through the center console alongside the main      N. Remove the T40 Torx screw from the factory ground located
  vehicle harness and secure with zip ties, this will run up to the center dash to      under the hood, near the center of the firewall. Attach the
  amplifier mounting location (NOTE: the fuse holder should remain within 12” of        amplifier ground wire with the ring terminal on the bolt and
  the battery                                                                           tighten

                                                               O                                                                                   P
O. Remove the two T40 Torx screws from inside the center dash                        P. Drill a ¼” hole on the bottom of the speaker enclosure for the
   and install the amplifier mounting board using the same two                          speaker wire, after running the speaker wire into the enclosure
   screws                                                                               seal the hole with silicone sealer

                           SLINGSHOT-2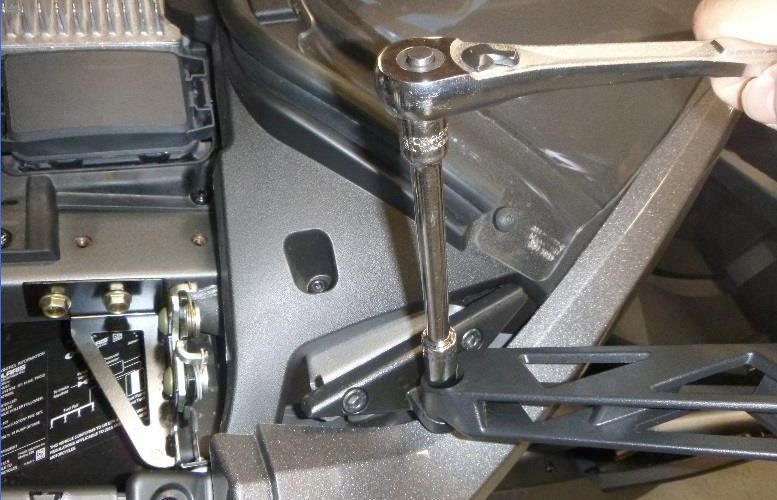
Q                                              R                                            R
Q. Place a speaker into the enclosure and mark the 4 mounting            R. Connect and install the speaker into the enclosure (be sure to connect the “+”
   holes, pre drill these holes using the 1/8” drill bit                    speaker wire to the “+” terminal on the speaker and the “-“ speaker wire to the
                                                                            “-“ terminal on the speaker) using the #2 Phillips screwdriver, attach the triangle
                                                                            block off plate using the M6 screws provided and the #3 screwdriver. Repeat for
                                                                            other side

                                     S                                           S                                                                           T
B. Loosen the screws on the 2 mounting brackets that are attached to the enclosure.        T. Route the speaker wire to the amplifier mounting location, be
   Place enclosure in to the cage; secure the brackets to the cage using the M6               sure to keep it away from any moving parts and any sharp metal
   screws and the #3 screwdriver. Attach the curved metal bracket to the underside
   of the enclosure; be sure it hooks correctly around the cage. Once the enclosure is
   in place, tighten all the screws. Repeat for other side

                                                                 U                                             V                                             V
U. Open the vehicles glove box and remove the rubber plug                V. Remove the nut from the AUX input provided with your Audio Source kit and run the
   located next to the 12v socket, using a drill bit open this hole         wires through the hole; from the backside of the glove box, install the nut onto the
   to 1” diameter                                                           AUX input

                                                                                                      SLINGSHOT-2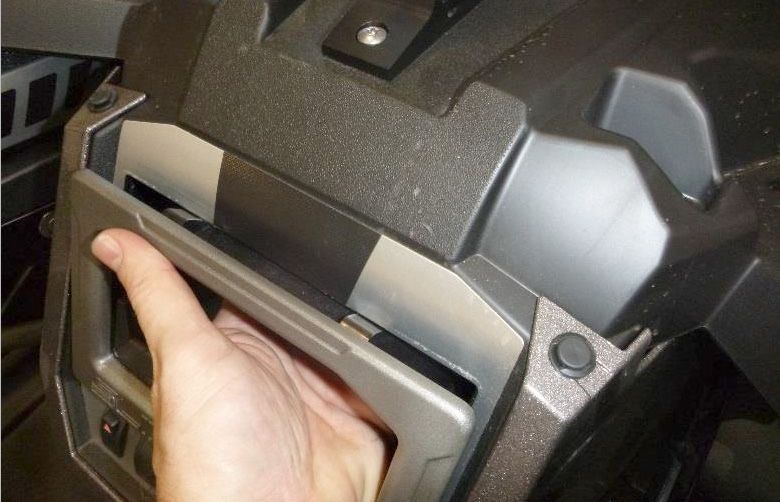
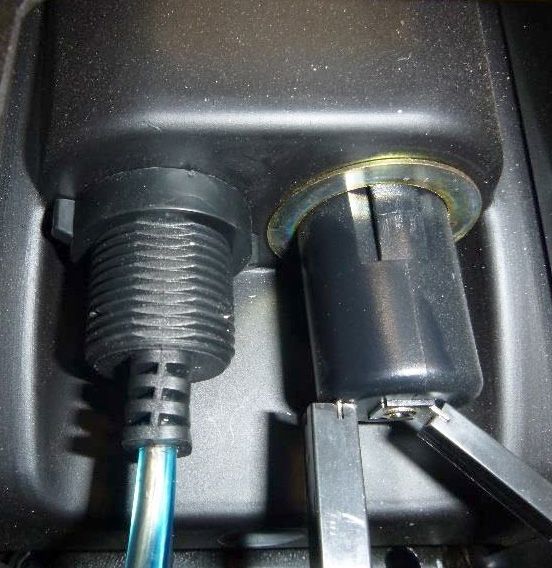
W                                                                                             X
W. Connect the RED wire from the AUX input AND the BLUE amplifier                       X. The location indicated above is an ideal location for either the
  turn on wire to the RED with WHITE stripe wire on the factory 12v                        Volume control for the AUX input source or the controller for the
  socket. Connect the BLACK wire from the AUX input to the BLACK                           MRB2 Bluetooth source. To mount the volume control, drill a ¼”
  wire on the 12v factory socket. (NOTE: If installing the MRB2                            hole, remove the knob by pulling off the shaft, remove the nut from
  Bluetooth unit as the source connect the RED wire from the MRB2                          the shaft, insert the shaft into the hole, and replace the nut and the
  to the same RED with WHITE stripe wire and the BLACK wire from                           knob. If you are using the MRB2 Bluetooth source unit, refer to the
  the MRB2 to the BLACK wire on the 12v socket) .                                          instructions included in the box for detailed mounting options.

                                                                Y                                                                                             Z
Y. After all the wiring (Power, Ground, Speaker wires, Amplifier                           Z. After fully testing the audio system, reinstall all panels and parts
   Turn On & Input cables) are ran to the Amplifier mounting                                  that have been removed in the reverse order of removal.
   location, wire the amplifier and mount to the amplifier mounting
   board. (NOTE: Refer to the instructions included in the amplifier
   for detailed wiring and tuning instructions

  WIRING INSTRUCTIONS

                                           “+”
                                           “-”           “+”
                                                                                                                                                   Audio
                                                         “-”                         “+”                                                         Input Kit
                                                                                                         Amplifier
                                                                  +              -   “-”
                                                                       Battery

For proper sound, ensure the speaker polarity is correct connect the “+” to the “+” and the “-“to the “-“from the speaker wire to the amplifier. If using with
an SSV Works complete system refer to the amplifier wiring instructions for more detailed wiring information.

                           SLINGSHOT-2                                                          © 2016 SSV Works, Oxnard, CA 93030   SLINGSHOT-2    Rev. A   2-10-16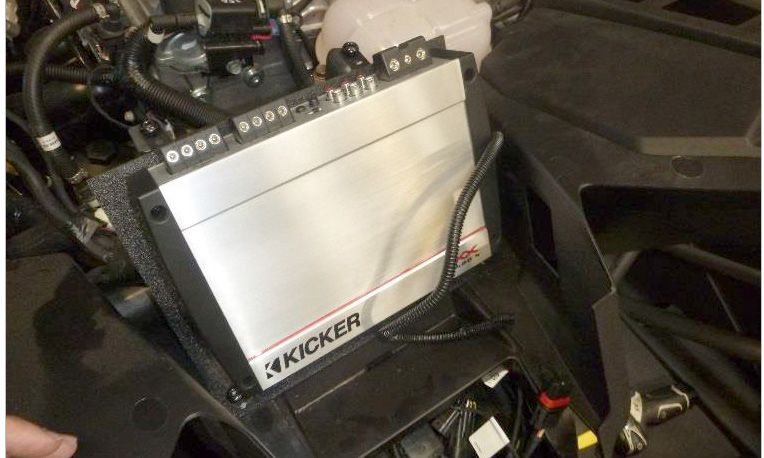
You can also read