Canon HD VIXIA HFM31 Basic Use
←
→
Page content transcription
If your browser does not render page correctly, please read the page content below

Canon HD VIXIA HFM31 Basic Use
Quick Set-up Guide
1. Attach camera to tripod
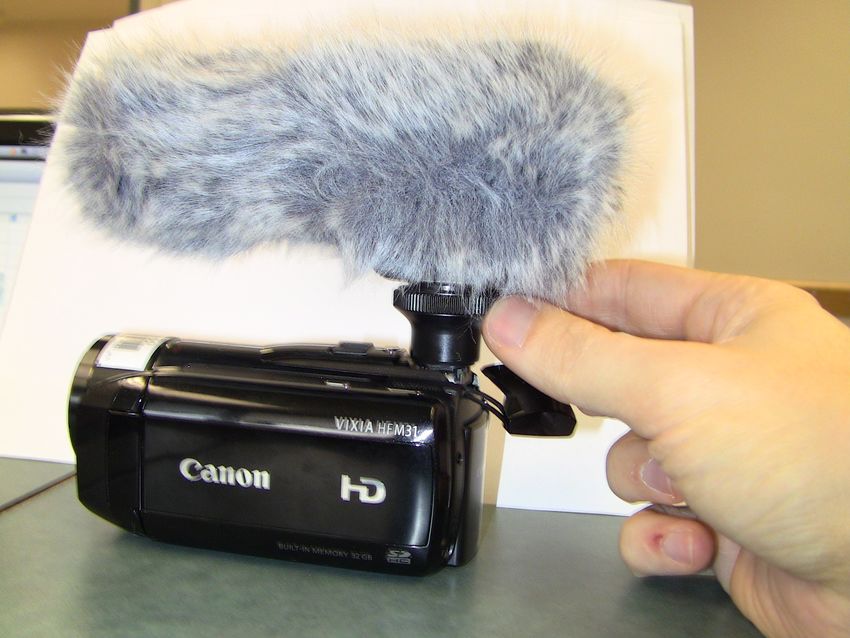
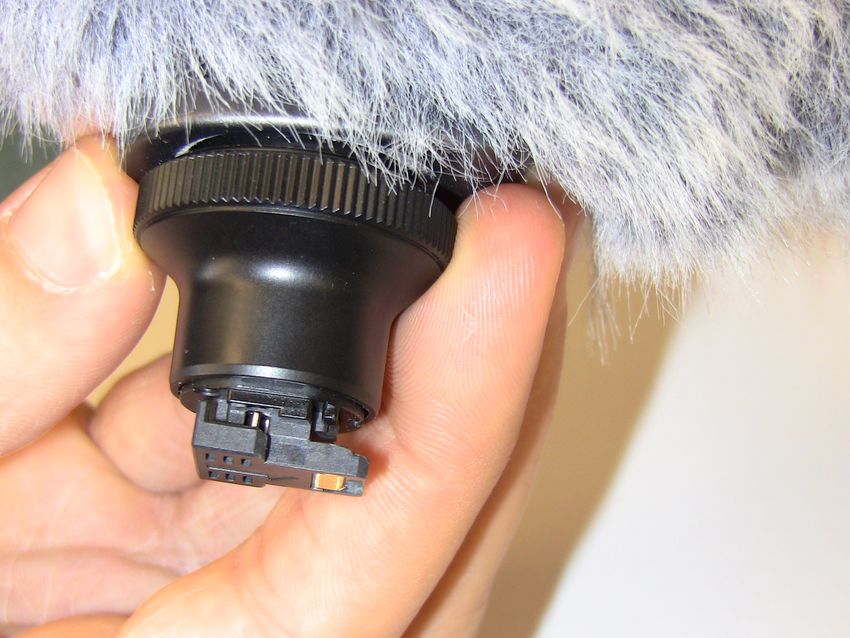
2. Attach external Microphone
3. Plug in power adapter
4. Set camera to video mode
5. Fold the view screen open and adjust
its angle as necessary
6. Point the camcorder at the subject
and press the red button on the back
to start recording. Press the red
button again to stop recording.
Quick Facts
Recording Time 9 hours + (with on board memory in SP mode)
Memory 32 GB on board memory. SD card slot available.
Battery life ~ 90 minutes. Always use power cable if possible!
Microphone Attach External Microphone (recommended), or use
internal microphone. Wireless lavalier microphone
available on request.
Use this camera for Presentations, interviews, instructional videos, digital
stories.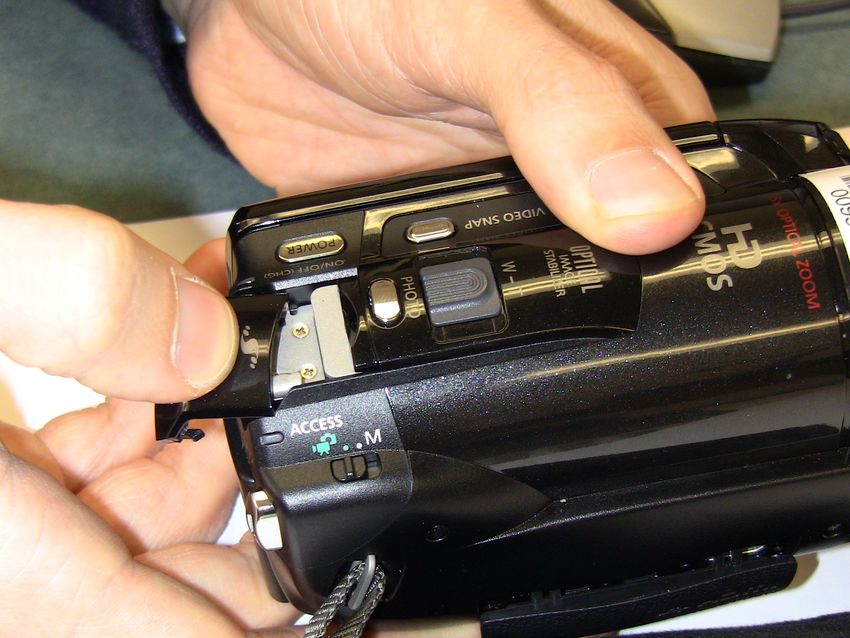
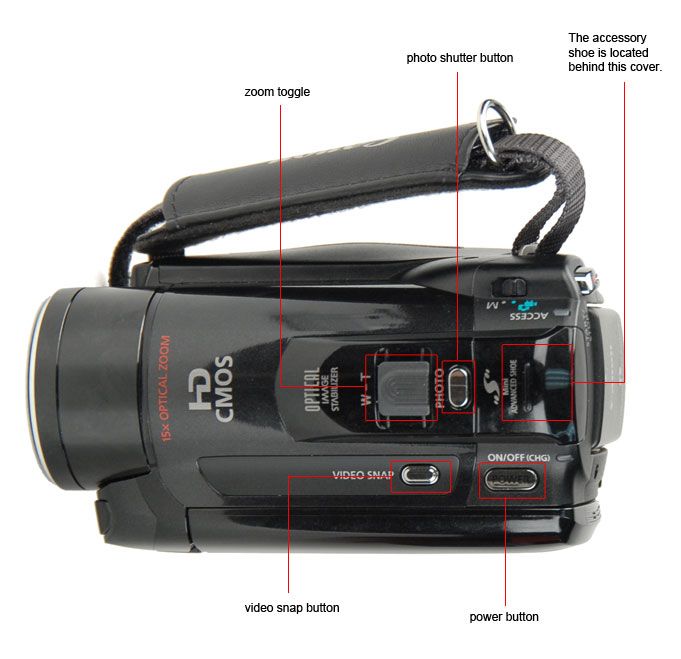
Detailed Instructions
Attach External Microphone (recommended)
1. Remove microphone “shoe” cover.

2. Open locking wheel on microphone (Turn
Counterclockwise!)

 3. Attach microphone to “microphone shoe”

4. Turn locking wheel clockwise to lock
microphone.
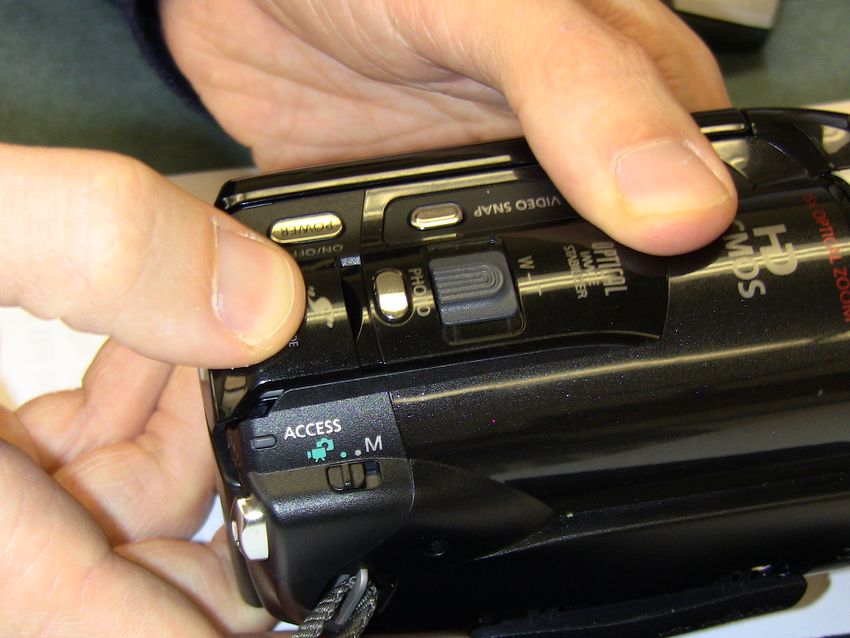
Record a clip

1. Attach the power cord to wall and DC input located on the back of the camcorder just to the left of
the battery pack, then slide your right hand through the grip belt on the right side of the camcorder, or
securely fasten the camcorder to a tripod using the mounting hole on the bottom.
 2. Set the camcorder to video mode by moving
 the switch on back to select the dual shot
 mode. Just make sure that the switch is moved
 to the left, over the video/still camera icon.

3. Press        on the top of the camcorder to turn it on.

4. Fold the view screen open and adjust its angle as necessary.
 5. If necessary, adjust the zoom level by
 pushing the gray slider on the top of the
 camcorder to the left to zoom out, or to the
 right to zoom in.

6. Point the camcorder at the subject and press the red button on the back to start recording.
7. When done, press the red button again to stop recording.

Play back a recorded clip

1. Press          (the rightmost button which is revealed on the left side of the camera when the
screen is opened) to switch between Playback mode and Record mode.
2. The video display screen now operates as a touch panel control, to navigate the menu, simply
touch the screen.
3. Touch the image that represents the clip you want to play back. This will begin to play the
video recorded.
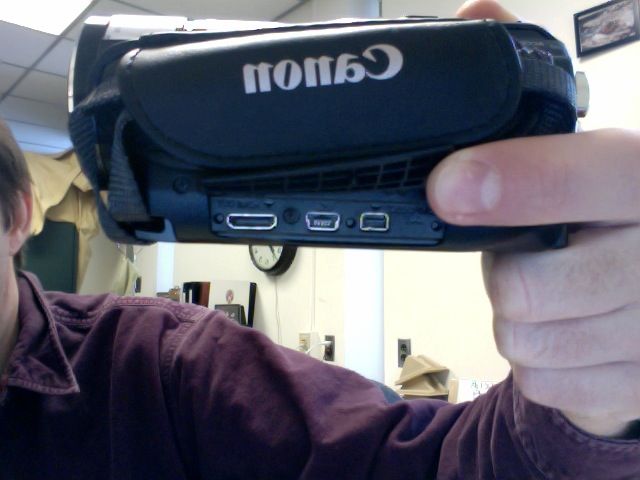
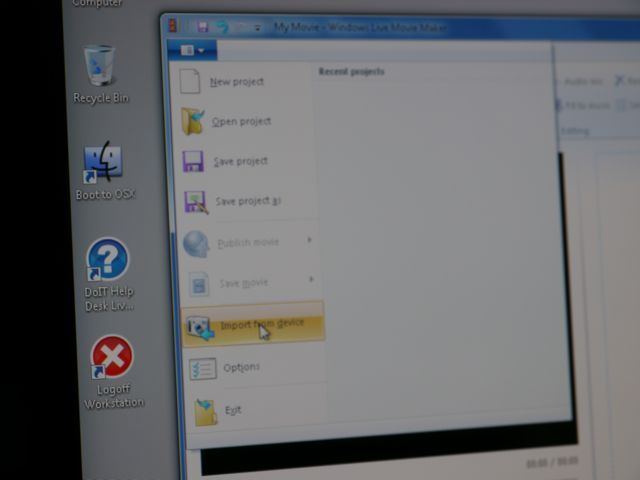
Downloading and Editing on a Computer

Connect the Camcorder to your computer
 1. Connect the USB cable to the
 computer and camcorder. The USB port
 on the camcorder is on the right side of
 the device and is covered by a protective
 flap. (Look for the label USB PORT!)

2.Plug the camcorder in to an electrical outlet.

3. Turn on the camcorder.

4. Press          to switch to playback mode.

5. When prompted, select COMPUTER/PRINTER by touching the screen.

Using Windows

Importing and Editing Videos in Windows:
If you plan to edit your clips with Movie Maker, it is best to import them from the camera
directly. If you do not plan to edit your clips, see “Importing Videos (no editing)” below.
1. Open Movie Maker.
 2. Click on the Movie Maker Menu icon and
 choose “Import from Device”.

 3. Navigate to your device and follow on-
 screen instructions. Select the clips you
 would like to import, and then click
 “Import”.
 4. From the Windows Live Photo Gallery,
 select the “Make” menu and choose “Make a
 movie”
 5. Your clips will be imported automatically.
 (Note that if you don’t change your
 destination folder, your clips are saved by
 default in “My Pictures” folder)
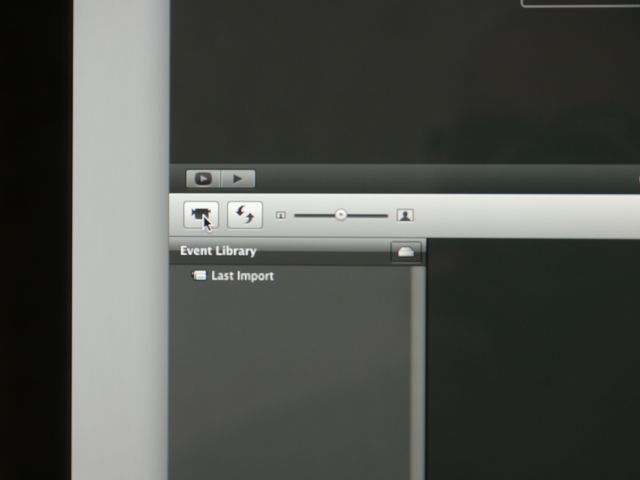
Using Mac OS
Essential:     We highly recommend importing your clips from the Canon FS31 is
through iMovie ’09. Why? At this time, this camera’s .MOD video format is NOT supported by
QuickTime. iMovie ’09 converts the .MOD files into .MOV files, which are more widely
supported.
To copy videos from the FS31 and edit them in iMovie ‘09:
1. Launch iMovie ‘09

 2. Click on the icon (with a camera)
 “Open Camera Import Window”

3. iMovie ‘09 will import your clips, converting them into a .MOV file, which is a format
compatible with most players (QuickTime, VLC player, iTunes, etc). If you have only a select
number of clips that you would like to import, move the switch on the left side of the import
window to “Manual,” check the clips you would like to import and then select “Import
Checked.” To import all clips, simply move the switch to automatic and then select “Import All.”
You can preview the clips by double clicking on them.

4. Once you have selected the clips you want to import, select the file size that you want to
import them: either “Large” or “Original.” You might want to select “Large” to save time.

5. Once they are imported, you may choose to continue with editing in iMovie, or simply close
iMovie and proceed to locate your video files on the computer. iMovie video files are always
located in a folder called “iMovie Events”, which iMovie creates automatically for you.

To find your videos on a Mac, navigate to the user’s home folder, then the “Movies” folder.
Choose the subfolder in the “iMovie Events” folder that corresponds to the “Event” you have
created in iMovie (if you don’t assign an event name, it will be named by default according to
today’s date”)

You can also read