Digital Data Manager Model 747 - Admin Guide 3M Library Systems 3M Center, Building 225-4N-14 St. Paul, Minnesota 55144-1000 www.3M.com/library
←
→
Page content transcription
If your browser does not render page correctly, please read the page content below

Digital Data Manager
           Model 747

                          Admin Guide

                               3M Library Systems
                    3M Center, Building 225-4N-14
                   St. Paul, Minnesota 55144-1000
                                 www.3M.com/library
     Copyright © 2000-2001, 3M IPC. All rights reserved.
                              75-0500-6135-9, Rev. B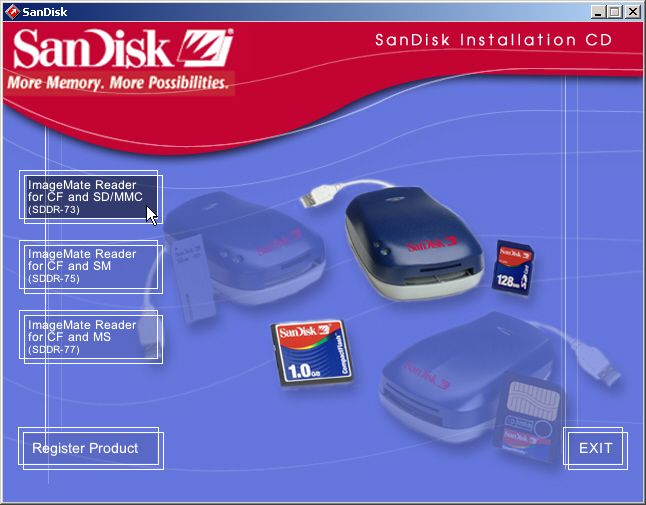
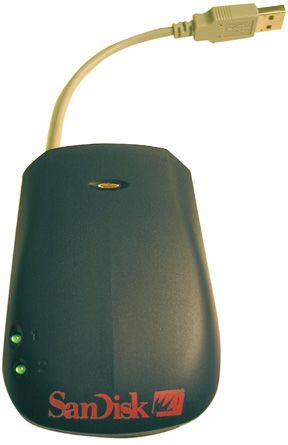
Table of Contents
Introduction .................................................................................... 1

A – Install Data Manager................................................................. 3
Hardware Requirements................................................................................................................ 3
Step 1 – Install the memory-card drive ........................................................................................ 4
Step 2 – Install Data Manager software ....................................................................................... 8

B - Generate list files from your circulation system ...................... 9
Step 1 – Determine Data-format Requirements .......................................................................... 9
Step 2 – Generate list files ............................................................................................................ 9

C – Create folders for your list files.............................................. 10
Step 1 – Create shelf-order, search-list, and import folders ................................................... 10
Step 2 – Move the list files into the correct folders.................................................................. 10
Step 3 – Start the Data Manager software ................................................................................. 11
Step 4 – Specify list folder and export/import locations.......................................................... 12

D – Define List Barcode Validation parameters ........................... 13

E – Set up export parameters ....................................................... 14
Step 1 – Create Export formats .................................................................................................. 15
Step 2 – Set up Duplicate Item Definitions (optional) .............................................................. 17

F - Test your export formats......................................................... 18
Step 1 - Preview the file export for errors ................................................................................. 18
Step 2 – Export lists and check for errors and warnings ........................................................ 19
Step 3 – View the exported lists on the DLA or other equipment........................................... 19

G - Set up import parameters ....................................................... 20
Step 1 – Set up an Import File Destination folder..................................................................... 21
Step 2 – Create and preview import formats............................................................................. 22
Step 3 – Create Collection Categories ....................................................................................... 23
Step 4 - Export collection-category labels to the memory card.............................................. 24
Step 5 – Test your Import Formats............................................................................................. 25

Other Procedures.......................................................................... 26
Installing New DLA Software ...................................................................................................... 26
Specifying Language Settings.................................................................................................... 27
Designating a default export format (optional)......................................................................... 28
Designating a default import format (optional)......................................................................... 29

Introduction
3M Digital Data Manager (Data Manager) performs the following tasks:
Process circulation data files (list files), generated by your circulation
system, and export them as files that are used by the 3M Digital
Library Assistant (DLA) and other equipment.
Import data collected by the Digital Library Assistant, and create a
formatted text file that can be used to update the data stored in an
automated circulation system.
Digital Data Manager Version 2.00 can only be installed on a
computer running the Windows 2000 operating system.
Before you begin….
You must complete all the set-up steps listed in the Admin Guide before you
can use Data Manager software. Once you complete the initial setup of Data
Manager software, day-to-day operations are relatively simple and
straightforward.
The initial setup of the Data Manager software should be performed
by personnel who have an in-depth understanding of your library’s
circulation system.
Shipping List
Digital Data Manager includes the following components.
Documentation Binder
Digital Data Manager Staff Guide
Digital Data Manager Admin Guide
Digital Data Manager Data Format Guide
Digital Data Manager Data Format Worksheet
Barcode Filters Guide
CD-ROM containing the Digital Data Manager software
One (1) USB memory-card drive
Cables
Documentation and software drivers
75-0500-6135-9, Rev. B; 060-A 1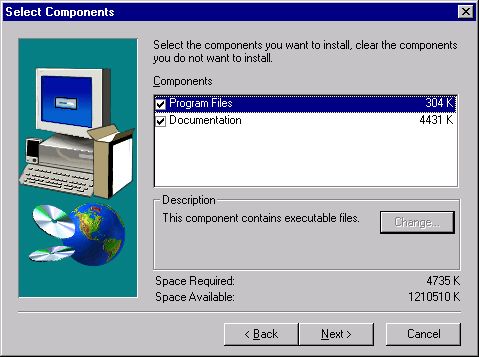
Related Documents
Digital Data Manager Data Format Guide – contains detailed
information regarding the data requirements and basic data format types
supported by the Digital Data Manager. The Data Format Guide will
assist you in determining which supported format type is the best match
for your library’s data files.
Digital Data Manager Admin Guide - includes instructions on how to
set up data format parameters, specify barcode validation parameters,
export data for use in the DLA, and import data collected by the DLA.
Digital Data Manager Staff Guide - includes instructions on how to
manage and export the list files that are used by the DLA and other
equipment.
Barcode Filters Guide – part of the Digital Data Manager binder, this
document explains how to set up and use barcode filters.
3M Digital Library Assistant User Guide - describes how to use the
DLA, which uses the data exported by Data Manager.
3M Digital Staff Workstation Model 795 Manual – describes how the
Digital Staff Workstation uses search lists.
3M Digital Conversion Station Model 711 Manual – describes how
the Conversion Station uses search and order lists.
2 75-0500-6135-9, Rev. B; 060A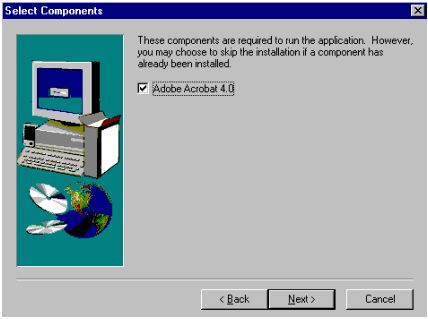
A – Install Data Manager

Hardware Requirements
The computer that you load Data Manager on must meet all the requirements listed below.
3M recommends using a USB memory-card drive when using Digital Data
Manger v2.00 with Windows 2000. The older, parallel-port memory-card
drive may work but is not recommended or supported by 3M.
    Both a parallel and a USB memory-card drive were included in the
    original purchase of Data Manager v1.00.
    New purchases of Data Manager v2.00 or greater include a USB
    memory-card drive.

 Component                      Requirement
 Operating System               Windows 2000 with Service Pack 2, or later.
 Processor                      100 MHz Pentium minimum, 1 GHz or faster strongly recommended
                                (especially when processing large files)
 RAM                            64 MB minimum, 128 MB or greater strongly recommended
 Hard drive                     200 MB minimum (More space may be needed when processing large files.)
 CD-ROM drive                   Required for software installation
 Monitor                        800 x 600 SVGA
 USB port                       Data Manager includes a USB memory-card drive
 Keyboard                       Any
 Mouse                          Any Microsoft-compatible mouse
 Sound Card                     Not required
 Modem                          Not required (unless needed for remote support)

75-0500-6135-9, Rev. B; 060-A                                                                            3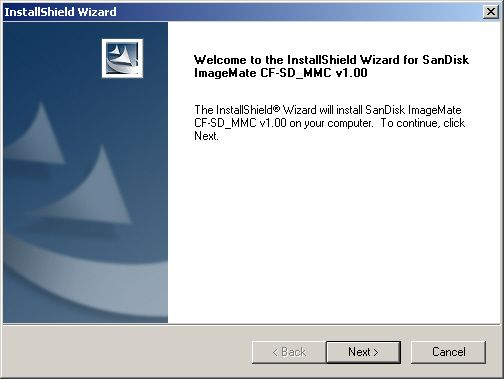
Step 1 – Install the memory-card drive
Before you begin
Please read all instructions before attempting to install or use the memory card drive.

    Do not plug the memory card drive into your computer until the instructions tell you to do so.

Check the version of Windows 2000 that is installed on
your computer

1   Right click on the My Computer icon on your Windows 2000
    desktop and select Properties from the drop-down menu.
      The Properties window displays the version of Windows 2000
      installed on your PC.

2   Your PC must have Windows 2000 (Service Pack 2) installed.

                                                                               Figure 1: Memory-card drive.

If you have problems…
If these installation procedures do not work on your computer,
call 3M Service at: 1-800-328-0067 Option 1.

4                                                                                          75-0500-6135-9, Rev. B; 060A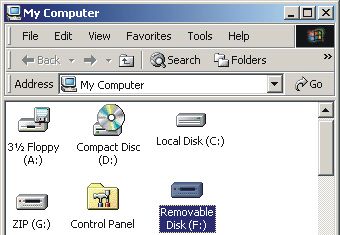
Installing the Memory Card Drive
This procedure is only for computers that have Windows 2000 Service Pack 2.
Step A – Install the memory-card drivers
Do not connect the memory card drive to your computer!
1 Important! - make sure that the memory card
drive is NOT PLUGGED IN.
2 Make sure that the computer is powered up and
that the Windows 2000 desktop is displayed.
3 Locate the SanDisk Installation CD that includes
the memory-card drivers.
The Installation CD-ROM is located inside the
plastic package along with the SanDisk memory
card drive.
4 Insert the SanDisk Installation CD into your
computer’s CD-ROM drive.
The first installation screen automatically
appears on the screen. (See Figure 2.) Figure 2: Click ImageMate Reader for CF and
SD/MMC (SDDR73) to begin the installation.
If the installation screen does not appear, use
Windows Explorer to open the SanDisk CD-
ROM and double-click SanDisk.exe to start the
installation program.
5 Click ImageMate Reader for CF and SD/MMC
(SDDR73) to begin the installation.
The second installation screen appears. (See
Figure 3.)
6 Select Windows 2000. (See Figure 3.)
7 Click Install Driver. (See Figure 3.)
The InstallShield Wizard starts. (See Figure 4.)
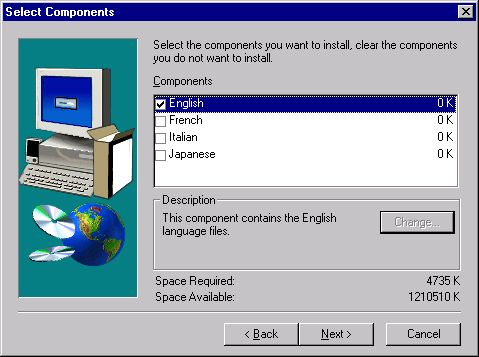
8 Follow the on-screen InstallShield Wizard Figure 3: Select Windows 2000 and click Install Driver.
instructions and select all the default settings.
9 Restart the computer when the software
installation is complete.
Figure 4: Accept all the default settings and restart
the computer when the installation is complete.
75-0500-6135-9, Rev. B; 060-A 5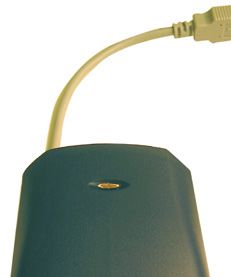
Step B - Connect the Memory Card Drive to your computer

1    Plug the USB cable from the memory-card drive
     into an available USB port on the computer.
       The Found New Hardware message should
       appear while Windows 2000 installs the new
       device. (This message may not appear on some
       computers.)

2    Double-click My Computer on the Windows
     desktop.
       The My Computer window appears. (Figure 5.)

3    Two new drive icons called Removable Disk
     appear in the My Computer window.
       Windows automatically creates these icons and
       assigns the next available letters to them.
       The first drive letter (in this example, E:) is
       assigned to the compact flash portion of the
       drive. (This is the drive letter that you select in
       Data Manager as your import/export location.)
       The second drive letter (in this example, F:) is
       assigned to the secure digital portion of the drive.
       (This drive is not used.)
                                                                                                Removable      Removable
                                                                                                 Disk (E:)      Disk (F:)
           The drive letters that Windows assigns to
           each of the two drives may vary depending
           upon what types of devices are connected to
           your computer.

4    Insert a memory card into the lower slot on the front
     of the memory-card drive.                                    Figure 5: Windows creates two new Removable Disk
                                                                  icons for the new memory card drive.
5    Double-click the memory card’s icon and verify that
     you can see the contents of the memory card.

                Slot 1 – Not used                              Slot 2 – Data Manager Memory Card Drive

                     Removable                                                   Removable
                      Disk (F:) *                                                 Disk (E:) *

     Slot 1 is a secure digital drive. (Data       Slot 2 is a compact flash drive that accepts the memory cards used
     Manager does not use this drive.)             by the DLA. (This is the drive used by Data Manager.)
                                                       The memory card drive (slot 2) is assigned the lower of the two
                                                       new drive letters that appear in the My Computer window.
     * The drive letters that Windows assigns to each of the two drives may vary depending upon what types of
     devices are connected to your computer.

    Figure 6: The memory card drive (slot 2) is assigned the first of the two new drive letters that appear in
    the My Computer window.

6                                                                                                75-0500-6135-9, Rev. B; 060A
Removing a Memory Card
Always use the following procedure to remove the memory card from the
memory-card drive.
The user who logs on to the Data Manager computer must have Administrative Privileges.
CAUTION
DO NOT remove a memory card while the activity light on the memory-card drive is flashing.
If you remove the memory card before the activity light stops flashing, you may corrupt the data
files on the memory card (making it impossible for other equipment to read the data).
If this happens, you may have to use Windows to reformat the memory card.
Power LED
1 Important! - Wait until the export or import ON = computer is on and
operation completes. reader is plugged into the USB port.
When the Media LED 2 activity light on the
memory-card drive stops flashing, the
import/export operation is complete.
Media LED1 - NOT USED
2 Close all windows on the Windows desktop and any
open windows in Windows Explorer.
Make sure that there are no open windows that Media LED 2
display the memory card drive or its contents. ON = when memory card is inserted correctly.
Flashing = when there is activity (writing data) to
or (reading data, downloading) from the memory card.
3 From the Windows Desktop, double-click My
Computer. 747_Sandisk_001
Figure 11: Wait until Media LED 2 stops flashing
4 Right click on the memory card’s Removable Drive
before attempting to eject the memory card.
icon.
A pop-up menu appears.
5 On the pop-up menu, click Eject.
Important - After clicking Eject, you must wait ten
seconds before removing the memory card.
6 Wait 10 seconds and then remove the memory card.
The current user logged on to the computer must
have Administrative Privileges to use the eject
feature.
If the current logon does not have Administrative
Privileges and you click Eject, the following
message appears:
Figure 12: Right click on the removable disk icon and
click Eject.
75-0500-6135-9, Rev. B; 060-A 7Step 2 – Install Data Manager software
Data Manager Version 2.00 can only be installed on a computer
that uses the Windows 2000 operating system.
Procedure
1 Insert the Data Manager CD-ROM into the CD-
ROM drive on your library’s PC.
2 The CD-ROM will automatically start the
installation program.
If the install program does not start, use
Windows Explorer to display the contents of Figure 13: Digital Data Manager Version 2.00 can only
the CD-ROM and double-click on Setup.exe. be installed on a computer running the Windows 2000
operating system.
3 Follow the installation instructions and accept all
the default settings.
4 Do not install Acrobat Reader if your computer
already has Acrobat Reader 4.0 or greater.
To skip the Acrobat installation, uncheck the
Adobe Acrobat Reader 4.0 checkbox.
5 Continue to follow the installation instructions and
accept all the default settings.
6 After the installation is complete, a 3M Digital
Figure 14: Uncheck the Adobe Acrobat Reader 4.0
Data Manager icon will be created on your PC
checkbox if it is already installed on your computer.
desktop.
8 75-0500-6135-9, Rev. B; 060AB - Generate list files from your circulation system
You must be able to consistently and accurately generate data from your
circulation system.
You may have to correct inconsistencies and errors in the
records stored in your circulation system. Data Manager can
help you identify problems with the data in your circulation
system.
Step 1 – Determine Data-format Requirements
You must complete this step before you can configure the Data Manager software.
Before attempting to use Data Manager…
1 Follow the steps in Digital Data Manager Data Format Guide (included in
this binder) to determine file formats and format parameters.
Step 1 Determine the List Barcode Validation parameters necessary to
extract barcode data from the circulation system.
Step 2 Determine the file formats for the list files that you will generate from
your circulation system.
Step 3 Determine export format parameters that specify what fields will be
exported from these list files for display on the DLA or other 3M Digital ID
equipment.
Step 4 Determine import format parameters that specify formats for the text
files that Data Manager creates from the data collected by the DLA. Data
Manager formats these files so they can be used to update data in your
automated circulation system.
2 Record your parameter settings on the Data Format Worksheet
(included in this binder).
Step 2 – Generate list files
1 Use your circulation system to generate shelf-order lists and search lists.
Make sure that the file format matches one of the three format types
supported by Data Manager. (See the Data Format Guide for
descriptions and examples of file formats.)
2 Save these files in a location that is accessible to the computer that you
will use to run Data Manager software.
These list files will be used to test the export formats that you will
define later in this procedure.
75-0500-6135-9, Rev. B; 060-A 9C – Create folders for your list files
The data lists generated from your circulation system must
be placed in Shelf Order List and Search List folders.
Data Manager software only exports lists stored in these
folders.
Step 1 – Create shelf-order, search-list, and import folders
1 Create two folders for your lists:
a Create a folder for shelf-order lists
b Create a folder for search lists.
You may create the folders on a local
hard drive or on a network drive.
These two list folders must be
separate (one list folder can not be
located within the other list folder).
You may give the folders any name
you like. Figure 15: Create list folders in a location that is easily
accessible.
Storing lists on a network drive may
degrade (slow) performance.
2 Create an import destination folder.
This is the folder where Data Manager will
save imported data.
Within these folders, you may create as
many subfolders as you like to help
organize your files.
The main Data Manager window displays
the subfolders and files found in these
folders.
Step 2 – Move the list files into the correct folders
1 Locate the shelf-order lists and search lists that you generated earlier.
2 Move the list files into the correct folders:
Move the shelf-order files into the shelf-order lists folder.
Move the search list files into the search lists folder.
You may add or remove files from the folders at any time.
10 75-0500-6135-9, Rev. B; 060AStep 3 – Start the Data Manager software
1 Double-click the 3M Digital Data Manager icon on
your PC desktop.
or
Use the Start button (located on the Windows task
bar) to start Digital Data Manager software.
The Data Manager main screen appears.
The file list remains blank until you select list-folder
locations.
2 Enter Admin Setup.
a From the Admin Setup menu, click Enter
Password.
The Enter Password dialog box appears.
b Type the password in the Password text box.
An admin password sheet is included in a
sealed envelope that is included in this
binder.
c Click OK.
75-0500-6135-9, Rev. B; 060-A 11Step 4 – Specify list folder and export/import locations
1 Insert a memory card into the memory-card drive.
2 Start the Data Manager software.
3 From the Admin Setup menu, click Folders.
The Folders dialog box appears.
4 Specify the locations for the folders that you
created earlier.
a Specify the Shelf Order Lists folder location.
b Specify the Search Lists folder location.
c Specify the Import File Destination folder
location.
Click the Browse buttons to select the list
folders that you created earlier.
If the folder does not exist, enter the path of
the new folder that you want to create.
5 Select the Export/Import Location.
4a
Use the Browse button to select the memory-
card drive that you installed earlier
4b
6 Check the Save data for faster exporting of the
same lists checkbox to save a backup copy of the 4c
latest export on your hard drive.
This allows faster exporting if you are exporting
the same group of lists to multiple memory 5
cards.
Always enable this option unless your 6
computer has limited hard-disk space.
7 Click OK.
The list folders (and any files and subfolders in
these folders) appear in the main window. (See
Figure 16.)
Can’t Find Export/Import Location
The following warning message appears if a memory
card is not in the memory-card drive.
Figure 16: Once you define folder locations, the
If the drive letter shown in the message is correct, folders and their contents appear in the main
click OK. window.
12 75-0500-6135-9, Rev. B; 060AD – Define List Barcode Validation parameters
Barcode validation parameters are used to validate the barcode data
extracted from each record in the list files generated from your circulation
system. Records with invalid barcodes are not exported.
The Data Format Guide includes detailed descriptions and
examples of barcode validation parameters.
Refer to the Data Format Worksheet, that you completed
earlier, for barcode validation settings.
To define barcode validation parameters
1 From the Admin Setup menu,
click List Barcode Validation.
The List Barcode Validation Parameters
dialog box appears.
2 Assign the Valid Length parameters.
After processing (removal of any invalid
characters), the final length must be within the
range specified here.
2
If all barcodes are the same length, enter the
same minimum and maximum length.
3 Select Valid Characters. 3
Define which characters are allowed in a valid
barcode by checking the appropriate valid
character boxes.
Other characters can be entered in the
Additional Valid Characters text box.
Figure 17: Barcode validation parameters are used
4 Click OK. to test the barcode data in each record of the list
files generated from your circulation system.
75-0500-6135-9, Rev. B; 060-A 13E – Set up export parameters
Export formats must be assigned to a list file before the list file can be
exported. An export format defines what information appears in the Primary
and Secondary Info Fields that are displayed by the DLA and other
equipment. For example, you may want to create different export formats for
shelf-order lists and weeding lists.
See the Data Format Guide for detailed descriptions and examples
of various export formats.
Export-format Parameters
Each export format includes a set of export-format
parameters that allow you to specify:
The field and record delimiters for list files created by
your automated circulation system.
The field within the item record that contains the
barcode information. Primary
info field
The portions of the item record that will be displayed
(on the DLA or other equipment) as Primary and
Secondary Information fields.
Any labels that you want to include in the Primary and Secondary
Secondary Information fields. (The DLA and other info field
equipment display these labels to help you interpret the
displayed data.)
Figure 18: An export format defines what
information appears in the Primary and
Secondary Info Fields on the DLA or other
equipment.
14 75-0500-6135-9, Rev. B; 060AStep 1 – Create Export formats
The Data Format Guide includes detailed descriptions and examples of
export-format parameters.
To create export formats
1 From the Admin Setup menu, click Export
Formats.
The Export Formats dialog box appears.
2
2 Click New.
The New/Edit Export Format dialog box
appears. (See Figure 20.)
3 Type a name in the Format Name text box.
This name will appear on the drop-down list
in the main window’s Format column.
4 Click the Format Type drop-down list and Figure 19: Click New to create a new format.
select the format type generated from your
circulation system.
You should have recorded the format type
on the Data Format Worksheet. 3
4
5 Define the parameter values.
a Click (select) a parameter in the list.
b Type the parameter value in the text box
located at the bottom of the dialog box.
c Press the Enter key.
You can also click Update or select
another parameter to enter a value.
5
d Continue until all parameter values are
entered.
Figure 20: Each Format Type has a different set of
6 Designate default export formats (optional).
parameters.
If default export formats are set, Data
Manager assigns the default export format
to any new list file that you move into either
list folder. (See Designating a default
export format (optional) on page 16 for
directions.)
7 Click OK when you are finished.
The new format appears in the Export
Formats dialog box.
Figure 21: Once you set a default export format, you can
clear it and set a different default.
75-0500-6135-9, Rev. B; 060-A 15Designating a default export format (optional)
If default export formats are set, Data Manager
assigns the default export format to any new list file
that you move into either list folder.
List files that are moved into the Shelf Order Lists
folder are assigned the Order Default export
format.
List files that are moved into the Search Lists folder
are assigned the Search Default export format.
To designate a default export format
1 From the Available Formats list,
select a format.
2 Click Set as Order Default and/or
Set as Search Default.
Any new list files placed into either folder are
automatically assigned the default format for that
folder.
The same format can be set as the Order Default
and the Search Default. Figure 22: Select an import format and click Set
Default.
16 75-0500-6135-9, Rev. B; 060AStep 2 – Set up Duplicate Item Definitions (optional)
Duplicate item checking is helpful if your library has groups of items (each item
with a unique barcode) that are shelved together, and the shelf order within the
group is not important (e.g., multiple copies of the same book).
Duplicate item checking is only used with shelf-order lists.
1 From the Admin Setup menu, click Duplicate Item
Definition.
The Duplicate Item Definition dialog box appears.
2 Click the Enable duplicate item checking based on
checkbox to enable or disable duplicate item checking.
Duplicate item checking enabled (checked )
When checking shelf order with the DLA, groups of
consecutive items (that meet the specified match
criteria) can be shelved together in any order.
Duplicate item checking not enabled (not checked )
When checking shelf order with the DLA, each item will
have its own distinct shelf position. 2
3
3 Select the Match Criteria for shelf-order lists.
Matching Primary Information Fields
Any consecutive records in the shelf-order list that have
identical information in their primary information fields Figure 23: Duplicate item checking is only
will be exported with the same shelf position. used with shelf-order lists.
Matching Secondary Information Fields
Any consecutive records in the shelf-order list that have
identical information in their secondary information
fields will be exported with the same shelf position.
Matching Primary and matching Secondary Fields
Any consecutive records in the shelf-order list that have
identical information in both primary and secondary
information fields will be exported with the same shelf
position.
4 Click OK.
75-0500-6135-9, Rev. B; 060-A 17F - Test your export formats
Step 1 - Preview the file export for errors
You should perform this procedure whenever you create a new export
format or edit an existing export format.
To preview the file export
1 Select the desired file from the
main window.
2 Apply an export format to the
list file.
Click in the list file’s format
column to display a pop-up list
of export formats.
(See Figure 24.)
3 From the View menu, click
Preview File Export.
A Notepad window displays
the first 1000 records.
(See Figure 25.)
Figure 24: Select a file to preview and assign an export format.
4 Check the export preview for any obvious formatting problems.
If the primary and/or secondary info fields include the wrong
information, check the export format parameters.
If primary or secondary information (e.g., call number, date) are not
displayed correctly, check the field start position and field length
parameters defined in your export format.
Missing information may be caused by incorrect data in the circulation
system.
If information runs together, you may want to insert additional spaces
between labels and/or other information.
Figure 25: Check for missing information and any formatting problems that may affect how the primary
and secondary information fields are displayed.
18 75-0500-6135-9, Rev. B; 060AStep 2 – Export lists and check for errors and warnings
Once you have set up export parameters and previewed the export, you can
export the list files and check for any errors and warnings.
1 Perform the Export Procedure located in the Staff section of this manual.
Follow the instructions for checking the Summary Log and the Error Log.
2 Correct any errors and warnings that are listed in the Error Log.
Errors are often caused by missing or invalid barcodes in the list files
generated by your circulation system.
Warnings may be caused by missing primary or secondary
information in the list files generated by your circulation system.
The Staff section of this manual provides detailed descriptions on how to
use the Summary log and Export Log.
Step 3 – View the exported lists on the DLA or other equipment
The final check of an export format requires that you view the exported
information on the 3M equipment where the lists will be displayed.
1 Insert the memory card into the DLA (or other
equipment).
2 Make sure that the primary and secondary
information is displayed correctly.
For lists used by the DLA:
Perform the Sort & Shelve or Collect Data
function on the DLA to display your shelf-order
export format.
See the Data Format Guide for information
on display planning.
3 If necessary, edit the export format. Figure 26: Make sure that the desired primary and
You may want to insert additional spaces secondary information is displayed correctly.
between labels and/or other information.
If primary or secondary information (e.g., call
number, date, etc.) is not displayed correctly,
check the field-start position and field-length
parameters defined in your export format.
Figure 27: Export formats for some tasks may
include additional information not found in shelf-
order lists.
75-0500-6135-9, Rev. B; 060-A 19G - Set up import parameters
You must set up import formats and export collection category labels to a
memory card before attempting to use the DLA to collect data.
Overview
Data Manager software can import collected Item IDs from
a memory card and save them as formatted text files.
These text files can be used to update data stored in your
automated circulation system (e.g., inventory dates).
Collection Categories
Use Data Manager to create different collection category
labels that are exported to a memory card and displayed
on the DLA.
When you use the DLA to collect Item IDs (read from
Digital ID tags) you can save the Item IDs to the
memory card in any of the collection categories that
you exported earlier.
Collected data can be saved in a specific category.
This helps ensure that the imported text files do not
contain “mixed use” item IDs (e.g., inventory and
weeded items in the same file).
Import Formats
Each time you import a collection category, Data Manager
saves the collected Item IDs from that category in a
separate, formatted text file.
Data Manager saves these files in the Import File Figure 28: Import format parameters allow you
Destination folder. to add any headers or command codes
Each file name includes the import date. required by your circulation system.
Use Data Manager to create Import Formats that
determine how these text files are formatted.
Use the import format parameters (e.g., header string,
barcode prefix, etc.) to add any special headers and
command codes required by your automated circulation
system.
Figure 28 shows an example of a formatted text file
with barcode prefixes, headers, etc. Your formatted
files may look quite different depending upon your
circulation system requirements.
If a collected Item ID appears on any shelf-order list.
Default Import Formats
If you designate a default import format: each time you add
a category, the default import format automatically appears
in the Import Format text box.
20 75-0500-6135-9, Rev. B; 060AStep 1 – Set up an Import File Destination folder
This step should have been performed earlier.
To set up an Import File Destination Folder
1 Insert a memory card into the memory-card drive.
2 Start the Digital Data Manager software.
3 Enter the Admin password.
From the Admin Setup menu, click Enter
Password.
4 From the Admin Setup menu, click Folders.
The Folders dialog box appears.
5 Make sure that the Import File Destination folder
location is correct. (This step should have been
performed earlier.)
Use the Browse button to select or create the
folder where you will save all imported text files.
Figure 29: Create an import-file-destination folder.
75-0500-6135-9, Rev. B; 060-A 21Step 2 – Create and preview import formats
Data Manager imports the Item IDs from a
collection category and converts them into a text
file.
An Import Format defines how these text files are
formatted. This formatting must include any
command codes required by your automated
circulation system.
To define input format parameters
1 From the Admin Setup menu, click Import
Formats.
Figure 30: Import Formats dialog box.
The Import Formats dialog box appears.
2 Click New to create a new import format.
To edit an existing import format
Select an existing Import Format and click
Edit.
3 Define the Import Format Parameters.
See the Data Format Guide for detailed
descriptions and examples of input format and
date/timestamp characters.
Figure 31: Import Format Parameters.
To check the import format
1 Click Preview to check the import format.
The characters shown (abc1234567890, etc.)
are generated as a sample barcode.
Header String
2 Click OK when you are done.
To designate a default import format Barcode Prefix
1 From the Admin Setup menu, click Import
Formats.
The Import Formats dialog box appears.
2 From the Available Import Formats list,
select the format that you want to designate as
the default format.
3 Click Set Default.
When you add a category, the default import
format automatically appears in the Import
Format text box. Figure 32: Preview the import format to ensure that the
formatting meets your circulation system’s requirements.
22 75-0500-6135-9, Rev. B; 060AStep 3 – Create Collection Categories
You can create collection categories for various tasks. For example, you
might create an “in house” collection category where you save the Item IDs
for each in-house item that you read.
1 From the List Actions menu, click Add
Category.
2 Define the following parameters:
Category Name – type the name that you
want displayed in the Collection Categories
listing.
Category Label – type the description (up to
10 characters) that will be displayed in the
Data Manager Label column and on the DLA.
Import Format – select the Import Format Figure 33: You can create collection categories for various
that you want to apply to collected data that collection tasks.
you save in this category.
3 Click OK.
Data Manager creates a new category folder
(with the same name as the category name) in
the Import File Destination Folder.
Permanent Collection Categories
Data Manager automatically creates Default and
Inventory collection categories.
You can view both of these categories in Data
Manager.
These categories are automatically exported
during each export procedure.
Inventory Category Figure 34: When you create a new collection category, it
appears in the Collection Categories listing.
The Inventory category accepts data collected
when you select the DLA’s Background Inventory
function.
Because the Inventory category is reserved for
Background Inventory only, it is not displayed
on the Save Data DLA screen.
You can not uncheck, delete, or move the
Inventory collection category.
Default Category
The Default collection label is always exported.
This ensures that you always have at least one
collection category (on the memory card) where Figure 35: Data Manager creates a category folder for each
you can save data. collection category that you create. These folders are
You can not uncheck, delete, or move the stored in the Import File Destination folder.
Default collection category.
75-0500-6135-9, Rev. B; 060-A 23Step 4 - Export collection-category labels to the memory card
Before you can use the DLA’s Collect Data function, you must export
collection-category labels to a memory card. (See the Staff section of this
manual for detailed descriptions of the export procedure.)
During normal operation, each time you prepare a memory card, you
export the list files and collection categories that you want to appear on
the DLA.
To export collection category labels
1 Insert the memory card into the memory-
card drive.
2 Select each collection category label(s) that
you want to export.
Any shelf order and/or search lists that
you select will also be exported.
The collection-category labels appear
on the DLA in the order that they appear
in Data Manager. If desired, use the Up
and Down arrows in the Data Manager
toolbar to rearrange the list.
3 On the toolbar, click Export .
Figure 36: Select (check) the collection categories (and
lists) that you want to export to the memory card.
4 Data Manager saves the selected collection-
category labels to the memory card.
You can view these collection category
labels on the DLA.
Figure 37: The label that you assign to each category
appears on the DLA.
24 75-0500-6135-9, Rev. B; 060AStep 5 – Test your Import Formats
The final test for your import formats requires using the DLA to collect Item
IDs, importing the collected Item IDs, and verifying that your circulation
system accepts the formatted text files created by Data Manager.
To test your import formats
1 Export collection categories to a memory card.
2 Use the DLA to collect data and save it to each
collection category.
See the DLA manual for descriptions on how
to collect data.
3 Transfer the memory card from the DLA to the
Data Manager memory-card drive.
4 Click Import to import the Item IDs from
the memory card.
Data Manger saves the collected Item IDs
from each category as a separate, formatted
text file.
Figure 38: Click Import to import collected Item IDs from
Each category has a separate folder where
a memory card.
the formatted text files for that category are
saved. These folders are located in the
Collection Categories folder that you
designated earlier.
5 View the imported text files to ensure that any
header or command codes required by your
circulation system are correct.
a From the main window, open the category
folder.
b Select the text file that you want to view.
c On the toolbar, click View File .
6 Use your circulation system to process the
formatted text files.
Make sure that the circulation data was
updated correctly.
Import file list order Figure 39: View the formatted text file to ensure that it
The text file lists collected Item IDs in expected meets the requirements of your circulation system.
shelf order if the collected Item IDs appear in one
or more of the shelf-order lists on the memory
card.
Any collected Item ID that does not appear on
any of the shelf-order lists on the memory card
are displayed at the bottom of the list.
75-0500-6135-9, Rev. B; 060-A 25Other Procedures
Installing New DLA Software
Data Manager software is used to upgrade Digital
Library Assistant (DLA) software. Data Manager
accomplishes this by exporting DLA software onto a
memory card that is then inserted into the DLA.
Step 1 - Install DLA software on your
computer’s hard drive
Figure 40: This dialog box appears if you have not
In this step, you install DLA software onto the hard loaded DLA software onto your computer.
drive of the computer that you use to run Data
Manager.
1 Insert the DLA Software CD-ROM into your
computer’s CD-ROM drive.
A DLA Software installation program
automatically starts.
2 Follow the installation instructions that ask you to
select a Destination folder, languages, etc.
The installation process copies the DLA
program files from the CD-ROM and saves
them on your hard drive.
DLA Documentation
Select the Documentation checkbox if you want
Figure 41: Select the Documentation checkbox if you
to install electronic files (Adobe pdf format) of
want to install electronic files (pdf format) of the DLA
the DLA documentation onto your hard drive.
documentation onto your hard drive.
This allows you to view and/or print the DLA
Owner’s manual.
You must have Adobe Acrobat Reader 4.0 or
greater installed on your computer to view the
pdf files.
3 When the installation is complete, click Finish.
The DLA software is now installed on your
computer’s hard drive.
Step 2 - Install DLA software on the DLA
1 During each export operation, Data Manager
automatically exports Digital Library Assistant
(DLA) software to the memory card.
2 When the memory card is inserted into the DLA,
the DLA compares the software version currently Figure 42: Select the languages that you want to
running on the DLA to the version that is on the install.
memory card.
If the software on the memory card is newer
than the version installed on the DLA, you will
be asked to upgrade the DLA software.
26 75-0500-6135-9, Rev. B; 060ASpecifying Language Settings
The administrator can specify which languages
that staff will be able to select.
To select which languages will be
available in the View Languages menu
1 Enter the Administrator password to access
the Admin Setup menus.
2 From the Admin Setup menu, click
Language Settings.
The Language Settings dialog box
appears.
3 In each of the four pop-up lists, select the
languages that you want to appear in the
Language menu selection (or select None).
Up to four languages can be displayed.
If you select one language, the
Languages selection will not appear in
the View menu.
4 Click OK.
75-0500-6135-9, Rev. B; 060-A 27Designating a default export format (optional)
If default export formats are set, Data Manager assigns
the default export format to any new list file that you
move into either list folder.
List files that are moved into the Shelf Order Lists
folder are assigned the Order Default export format.
List files that are moved into the Search Lists folder
are assigned the Search Default export format.
To designate a default export format
5 From the Admin Setup menu, click Export
Formats.
The Export Formats dialog box appears.
6 From the Available Formats list,
select a format.
7 Click Set as Order Default and/or
Set as Search Default.
Any new list files placed into either folder will be
automatically assigned the default format for that
folder.
The same format can be set as the Order Default
and the Search Default. Figure 43: Select an import format and
click Set Default.
Figure 44: Once you set a default export
format, you can clear it and set a different
default.
28 75-0500-6135-9, Rev. B; 060ADesignating a default import format (optional)
When you add a category, the default import
format automatically appears in the Import
Format text box (see Figure 46).
To designate a default import format
1 From the Admin Setup menu, click Import
Formats.
The Import Formats dialog box appears.
2 From the Available Import Formats list,
select the format that you want to be the
default format.
3 Click Set Default.
Figure 45: Select an import format and click Set
Default.
4 When you add a category, the default import
format automatically appears in the Import
Format text box.
Figure 46: When you add a category, the default
import format automatically appears in the Import
Format text box.
75-0500-6135-9, Rev. B; 060-A 29You can also read