ZoomText Quick Reference Guide - version
←
→
Page content transcription
If your browser does not render page correctly, please read the page content below
ZoomText
Quick Reference Guide
                        version

                        10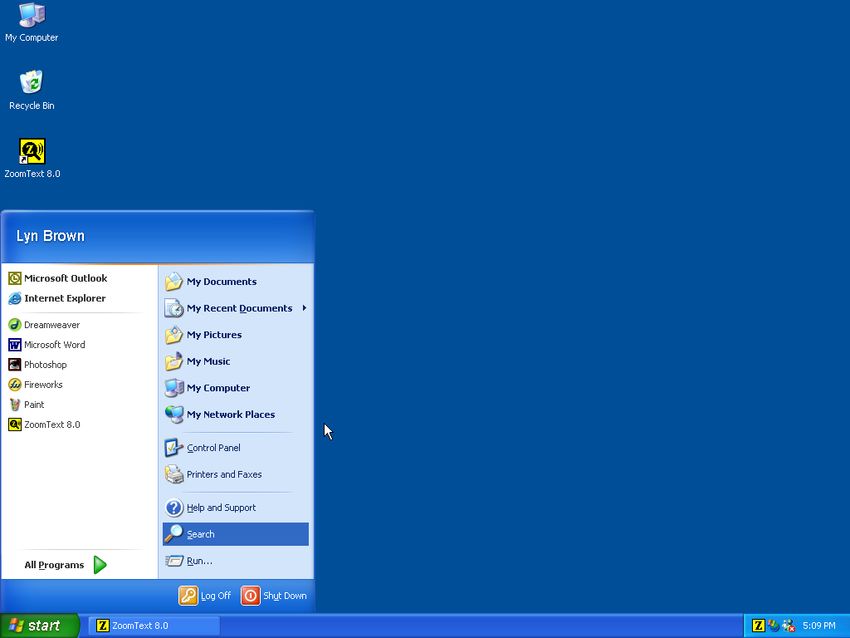
Contents
Welcome to ZoomText 10.....................3                 Cursor Enhancements ............................24
 System Requirements...............................4         Focus Enhancements ..............................25
 Installing ZoomText .................................5      Font Enhancements.................................26
 Activating ZoomText ...............................6        Desktop Finder ........................................27
 Starting ZoomText ....................................8     Web Finder...............................................28
 ZoomText User Interface .........................9          Text Finder ...............................................31
 Enabling and Disabling ZoomText ......11                    Smooth Panning ......................................33

Magnifier Toolbar ..................................12     Reader Toolbar........................................35
 Setting the Magnification level .............13            Turning Speech On and Off...................36
 Selecting a Zoom Window ....................14             Adjusting the Speech Rate .....................37
 Adjusting a Zoom Window...................16               Synthesizer Settings ................................38
 Using the Freeze Window .....................17            Typing Echo .............................................39
 Using View Mode ...................................18      Mouse Echo ..............................................40
 Dual Monitor Support............................19         Verbosity...................................................41
 Color Enhancements ..............................22        AppReader .............................................. 42
 Pointer Enhancements ...........................23         DocReader ................................................45

ZoomText 10 Quick Reference Guide                                                                                      1
Contents
    Reading Zones.........................................48
    SpeakIt Tool .............................................55
    Text Reading Commands ......................56

Tools Toolbar ................................ 58
 ZoomText Camera ..................................59
 ZoomText Recorder................................68
 Background Reader ................................71

Hotkeys......................................................74

Configuration Files ................................91
 The Default Configuration File.............92
 Application Settings ...............................93

ZoomText Scripting ...................... 95

2                                                                  ZoomText 10 Quick Reference Guide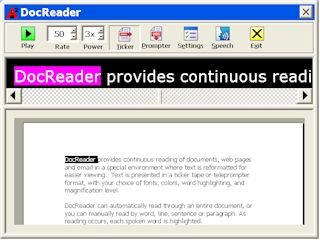
Welcome to ZoomText 10
ZoomText 10 is a powerful computer access solution for the visually-impaired.
Consisting of two adaptive technologies – screen magnification and screen reading –
ZoomText allows you to see and hear everything on the computer screen, providing
complete access to applications, documents, email and the Internet.
ZoomText 10 is available in two product versions:
Magnifier – a standalone screen magnifier
Magnifier/Reader – an integrated magnifier and screen reader
This quick reference guide provides helpful information on installing and using
the key features of ZoomText Magnifier and ZoomText Magnifier/Reader. Features
associated with screen reading and speech are only available in ZoomText
Magnifier/Reader.
Note: This guide does not describe all of the features of ZoomText 10, nor is it
intended to replace the full documentation. For complete information, refer
to the ZoomText User's Guide or online help system. To launch the online
help system, select Help ZoomText Help in the ZoomText menu bar.
ZoomText 10 Quick Reference Guide 3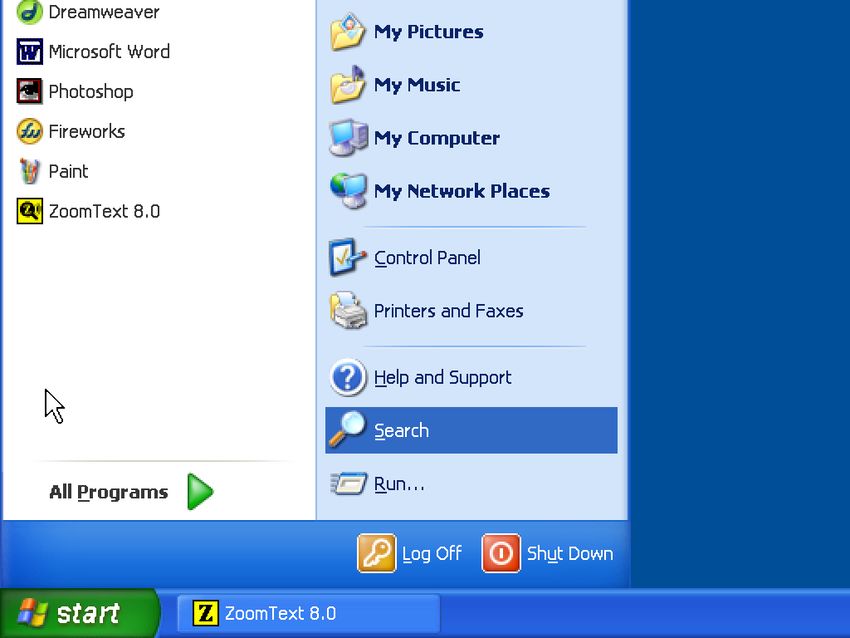
System Requirements
To run ZoomText 10 you must have a system that includes the following:
Windows 7, Windows Vista, or Windows XP (SP2 or later)
1.5 GHz for Windows 7 and Windows Vista
1 GHz Pentium® 4 or equivalent for Windows XP
1 GB RAM for Windows 7 and Windows Vista (2GB recommended)
512 MB RAM for Windows XP (1 GB recommended)
50 MB free hard disk space (additional 60 MB required for each NeoSpeech
synthesizer)
Sound card (for Magnifier/Reader version only)
4 ZoomText 10 Quick Reference Guide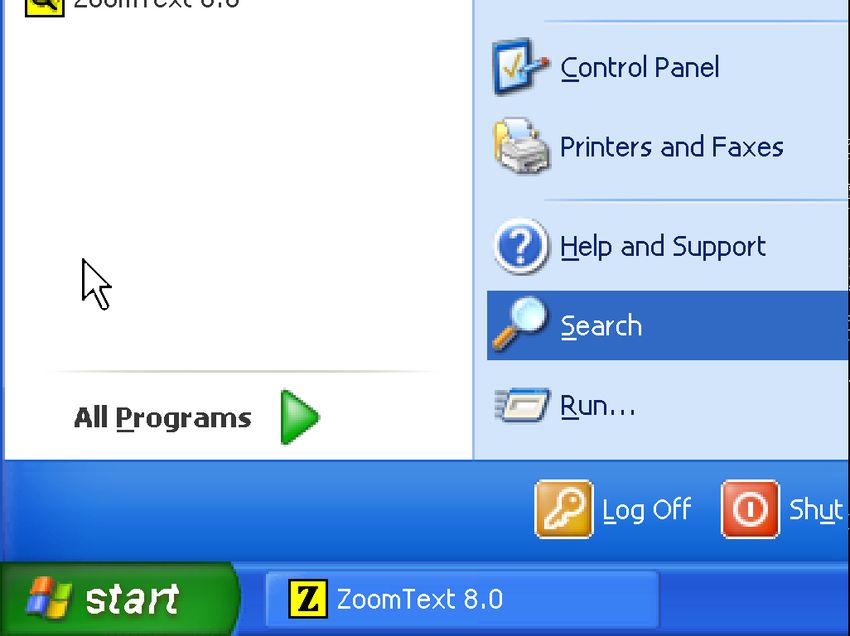
Installing ZoomText
When you insert the ZoomText CD into your CD-ROM drive, the Setup program will
start automatically. Follow the on-screen instructions to complete the installation.
If Setup does not start automatically
1. Click on the Windows Start button and select Run…
2. Browse to your CD-ROM drive.
3. Select the Setup program and click Open.
4. Click OK in the Run dialog box.
To uninstall ZoomText
1. In the Start menu, choose Programs ZoomText 10 Other
Uninstall ZoomText 10.
2. Follow the on-screen instructions.
Installing ZoomText in Windows 7, Vista, and XP
When you run Setup in Windows 7, Vista or XP, the setup program will install
system-level components. In order to install these components you must have
administrator privileges. If you do not have these privileges, contact your network
administrator before proceeding with the installation.
ZoomText 10 Quick Reference Guide 5
Activating ZoomText
ZoomText 10 contains product activation technology designed to eliminate
unauthorized use of ZoomText, without imposing a burden on legitimate users.
Product activation is a simple, straightforward and anonymous process that takes just
a few seconds to complete when performed over the Internet.
After you install ZoomText you have up to 60 days to activate the software. Until you
do, ZoomText will run as a trial. You can activate immediately or anytime during the
60-day trial period. All features are available during the trial period, so you have full
use of the software. When the trial period expires you must activate ZoomText to
continue using it.
Preparing to Activate ZoomText
To activate ZoomText 10 you will need your ZoomText 10 serial number, provided
with your purchased copy. If you have purchased an upgrade version of ZoomText 10
you will also need the serial number from your previous version of ZoomText (version
9.1 or earlier) unless your previous version is already installed on your system. These
serial numbers can be found in the following locations of your ZoomText product
packages: on the ZoomText CD sleeve, on the product registration card, on the top of
the ZoomText box, and on back of the ZoomText User’s Guide.

6                                                      ZoomText 10 Quick Reference Guide
Activating ZoomText (continued)
During the 60-day trial period, each time you start ZoomText the Activation Wizard
appears. The wizard presents the following options for you to choose from:
Option 1: I have a serial number and want to activate ZoomText
Choose this option if you have already purchased or been provided with a
ZoomText product and you're ready to activate the software. The wizard will
guide you through the activation process.
Option 2: I want to purchase ZoomText
Choose this option if you are ready to purchase a ZoomText product. The
wizard will display information on how to purchase ZoomText.
Option 3: I want to try ZoomText
Choose this option if you want to run ZoomText in trial mode. Trial mode
allows you to use ZoomText for up to 60 days. When the 60-day trial period
expires, you must activate ZoomText to continue using it.
For complete information on activating ZoomText, see “Activating ZoomText 10” in
the ZoomText User's Guide or online help system.
ZoomText 10 Quick Reference Guide 7Starting ZoomText
Once ZoomText is installed on your system, it can be started using one of the following
procedures.
On the Windows desktop, click on the ZoomText 10 icon.
In the Windows Start menu, choose Programs ZoomText 10 ZoomText 10.
When ZoomText starts up, it changes your display to show a magnified view of the
normal screen. As you move the mouse, type text and navigate your applications, the
magnified view automatically scrolls, keeping the area of activity in view.
If you have installed ZoomText Magnifier/Reader, ZoomText will also speak aloud,
narrating your actions as you work with your documents and applications. All of your
Windows programs will operate normally while ZoomText is running.
To exit ZoomText
In the File menu, choose Exit.
8 ZoomText 10 Quick Reference GuideZoomText User Interface
When you start ZoomText its user interface appears on the screen. This window
contains all of the controls for operating ZoomText. Features associated with
magnification and screen reading are grouped into separate toolbars and dialogs.
Magnifier tab
Displays controls for ZoomText's magnification features.
Reader tab
Displays controls for ZoomText's screen reading features.
Tools tab
Displays controls for ZoomText's tools features.
ZoomText button Minimize button
Enables or disables ZoomText. Hides the ZoomText user interface.
ZoomText 10 Quick Reference Guide 9ZoomText User Interface (continued)
The ZoomText user interface can be minimized (hidden) and restored (made visible),
without affecting the operation of ZoomText.
To minimize ZoomText
Do one of the following:
On the ZoomText title bar, click on the minimize button.
While the ZoomText user interface is active, press ESC.
To restore ZoomText
Do one of the following:
Click on the ZoomText 10 button in the task bar.
Press the Display User Interface hotkey: CTRL + SHIFT + U.
10 ZoomText 10 Quick Reference GuideEnabling and Disabling ZoomText You can enable and disable ZoomText at any time, without exiting the program. When disabled, ZoomText returns the screen to its normal (unmagnified) state and all speech output is terminated. To enable ZoomText Do one of the following: On the ZoomText user interface, click on the ZoomText button. Press the Enable ZoomText hotkey: ALT + INSERT. To disable ZoomText Do one of the following: On the ZoomText user interface, click on the ZoomText button. Press the Disable ZoomText hotkey: ALT + DELETE. ZoomText 10 Quick Reference Guide 11
Magnifier Toolbar
The Magnifier toolbar provides quick access to ZoomText's magnification features.
Each toolbar button has an intuitive icon and label for easy identification. Many of
these buttons have pop-up menus that provide fast access to the most important and
frequently used settings. Related buttons are grouped together and the group is
labeled with a clickable link that opens their associated dialog box. Features
associated with this toolbar are described in pages 13 through 34.

                                            Icon
                                             Group label

                                            Group

                                            Icon label

12                                                   ZoomText 10 Quick Reference Guide
Setting the Magnification Level
ZoomText provides a wide range of magnification levels, allowing you to enlarge the
view according to your needs. Magnification levels range from 1x to 36x (1x to 8x in
steps of 1, 10x to 16x in steps of 2, 20x to 36x in steps of 4, and fractional powers of
1.25x, 1.5x, 1.75x and 2.5x).
To adjust the magnification level
On the Magnifier toolbar, adjust the level in the Power spinbox,
or press the Magnification hotkeys:
To… Press…
Increase magnification ALT + NUMPAD PLUS
Decrease magnification ALT + NUMPAD MINUS
1x view (normal screen) 2x View 3x View
ZoomText 10 Quick Reference Guide 13Selecting a Zoom Window
ZoomText provides eight zoom window types: Full, Overlay, Lens, Line and four
Docked positions. Each of these windows offers a unique way of viewing what is on
the screen. At any time, you can switch zoom window types to accommodate a
different task or application environment.
To select a zoom window type
On the Magnifier toolbar, select Type, and then select the desired
zoom window.
You can also cycle through the zoom window types by pressing
the Zoom Window hotkey: CTRL + SHIFT + Z.
14 ZoomText 10 Quick Reference GuideSelecting a Zoom Window (continued) Zoom Window Types Full displays a magnified view that occupies the entire screen. Overlay displays a magnified view that can be sized and moved to occupy any portion of the screen. Lens moves over the normal screen like a magnifying glass, displaying what is directly beneath it. The lens automatically follows as you move the mouse pointer, type text and navigate your programs. Line moves up and down the screen like a magnifying ruler, displaying what is directly beneath it. The line window automatically follows as you move the mouse pointer, type text and navigate your programs. Docked splits the screen in half, displaying a magnified 'docked' view on one side and a normal (unmagnified) view on the other. The magnified view can be docked against any edge of the screen: top, bottom, left, or right. ZoomText 10 Quick Reference Guide 15
Adjusting a Zoom Window
ZoomText's windows can be sized and/or moved to occupy a different portion of the
screen (with the exception of Full zoom).
To size and move a zoom window
1. On the Magnifier toolbar, choose Type Adjust.
The Adjust tool becomes active and sizing handles appear on the
zoom window frame.
2. To size the window, drag any handle.
3. To move the window, drag inside the window frame.
4. To scroll the contents of the window, hold down CTRL, and then drag inside
the window frame.
5. To exit the Adjust tool, right-click or press ESC.
16 ZoomText 10 Quick Reference GuideUsing the Freeze Window
In a magnified view, it is impossible to see the entire screen at once. As a result, you
may not be able to view multiple items of interest at the same time, such as
information located at opposite edges of the screen. The Freeze window allows you to
monitor a selected area of the screen while you simultaneously view and work in other
areas of the screen.
To set up a Freeze window
1. Set the zoom window type to Full.
2. In the Magnifier toolbar, select Type Freeze New.
3. Move the mouse pointer until the area you want to freeze is scrolled into view.
4. Drag to select the freeze area.
The Freeze window appears with sizing handles on the frame.
5. To size the window, drag any handle. To move the window, drag inside the
window frame. To scroll the contents of the window, hold down CTRL and
drag inside the window frame.
6. To exit the Freeze tool, right-click or press ESC.
To enable and disable the Freeze window
On the Magnifier toolbar, choose Type Freeze Enable (or Disable).
ZoomText 10 Quick Reference Guide 17Using View Mode
View mode shows you the area of the screen that’s currently being magnified, and
allows you to select a new area to zoom in on. When view mode is activated,
magnification turns off and the view locator appears in the normal screen. By moving
the view locator, you can select a new area to zoom in on.
To use View Mode
1. In the Actions menu, choose View Mode.
Magnification is temporarily turned off and the view locator appears.
2. Move the view locator to the desired screen location.
3. Click to zoom-in on the new location.
Magnification is restored with the selected screen area displayed.
You can configure the view locator to appear in a variety of shapes and colors.
To configure the view locator
1. In the Magnifier menu, choose View Locator…
2. Adjust the locator options as desired.
3. Click the OK button.
18 ZoomText 10 Quick Reference GuideDual Monitor Support
When using a computer equipped with two monitors, ZoomText’s Dual Monitor
Support allows you to use the primary and secondary monitors to double the width of
the magnified view (Primary Span), duplicate the magnified view (Primary Clone), or
simultaneously see a magnified and unmagnified view of the screen (Primary with 1x).
ZoomText’s dual monitor views are designed to enhance productivity and comfort for
individual users (working alone) or a group of users (low vision and normal sighted)
that are working together on the same system.
System Requirements
To use ZoomText’s Dual Monitor Support your system must have the following
hardware and software:
Windows Vista or Windows XP
A desktop or laptop computer with a dual-head video card or two video cards
Two computer monitors (any combination of CRT or LCD)
Note: For best viewing we recommend using a matching set of LCD monitors
positioned next to one another on your workstation.
ZoomText 10 Quick Reference Guide 19Dual Monitor Support (continued)
Primary Span extends ZoomText’s magnified view across
the primary and secondary monitors, doubling the amount
of information that can be seen at any time. With twice as
much information in view, you can work with greater speed
and comfort than is possible when using a single monitor.
Primary Clone displays the same magnified view on your
primary and secondary monitors. This mode is useful when
two or more users need to see the same magnified view, but
are not seated so that they can share a single monitor.
Primary with 1x displays a magnified view on your primary
monitor and an unmagnified view on your secondary
monitor. This mode is useful when a low-vision user and
normal-sighted user are working together on the same
system. The low-vision user can zoom-in to the desired
level (on the primary monitor) while the normal-sighted
user sees the unmagnified view on the secondary monitor.
20 ZoomText 10 Quick Reference GuideDual Monitor Support (continued)
The first time you start ZoomText, it will automatically detect the presence of two
monitors on your system and ask if you want to enable the dual monitor feature. If
you choose 'Yes', ZoomText will enable the dual monitor feature in Primary Span view
(default). However, you can enable and disable the dual monitor feature or select a
different dual monitor view at any time.
To enable and disable the dual monitor feature
On the Magnifier toolbar, select Type Dual Monitor Enable
(or Disable), or, press the Dual Monitor On/Off hotkey:
WINDOWS + SHIFT + D.
To select a dual monitor view
On the Magnifier toolbar, select Type Dual Monitor, and then
select the desired dual monitor view.
You can also cycle through the dual monitor views by pressing
the Dual Monitor View hotkey: WINDOWS + SHIFT + Z.
ZoomText 10 Quick Reference Guide 21Color Enhancements
Color enhancements improve clarity of text and graphics, providing easier viewing
and reduced eyestrain. The color enhancement options consist of a variety of
filter effects that adjust color, contrast and brightness. You can choose from preset
color schemes or configure your own custom color settings.
To choose a preset color scheme
On the Magnifier toolbar, select Color Scheme, and then
select the desired color scheme.
To configure custom color settings
1. In the Magnifier menu, choose Color Enhancements…
2. Select Custom…
3. Adjust the custom settings as desired.
4. Click the OK button.
Note: You can turn color enhancements on and off using the
Color Enhancements On/Off hotkey: CTRL + SHIFT + C.
22 ZoomText 10 Quick Reference GuidePointer Enhancements
Pointer enhancements make it easy to locate and follow the mouse pointer. You can
adjust the size and color of the pointer, and activate a locator that emphasizes the
pointer’s position on the screen. You can choose from preset pointer schemes or
configure your own custom pointer settings.
To choose a preset pointer scheme
On the Magnifier toolbar, select Pointer Scheme, and then
select the desired pointer scheme.
To configure custom pointer settings
1. In the Magnifier menu, choose Pointer Enhancements…
2. Select Custom…
3. Adjust the custom settings as desired.
4. Click the OK button.
Note: You can turn pointer enhancements on and off using the
Pointer Enhancements On/Off hotkey: CTRL + SHIFT + P.
ZoomText 10 Quick Reference Guide 23Cursor Enhancements
Cursor enhancements make it easy to locate and follow the text cursor. A choice of
high visibility locators marks the cursor’s position, without obscuring the surrounding
text. You can choose from preset cursor schemes or configure your own custom cursor
settings.
To choose a preset cursor scheme
On the Magnifier toolbar, select Cursor Scheme, and then
select the desired cursor scheme.
To configure custom cursor settings
1. In the Magnifier menu, choose Cursor Enhancements…
2. Select Custom…
3. Adjust the custom settings as desired.
4. Click the OK button.
Note: You can turn cursor enhancements on and off using the
Cursor Enhancements On/Off hotkey: CTRL + SHIFT + R.
24 ZoomText 10 Quick Reference GuideFocus Enhancements
Focus enhancements make it easy to locate and follow the control focus when you tab
and arrow key through menus, dialogs, toolbars, and other application controls. When
enabled, a choice of high visibility locators mark the position of the control with focus,
without obscuring any surrounding text. You can choose from preset focus schemes or
configure your own custom focus settings.
To choose a preset focus scheme
On the Magnifier toolbar, select Focus Scheme, and then
select the desired focus scheme.
To configure custom focus settings
1. In the Magnifier menu, choose Focus Enhancements…
2. Select Custom…
3. Adjust the custom settings as desired.
4. Click the OK button.
Note: You can turn focus enhancements on and off using the
Focus Enhancements On/Off hotkey: CTRL + SHIFT + O.
ZoomText 10 Quick Reference Guide 25Font Enhancements
With conventional screen magnifiers, the clarity of fonts (text characters) is degraded
in the magnified view. As a result, many fonts are difficult to read, including; small
fonts, serif and italic fonts, and most cursive and ornate fonts. These problems are
eliminated with ZoomText's patented xFont text enhancement technology.
With xFont, all font types are magnified with perfect clarity – at all magnification
levels. In addition, xFont options allow you to fine-tune text legibility by applying
Smooth, Bold, and Condense options.
If your system is too slow to support xFont, you can switch to Standard font
enhancements, which displays medium quality text with faster system performance.
To switch font enhancement types
Press the Font Enhancements hotkey: CTRL + SHIFT + F. Repeated presses of this
hotkey cycles through the three enhancement types: xFont, Standard and None.
To configure font enhancement options
1. In the Magnifier menu, choose Font Enhancements…
2. Adjust the font enhancement options as desired.
3. Click the OK button.
26 ZoomText 10 Quick Reference GuideUsing the Desktop Finder
The Desktop Finder helps you find and open programs and documents located in the
Windows desktop environment - including the quick launch bar, system tray and
control panel. When executing the Desktop Finder, a dialog box displays a list of items
located in the desktop environment. This list can be filtered and searched, allowing
you to quickly locate the desired item. Desktop Finder 'Actions' allow you to open the
item or view its properties.
To use the Desktop Finder
1. On the Magnifier toolbar, select Desktop.
The Desktop Finder dialog appears.
2. Filter and sort the Desktop Items list by selecting the desired
options under Show These Items and Sort Items By.
3. To narrow the search, type the information you are searching for in
the Search For combo box, or select a recent entry from the combo
box list.
4. Select the desired item in the Desktop Items list.
5. Click the Open button to launch the selected item, or the
Properties button to view the properties for the selected item.
ZoomText 10 Quick Reference Guide 27Using the Web Finder
The Web Finder allows you to swiftly search, skim, navigate and read webpages. You
can search for words or phrases throughout an entire webpage to find topics of
interest. When you've found a topic of interest you can have Web Finder start reading
from that location (ZoomText Magnifier/Reader only). Web Finder can also find and
execute links and controls allowing you to seamlessly navigate between webpages. All
of these actions are performed using Web Finder’s simple toolbar/dialog and keyboard
commands.
Web Finder provides two modes for searching webpages: Page Search and List
Search. These modes and how to switch between them are described in the sections
below.
Note: Web Finder can be used in popular web browsers including Internet Explorer
and Firefox.
To use the Web Finder
1. On the Magnifier toolbar, select Web.
The Web Finder toolbar/dialog appears.
28 ZoomText 10 Quick Reference GuideUsing the Web Finder (continued)
To use Page Search
1. If Web Finder is currently in List Search mode, click the List button to switch to
Page Search mode.
2. Select the type of Page Items that you want to search. Choose "All Text" to
search for words or phrases anywhere on the page.
3. In the Search box, type a word or phrase that you want to find.
If the word or phrase does not exist in the selected type of page item the Search box will
turn orange and the navigation buttons will be disabled (grayed out).
Note: When Page Items is set to "All Text", you must type at least one character in
the Search box to initiate a search.
4. Click the Next and Previous buttons to navigate forward and backward.
As you navigate each item is highlighted. When using ZoomText Magnifier/Reader (with
Web Finder speech enabled), the sentence containing the item is announced.
5. To have Web Finder execute a link or control, click the Execute button.
6. To have Web Finder start reading at the current item, click the AppRdr button. *
7. To exit Web Finder, click the Exit button.
ZoomText 10 Quick Reference Guide 29Using the Web Finder (continued)
To use List Search
1. If Web Finder is currently in Page Search mode, click the List button to switch to
List Search mode.
2. In the Page Items combo box, select the type of items that you want to view in
the Items found list.
3. To search (or filter) the list, type a word or phrase in the Search box.
As you type in the Search box the list is automatically filtered to display only items that
contain the search string. The Search box turns orange when the typed word or phrase
does not exist within the list of items.
4. Select the desired sorting order in the Sort by list box. You can also sort the list
by clicking on the Name and Type headings at the top of the list.
5. To have Web Finder start reading from the selected item (using AppReader),
click the AppRdr button. *
6. To have Web Finder execute a link or control, click the Execute button.
7. To have Web Finder go to the location of the selected item, click the GoTo
button.
8. To exit Web Finder, click the Exit button.
30 ZoomText 10 Quick Reference GuideUsing the Text Finder
The Text Finder helps you locate words or phrases within the active application
window or the entire screen. After entering the text you want to search for, the Text
Finder highlights and reads each found occurrence of the text or the entire line that
contains the text. Note: Text is not spoken by ZoomText Magnifier.
To use the Text Finder
1. On the Magnifier toolbar, select Text.
The Text Finder dialog appears. For information on this dialog, see “Text
Finder” in ZoomText’s user’s guide or online help system.
2. In the Search For box, type the word(s) you want to search for.
3. Select any other Text Finder options that you want to use.
4. Click the Search button.
The Text Finder dialog is hidden and the first occurrence of the search text
is highlighted and spoken according to the selected options. The Text
Finder toolbar appears above the found text, providing controls for
navigating and reading occurrences of the search text.
5. To navigate to the next or previous occurrence of the search text,
use the Text Finder toolbar or associated Text Finder commands.
6. To exit the Text Finder, right-click or press ESC.
ZoomText 10 Quick Reference Guide 31Using the Text Finder (continued)
The Text Finder toolbar appears above the found text, providing controls for
navigating and reading occurrences of the search text.
The Text Finder toolbar
Read * Reads the entire line that contains the found word.
Shortcut Key: ENTER
Previous Displays the previous occurrence of the search text.
Shortcut Key: LEFT or SHIFT + TAB
Next Displays the next occurrence of the search text.
Shortcut Key: RIGHT or TAB
Start AppReader * Launches AppReader and begins reading from the
location of the highlighted search text. Shortcut Key: A or CTRL + ALT + A
Settings Returns to the Text Finder dialog.
Shortcut Key: BACKSPACE
Close Exits the Text Finder.
Shortcut Key: ESC
* This option is not available in ZoomText Magnifier.
32 ZoomText 10 Quick Reference GuideSmooth Panning
Smooth panning (patent pending) provides a more natural panning motion when the
magnified view scrolls to keep the focus in view. As you type text and navigate
menus, dialogs and other program controls the magnified view smoothly pans across
the screen, rather than jumping in an abrupt manner. You can also use “smooth mouse
panning” to smoothly pan and explore in any direction.
Note: Smooth mouse panning is only available when the zoom window type is
set to Full.
To enable and adjust smooth panning
1. In the Settings menu, choose Panning...
2. Make sure the Enable smooth panning box is checked.
3. Adjust the panning options as desired.
4. Click the OK button.
Note: You can turn smooth panning on and off using the
Smooth Panning On/Off hotkey: WINDOWS + SHIFT + P.
ZoomText 10 Quick Reference Guide 33Smooth Panning (continued)
To use smooth mouse panning
1. Make sure the zoom window type is set to Full.
2. Press the Smooth Mouse Panning hotkey: CTRL + mouse wheel click.
The mouse panning tool becomes active.
3. To start panning, move the mouse pointer in the direction you want to pan.
4. To increase or decrease the panning speed, move the pointer further or closer to
the center point.
5. To change the panning direction, move the pointer to a new direction (relative to
the center point).
6. To stop panning, move the pointer back to the center point.
7. To exit the mouse panning tool, right click or press ESC.
34 ZoomText 10 Quick Reference GuideReader Toolbar
The Reader toolbar provides quick access to ZoomText's screen reading features.
Each toolbar buttons has an intuitive icon and label for quick identification. Many of
these buttons have pop-up menus that provide fast access to the most important and
frequently used settings. Related buttons are grouped together and the group is
labeled with a clickable link that opens their associated dialog box. Features associated
with this toolbar are described in pages 36 through 58.
Icon
Group label
Group
Icon label
ZoomText 10 Quick Reference Guide 35Turning Speech On and Off
You can turn speech output on and off without disabling the magnification features.
To enable and disable speech
On the Reader toolbar, select Speech Enable (or Disable),
or, press the Speech On/Off hotkey: ALT + SHIFT + S
Note: AppReader, DocReader and the SpeakIt tool can be used when
speech is disabled.
There may be times when you want to terminate speech output while it is occurring.
For example, when ZoomText is reading a message box that you are already familiar
with. You can force ZoomText to stop speaking this text without turning speech off
altogether.
To terminate speech output as it occurs
Press and release the CTRL key.
The information that is currently being spoken is terminated.
36 ZoomText 10 Quick Reference GuideAdjusting the Speech Rate
Speech rate allows you to control how fast ZoomText speaks in words per minute
(SAPI 4 synthesizers) or in percentage of the synthesizer's range (SAPI 5 synthesizers).
To adjust the speech rate
On the Reader toolbar, adjust the level in the Rate spinbox,
or, use the Speech Rate hotkeys:
To… Press…
Increase speech rate CTRL + NUMPAD PLUS
Decrease speech rate CTRL + NUMPAD MINUS
A separate speech rate is available for AppReader and DocReader.
This setting is located in the Reading Options dialog box. In the
Reader menu, choose Reader Options…
ZoomText 10 Quick Reference Guide 37Synthesizer Settings
Synthesizer settings let you customize the screen reading voice. You can select from a
variety of male and female voices, and adjust their speaking rate, pitch and volume.
Note: ZoomText comes with four speech synthesizers: NeoSpeech (English only),
TruVoice, ViaVoice and Microsoft Speech. The ZoomText Setup program
allows you to install any combination of these synthesizers. ZoomText also
supports other SAPI 4 and 5 based synthesizers that have been installed on
your system.
To adjust the speech synthesizer settings
1. In the Reader menu, choose Synthesizer…
2. Make sure the Enable speech output box is checked.
3. Choose a Synthesizer and Voice, and then adjust the rate, pitch and volume
as desired.
4. To preview the synthesizer settings, type some text in the Sample Text edit box,
and then click Speak Sample.
5. Click the OK button.
38 ZoomText 10 Quick Reference GuideTyping Echo
Typing echo allows you to hear the keys and words that you type. You can choose to
have individual keys, words, or both keys and words spoken. Typed words are
spoken upon completion (as soon as you type a space or punctuation character).
Additional typing echo options also allow you to select which keys are spoken – all
keys or selected groups of keys.
To enable typing echo
On the Reader toolbar, click Typing and then select the desired
typing echo mode.
To adjust the typing echo options
1. In the Reader menu, choose Typing Echo…
2. Adjust the typing echo options as desired.
3. Click the OK button.
ZoomText 10 Quick Reference Guide 39Mouse Echo
Mouse echo automatically reads text beneath the pointer. As you move the pointer
across the screen, single words or complete lines of text are echoed instantly or after
hovering briefly.
To enable mouse echo
On the Reader toolbar, click Mouse and then select the desired
mouse echo mode.
To adjust the mouse echo options
1. In the Reader menu, choose Mouse Echo…
2. Adjust the mouse echo options as desired.
3. Click the OK button.
40 ZoomText 10 Quick Reference GuideVerbosity
Verbosity allows you to adjust the amount of information spoken about program
controls when they become active or highlighted. Program controls include:
application and document windows, menus, dialogs, buttons, icons, and more.
Three verbosity levels – Beginner, Intermediate and Expert – allow you to quickly
increase or decrease the verbosity. Beginner verbosity provides more information,
while Expert verbosity provides less information. Each of these verbosity levels can be
fully customized according to your personal needs.
To select a verbosity level
On the Reader toolbar, click Verbosity and then select the desired
verbosity level.
To adjust the verbosity options
1. In the Reader menu, choose Verbosity…
2. Adjust the verbosity options as desired.
3. Click the OK button.
ZoomText 10 Quick Reference Guide 41AppReader
AppReader reads documents, web pages and email, within the parent application. As
you enter and exit AppReader your view of the document does not change, providing
quick and seamless transitions between document editing and reading.
AppReader can automatically read through the entire document, or you can manually
read by word, line, sentence or paragraph. As reading occurs, each spoken word is
highlighted. AppReader settings allow you to customize the appearance of word
highlighting, including the highlight shape, size, color, and transparency level.
To adjust the AppReader settings
1. In the Reader menu, choose AppReader…
2. Adjust the AppReader settings as desired.
3. Select the OK button.
AppReader highlighting
42 ZoomText 10 Quick Reference GuideAppReader (continued)
To start and operate AppReader
1. Open the document, web page or email that you wish to read.
2. Press the AppReader hotkey: ALT + SHIFT + A,
or, on ZoomText's Reader toolbar, click the AppRdr button.
AppReader begins reading from the current text cursor position. If a
cursor does not exist, AppReader starts paused on the first word.
Note: The AppReader button is disabled (grayed out) when
the last active application does not contain readable text.
3. To start and stop reading, press ENTER or click the mouse.
When using the mouse, you can resume reading from a new location
by clicking on the word where you wish to read.
4. To read manually, use the AppReader navigation commands
(see "AppReader and DocReader Hotkeys" on page 76).
5. To exit AppReader, right-click or press ESC.
When AppReader exits, the cursor is automatically positioned at the
last word that was highlighted in AppReader (if a cursor exists).
ZoomText 10 Quick Reference Guide 43AppReader (continued)
Read from Pointer (AppReader)
The Read from Pointer command lets you instantly start AppReader at the word under
the mouse pointer, making use of AppReader fast and seamless in documents, web
pages and email.
To use the Read from Pointer command
1. Position the mouse pointer over the word where you want AppReader to start.
2. Press the Read from Pointer command: ALT + SHIFT + LEFT-CLICK.
AppReader starts up and begins reading at the word under the mouse pointer.
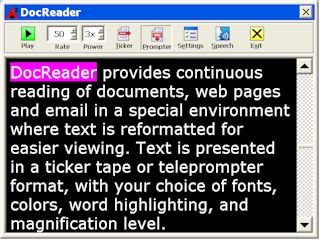
44 ZoomText 10 Quick Reference GuideDocReader
DocReader reads documents, web pages, and email, in a special environment
where text is reformatted for easier viewing. Text is presented in a single line (Ticker)
or wrapped lines (Prompter), with your choice of fonts, colors, word highlighting, and
magnification level.
DocReader can automatically read through an entire document, or you can manually
read by word, line, sentence or paragraph. As reading occurs, each spoken word is
highlighted.
Ticker mode Prompter mode
ZoomText 10 Quick Reference Guide 45DocReader (continued)
To start and operate DocReader
1. Open the document, web page or email that you wish to read.
2. Press the DocReader hotkey: ALT + SHIFT + D, or,
on ZoomText's Reader toolbar, click the DocRdr button.
The DocReader screen appears with text from the source document.
If the source document contains an active text cursor, the word at the
cursor position is highlighted in the DocReader display. Otherwise,
the first word in the DocReader screen is highlighted.
Note: The DocReader button is disabled (grayed out) when the
last active application does not contain readable text.
3. To start and stop reading, click the Play button or press ENTER.
While paused, you can click any word to set a new location to read from.
4. To read manually, use the DocReader navigation commands
(see "AppReader and DocReader Hotkeys" on page 76).
5. To exit DocReader, right-click or press ESC.
When DocReader exits, the text cursor is automatically positioned at
the last word that was highlighted in DocReader (if a cursor exists).
46 ZoomText 10 Quick Reference GuideDocReader (continued)
The DocReader toolbar provides controls for operating DocReader and accessing
settings that modify the appearance of text and highlighting.
DocReader toolbar
Play/Pause Starts and stops reading at the highlighted word.
Rate Controls how fast DocReader speaks.
Power Sets the magnification level used by DocReader, from 1x to 36x.
Ticker Displays a single line of text that scrolls horizontally like a tickertape,
along with a 1x view of the source document that appears beneath.
Prompter Displays multiple wrapped lines of text that scroll vertically like
a teleprompter.
Settings Opens the Reading dialog box to change the DocReader settings.
Speech Opens the Speech dialog box to change the speech settings.
Exit Exits DocReader and activates the source application.
ZoomText 10 Quick Reference Guide 47Reading Zones Reading zones let you instantly see and hear selected locations in an application window. For example, your database application may display a dozen or more fields of information. In your normal work flow you may be interested in only a few of these fields. With reading zones, you can instantly see and/or hear these select fields with the press of a hotkey. You can create up to 10 reading zones per application. As you open and switch between applications, the zones for the active application are automatically loaded and ready to use. 48 ZoomText 10 Quick Reference Guide
Reading Zones (continued)
The Reading Zones toolbar appears over the active reading zone whenever you access
reading zones. The toolbar provides controls for navigating and reading the defined
zones.

  Reading Zones toolbar - Edit and Navigate modes      Reading Zones toolbar – Trigger mode

       Play/Pause/Stop Starts and stops reading. When Play mode is executed, the
       Pause or Stop button appears on the toolbar (according to the mode that is active).
       The Pause button appears in Trigger and Navigate modes where you can pause and
       restart reading at the highlighted word. The Stop button appears in Edit mode where
       reading always restarts at the first word in the zone.
       Shortcut Key: ENTER
       Previous Activates the previous reading zone.
       Shortcut Key: SHIFT + TAB
       Next Activates the next reading zone.
       Shortcut Key: TAB
       Close Exits the Reading Zone mode.
       Shortcut Key: ESC

ZoomText 10 Quick Reference Guide                                                       49
Reading Zones (continued)
To create a reading zone
1. Open the application in which you want to create reading zones.
Make sure the desired application tab, view or window is
displayed.
2. On ZoomText’s Reader toolbar, select Zones New, or, press the
Reading Zones hotkey: CTRL + ALT + Z.
The New Zone Tool becomes active and all existing zones for the active
application are displayed.
3. Move the mouse pointer to scroll the new zone area into view.
4. Hold down the left button, drag the selection rectangle over the
desired zone area and release the button.
When you complete the drag (release the mouse button), the Reading Zones
dialog appears. This dialog allows you to name the zone and select zone
options. For complete information on this dialog, see “Reading Zones
Settings” in ZoomText’s user’s guide or online help system.
5. In the Zone Name box, type a descriptive name for the new zone.
When you navigate to the next dialog control, the new zone name will
appear in the Zones list.
50 ZoomText 10 Quick Reference GuideReading Zones (continued)
6. Under Zone is relative to, select the zone's relative position within the
application window.
7. Under Zone Actions, select the desired options.
8. To test the new zone, click Trigger.
The Reading Zones dialog is temporarily hidden while the zone is displayed and/or
spoken according to the selected settings.
9. To create additional zones, click New Zone and repeat steps 4 through 9.
10. When you're done creating and editing zones, click the OK button.
ZoomText 10 Quick Reference Guide 51Reading Zones (continued)
To edit reading zones
1. Open the application that contains the zones you want to edit.
2. On ZoomText’s Reader toolbar, select Zones Edit, or, press the
Edit Reading Zones hotkey: CTRL + ALT + E.
The Edit Zones Tool becomes active and all existing zones for the active
application are displayed. The Reading Zones toolbar appears over the
active zone.
3. Move the mouse pointer to scroll the desired zone into view, or
click the Next or Previous buttons on the Reading Zones toolbar.
4. Click inside the zone to activate the sizing handles and toolbar.
5. To size the zone, drag any handle.
6. To move the zone, drag inside the zone frame.
7. To test reading of the zone, click the Play button.
8. To move to another zone, press the number of the desired zone, or
click the Next or Previous buttons.
9. To edit another reading zone, repeat steps 4 through 8.
10. To exit the Edit Zones tool, right-click or press ESC.
52 ZoomText 10 Quick Reference GuideReading Zones (continued)
To trigger a reading zone
1. Open the application that contains the zones you want to trigger.
2. On ZoomText’s Reader toolbar, select Zones Trigger, then select
the desired reading zone.
The selected reading zone is displayed and/or spoken according to the
zone settings.
You can also trigger reading zones using the following methods:
Press the List Reading Zones hotkey: CTRL + ALT + L, then
select the desired zone from the menu.
Use the Reading Zone hotkeys:
To trigger… Press…
Trigger zone 1 … 10 CTRL + ALT + 1 … 0
Next reading zone CTRL + ALT + N
Previous reading zone CTRL + ALT + P
ZoomText 10 Quick Reference Guide 53Reading Zones (continued)
To navigate through all reading zones
1. Open the application that contains the zones you want to navigate.
2. On ZoomText’s Reader toolbar, select Zones Navigate, or press
the Navigate Reading Zones hotkey: CTRL + ALT + V.
Navigate Mode becomes active and the Reading Zones toolbar appears
over the first active zone. The zone name and number are spoken.
3. To start and stop reading of the zone, click the Play/Pause button.
Note: The Play/Pause button is disabled (grayed out) when
navigating to non-spoken zones.
4. To navigate to another zone, click the Next and Previous buttons.
5. To exit Navigate Mode, click the Exit button on the Navigate
toolbar. You can also exit by right-clicking or pressing ESC.
54 ZoomText 10 Quick Reference GuideSpeakIt Tool
The SpeakIt tool allows you to read selected areas of the screen by clicking or dragging
with the mouse. Any text that is visible on the screen can be spoken, even if it is
outside the active program.
Note: Text that appears in graphical images cannot be spoken.
To use the SpeakIt tool
1. On the Reader toolbar, click the SpeakIt button,
or, press the SpeakIt Tool hotkey: ALT + SHIFT + I.
2. To speak a single word, click on the word.
3. To speak a block of text, drag to highlight the text.
Upon release of the mouse button, all highlighted text will be spoken.
4. To exit the SpeakIt tool, right-click or press ESC.
ZoomText 10 Quick Reference Guide 55Text Reading Commands
Text reading commands let you navigate and read while creating and editing
documents (by word, line, sentence or paragraph). When using these commands, the
text cursor moves in accordance with the command. For example, when pressing the
Say Next Sentence command, the cursor moves to the beginning of the next sentence
and the entire sentence is spoken. The following table lists the text reading commands.
Note: Num Lock must be turned off when using ZoomText commands that utilize
the numeric keypad.
Text Reading Commands Keys
Say Previous Character LEFT
1
Say Current Character NUMPAD 5
Say Next Character RIGHT
Say Previous Word CTRL + LEFT
2
Say Current Word CTRL + NUMPAD 5
Say Next Word CTRL + RIGHT
Say Previous Sentence CTRL + ALT + LEFT
Say Current Sentence CTRL + ALT + NUMPAD 5
Say Next Sentence CTRL + ALT + RIGHT
56 ZoomText 10 Quick Reference GuideText Reading Commands (continued)
Text Reading Commands (continued) Keys
3
Say Previous Line UP
Say Current Line SHIFT + NUMPAD 5
3
Say Next Line DOWN
Say Previous Paragraph CTRL + UP
Say Current Paragraph CTRL + SHIFT + NUMPAD 5
Say Next Paragraph CTRL + DOWN
1
Second press of the Say Current Character command speaks the character
phonetically ("Alpha, Bravo, Charlie…")
2
Repeated presses of the Say Current Word command operates as follows:
First press: speaks the word
Second press: spells the word
Third press: spells the word phonetically ("Alpha, Bravo, Charlie…")
Note: Repeated presses must occur within two seconds.
3
This command reads the current word or entire line according to the Program
Echo setting When the text cursor moves into a new line.
ZoomText 10 Quick Reference Guide 57Tools Toolbar
The Tools toolbar provides quick access to ZoomText's tools features. Each toolbar
button has an intuitive icon and label for easy identification. Related buttons are
grouped together and the group is labeled with a clickable link that opens their
associated dialog box. Features associated with this toolbar are described in pages 59
through 73.
Icon
Group label
Group
Icon label
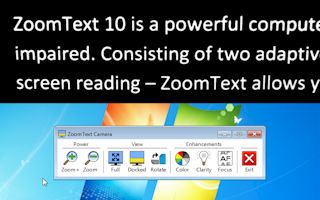
58 ZoomText 10 Quick Reference GuideZoomText Camera
The ZoomText Camera feature allows you to use any high-definition (HD) webcam to
magnify printed items and other objects right on your computer screen—including
bills, magazines, photographs, medicine labels, craft items and more. Simple controls
allow you to quickly zoom in and out and choose between full and high contrast
colors. You can also switch between Full and Docked screen views which allow you to
see the camera image and your Windows desktop at the same time. And by utilizing
affordable and readily available HD webcams, the ZoomText Camera feature offers a
portable and affordable compliment or alternative to conventional CCTVs.
Full View Docked (Top) View
ZoomText 10 Quick Reference Guide 59ZoomText Camera (continued) Getting Started With ZoomText Camera Before you can use the ZoomText Camera feature you must acquire a suitable camera and camera stand, set up the camera in your work space and choose your camera in the ZoomText Camera settings. Acquiring a suitable camera and stand To use the ZoomText Camera feature, you will need an HD webcam with autofocus. For best quality, your webcam should deliver 1080p video resolution with automatic low-light correction. A USB 2.0 port is also required to connect your webcam. In addition to a camera, you will also need a camera stand that can securely position the camera over the items you want to view. The stand should be adjustable and stable. Ai Squared offers high quality webcam and camera stand packages that are flexible, portable and affordable. For more information on these packages, visit the Ai Squared website at www.aisquared.com, or contact your Ai Squared dealer. 60 ZoomText 10 Quick Reference Guide
ZoomText Camera (continued)
Setting up your camera in your workspace
To achieve best performance and usability with the ZoomText Camera feature, use the
following guidelines when setting up your camera in your workspace:
Position the camera as close as possible to your computer screen. This will allow
you to easily manipulate items under the camera while viewing the image.
Make sure there is sufficient lighting around the camera.
Adjust the camera stand so that the camera is about 4 inches from the target item.
Selecting a camera (when more than one camera is present)
ZoomText automatically detects all webcams that are attached or built into your
system. If your computer has more than one webcam, you will need to tell ZoomText
which webcam you want it to use.
To select a camera
1. In the Tools menu, choose Camera…
2. In the Active Camera list box, choose the camera you want to use.
3. Click the OK button.
ZoomText 10 Quick Reference Guide 61ZoomText Camera (continued)
Using ZoomText Camera
Use the following steps to start, configure and use ZoomText Camera.
To start ZoomText Camera
1. On the Tools toolbar, click the Docked button.
The camera image appears in the top half of the screen while ZoomText's
magnified view of the desktop remains on the bottom half of the screen.
The ZoomText Camera toolbar appears in the bottom half.
2. If the Camera toolbar is not in view, press CTRL + WINDOWS + T
to bring the toolbar into view.
ZoomText Camera toolbar
62 ZoomText 10 Quick Reference GuideZoomText Camera (continued)
To rotate the camera image
Place a document under the camera so that it is right-side up from your perspective.
If the document is not oriented right-side up on the screen, click the Rotate button
until the image appears right-side up.
To zoom the image in and out
Click the Zoom + and Zoom - buttons to adjust the magnification to a comfortable
reading size.
To adjust the image colors
1. Click the Color button.
2. Choose between Normal (full color) and a variety of high-contrast Two-Color
Schemes.
Note: You can toggle between Normal (full color) and the selected Two-Color
scheme using the Camera Two-Color On/Off hotkey:
ALT + WINDOWS + SPACEBAR.
ZoomText 10 Quick Reference Guide 63ZoomText Camera (continued)
To adjust the camera clarity (Brightness/Contrast)
1. Click the Clarity button.
The Camera Clarity dialog appears.
2. Place a checkmark next to Enable brightness and contrast settings.
3. Move the Brightness and Contrast sliders to adjust the clarity.
4. Click the Reset button to return the Brightness and Contrast settings to the
camera's defaults.
5. Click the OK button.
Tip: Use the Brightness setting to eliminate glare spots that are appearing
in the image.
Note: This button will be disabled (grayed out) if the active camera does not
support adjustments to both brightness and contrast.
64 ZoomText 10 Quick Reference GuideZoomText Camera (continued)
To adjust the camera focus
1. Click the Focus button.
The Camera Focus dialog appears.
2. Place a checkmark next to Enable manual camera focus.
3. Move the Focus slider to adjust the image focus.
4. Click the OK button.
Note: This button will be disabled (grayed out) if the active camera does not
support autofocus.
To move the docked view location
Click the Docked button. Each click cycles through the docked views in the
following (clockwise) order: Docked Top > Docked Right > Docked Bottom >
Docked Left.
ZoomText 10 Quick Reference Guide 65ZoomText Camera (continued)
To switch between Full and Docked views
Do one of the following:
From either Full or Docked view, press CTRL + WINDOWS + SPACEBAR.
From Docked View, on the ZoomText Camera toolbar click the Full button.
To exit the ZoomText Camera
Do one of the following:
From Full view, press ESC.
From Docked view, click the Exit button.
From either Full or Docked view, press CTRL + WINDOWS + ENTER.
To operate ZoomText Camera with hotkeys
All of ZoomText Camera settings can be adjusted and controlled using hotkeys.
See "ZoomText Camera Hotkeys" on page 80).
66 ZoomText 10 Quick Reference GuideZoomText Camera (continued)
Camera Video and System Performance
On older computers, when using ZoomText Camera you may experience slow system
and camera video performance when the camera is configured to run at a higher
resolution, particularly at camera resolutions of 1280 and above. To resolve this
problem, lower the camera resolution until your system and camera video
performance is at an acceptable level. The resolution setting for ZoomText Camera is
located in the Camera tab in ZoomText’s Tools dialog box. See “ZoomText Camera
Settings” below.
ZoomText Camera Settings
The ZoomText Camera settings allow you to configure and launch the
ZoomText Camera.
To configure the ZoomText Camera settings
In the Tools menu, choose Camera...
The Tools dialog appears with the Camera tab displayed.
ZoomText 10 Quick Reference Guide 67ZoomText Recorder ZoomText Recorder allows you to turn text from documents, webpages, email or other sources into audio recordings that you can listen to on your computer or transfer to your mobile device for listening to on the go. You simply copy or select the text you want to record and start ZoomText Recorder. With a few simple steps you give your recording a friendly name, choose a destination to record to and click the record button. And each recording is created using your choice of ZoomText voices or any other voices available on your system. When choosing iTunes or Windows Media Player as your destination your recordings are conveniently placed in a "ZoomText Recorder" playlist. And when using iTunes your recordings can be automatically synced when you plug in your iPod, iPhone or other iDevice. 68 ZoomText 10 Quick Reference Guide
ZoomText Recorder (continued)
Starting ZoomText Recorder
There are two ways to record text when starting ZoomText Recorder. ZoomText
Recorder can record text that you have copied to the Windows Clipboard or text that
you have selected in the active application.
To record text from the Windows Clipboard
1. Select the text that you want to record and copy it to the
Windows Clipboard.
2. Use one of the following methods to start ZoomText Recorder:
Press the Record Clipboard Text hotkey: CTRL + CAPS LOCK + C.
On the Tools toolbar, select Recorder.
The ZoomText Recorder dialog appears.
To record text selected in the active application
1. Select the text you want to record.
2. Press the Record Selected Text hotkey: CTRL + CAPS LOCK + S.
The ZoomText Recorder dialog appears.
ZoomText 10 Quick Reference Guide 69ZoomText Recorder (continued)
Completing the recording process
When you start ZoomText Recorder its dialog appears with the captured text ready to
record. All you have to do is choose the desired recording options and select the
Record Text button. A progress indicator appears during the recording process to let
you know that it is working. You can stay and watch the progress indicator or switch
to another application and make better use of your time. A friendly chime will sound
when the recording process is complete.
Recording times vary depending on the size of the text selection, chosen synthesizer,
destination and speed of the system. However, our general rule of thumb for
recording time is about 5 to 10 seconds per page of text.
Note: When "Record text to:" is set to iTunes the iTunes application will open at the
end of the recording process.
70 ZoomText 10 Quick Reference GuideYou can also read