WORDPRESS TRAINING THE BASICS - SHANNON OSWALD 1/11/2010
←
→
Page content transcription
If your browser does not render page correctly, please read the page content below
WordPress Training
The Basics

Shannon Oswald

1/11/2010

WordPress Training

                                TABLE OF CONTENTS

What is a Blog?…………………………………………………………………………………………………..……………..Page 3

How to Log‐In to WordPress……………………………………………………………………………………………..Page 3

The Dashboard………………………………………………………………………………………………………………….Page 4

The “Right Now” Area……………………………………………………………………………………………………….Page 4

Posts / Add New Post………………………………………………………………………………………………………..Page 5‐6

Adding Categories…………………………………………………………………………………………………………….Page 6

Adding Pages…………………………………………………………………………………………………………………….Page 7

Adding Media (Pictures, Video, Documents, Flash).…..…………………………………………………….Page 8‐11

Themes……………………………………………………………………………………………………………………………..Page 11

Widgets…..………………………………………………………………………………………………………………………..Page 12

QuickPress…………………………………………………………………………………………………………………………Page 13

How to Log‐Out of WordPress……….………………………………………………………………………………….Page 13

January 2010                                                                     Page 2
WordPress Training

Working with WordPress

What is a Blog?

A blog or "weblog" is a type of website, usually maintained by an individual with regular entries of commentary,
descriptions of events, or other material such as graphics or video. Entries are commonly displayed in reverse‐
chronological order. "Blog" can also be used as a verb, meaning to maintain or add content to a blog. A typical
blog combines text, images, and links to other blogs, Web pages, and other media related to its topic. The ability
for readers to leave comments in an interactive format is an important part of many blogs.
http://en.wikipedia.org/wiki/Blog

How to Log in:

Begin by navigating to the Log‐In site: be http://lonestar.edu/blogs/username/wp‐login.php
(Where username is their particular username)
             a. For example http://lonestar.edu/blogs/soswald/wp‐login.php
             b. Bookmark your site!

    2.   The log‐in button is at the bottom of the page under the “Meta” section. Users will use their network ID
         and password to login.
             a. This will bring you to your Dashboard.

January 2010                                                                                                 Page 3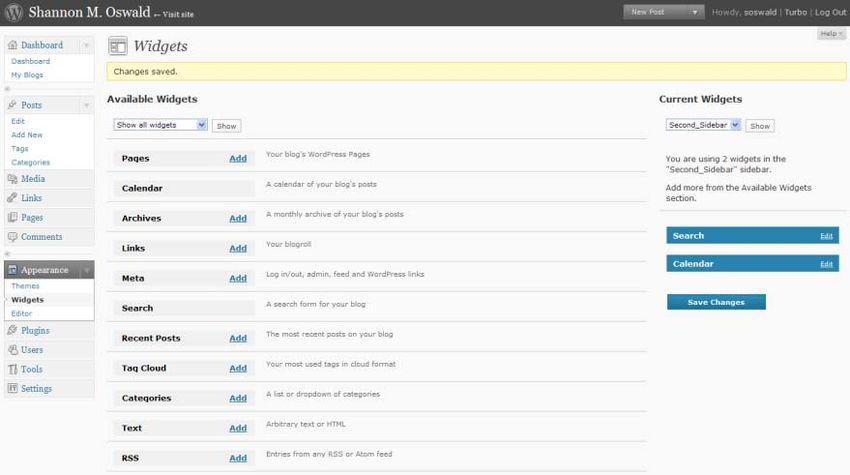
WordPress Training
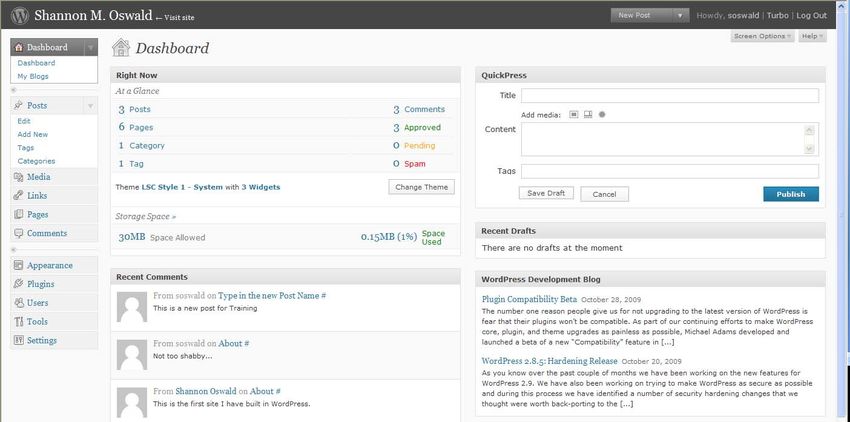
The Dashboard:
The dashboard is the launching point for your site. From here users will be able to view, edit, and update posts,
pages, media, links, etc.
Right Now Area:
The Dashboard shows users an overview of the site. Users can
access posts, pages, categories, tags, and themes.
Storage Space, if a user needs more storage, please let the web
team know, however 30MB should be sufficient for the majority
of users.
Posts – Posts are the entries that display in reverse chronological order on your home page. In contrast to pages,
posts usually have comments fields beneath them.
*It is also the front page of the Faculty blog home page.
January 2010 Page 4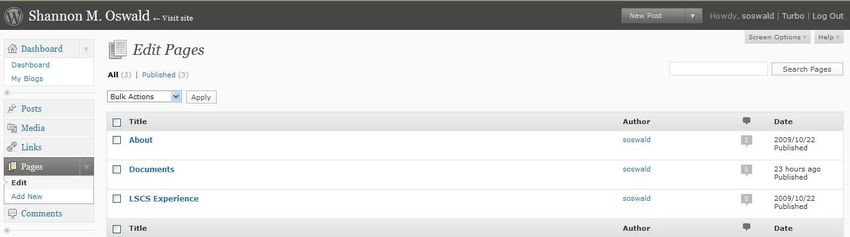
WordPress Training
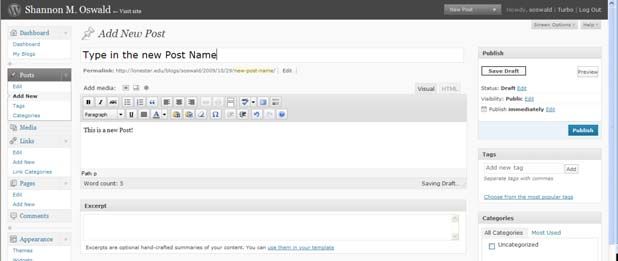
To write/add a post:
1. Log in to your WordPress Administration Panel (Dashboard).
2. Click the Posts tab on the left‐hand menu.
3. Click the “Add New” link.
4. Start filling in the blanks.
5. As needed, select a category, add tags, and make other
selections from the sections below the post, such as
turning OFF or ON “Allow comments on this post”
(Check box on bottom of the Edit Posts screen.)
6. When you are ready, click “Publish”. (top, right box)
7. View Post by clicking on the “View Post” link at the top left‐hand side of your screen.
a. You can ALWAYS view your site updates by clicking on your NAME in the top, left‐hand side of the
screen – But then must click on SITE ADMIN on front page to get back to the Dashboard.
b. IMPORTANT: To return to your Dashboard from here and at other times, click on “My Blogs” on the
top, left‐hand side of the Dashboard menu. Then Click on “Dashboard”
January 2010 Page 5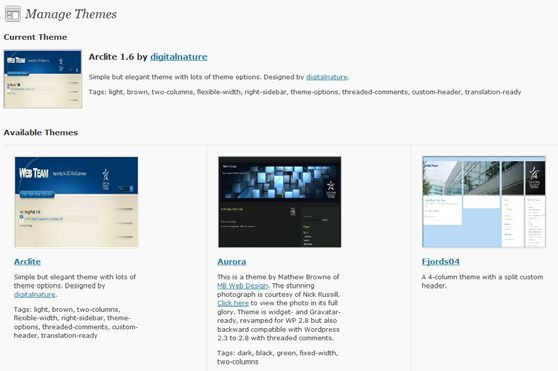
WordPress Training

Categories – The general topic the post can be classified in. Generally, bloggers have 7‐10 categories for their
content. Readers can browse specific categories to see all posts in the category.

1. Click on Category in the “Right Now” area
2. Add a Category name or edit the existing Categories on the top areas of your screen (left & right)
3. Click the Add Category button in the bottom right‐hand side of your screen.

2. * You can manage your categories by going to Posts > Categories

January 2010                                                                                                 Page 6
WordPress Training

Adding Pages – New pages/tabs – Pages/Tabs appear on site in alphabetical order.

1.   Click on Pages in the “Right Now” area
2.   Click the Pages tab on the left‐hand menu.
3.   Click the Add New link.
4.   Start filling in the blanks.
5.   When you are ready, click Publish. (top, right box)
6.   View Post by clicking on the View Page link at the top of your screen.
7.   Click on Site Admin under the Meta area to return to your Dashboard.

January 2010                                                                       Page 7
WordPress Training

Adding Media (Pictures, Videos, Documents, Flash)

Pictures:
(Videos/Pictures should be no more than 5 Mb)
1. Click in the text editor where your want to insert your picture.
2. Click on the first icon for your picture above the text editor
3. Browse for a picture on your computer or already in your Media Library
          * Click on “Select Files” and choose to “open” your picture file.

4.  Fill in the Caption (Optional)
5.  Fill in the Description – for compliance issues
6.  Insert a FULL url to link the picture to another
    site/page
7. Choose your preferred alignment of the picture
8. Click “Insert into Post”
9. Click on “Publish”
10. Click on your name to view the site.

How to Edit a Photo:

1.   Go to the Dashboard
2.   Click on “Pages”
3.   Select/Hover the page that has the picture on it
4.   Click “Edit”
5.   Click on your picture in the Text Editor so it is
     selected and there will be two new icons that
     hover over the picture.
6.   Click on the 1st icon (looks like a mountain)
7.   New Options will appear: Edit Image
          a. Resize
          b. Alignment
          c. Image Title

January 2010                                                                  Page 8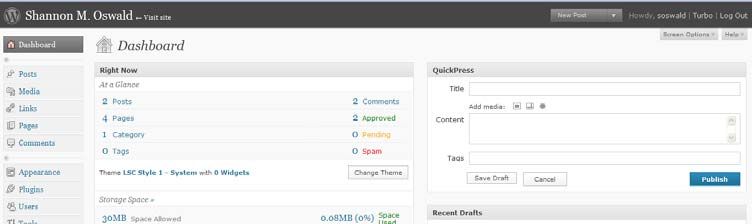
WordPress Training

         d.   Caption
         e.   Link URL
         f.   Scroll Down and click “Update”

8.   Advanced Settings:
        a. Alternate Text
        b. Size: Width/Height
               i.    Max Width should be 500 pixels or less
              ii.    Max Height should be around the same – 500 or less

         a. You can ALWAYS view your site updates by clicking on your NAME in the top, left‐hand side of the
              screen – But then must click on SITE ADMIN on front page to get back to the Dashboard.

         b. IMPORTANT: To return to your Dashboard from here and at other times, click on “My Blogs” on the
              top, left‐hand side of the Dashboard menu. Then Click on “Dashboard”

Videos: (.mov, .wmv, avi)

1. Click in the text editor where your want to insert your video.
2. Click on the second icon for Video above the text editor
3. Browse for a video on your computer or already in your Media Library
          * Click on “Select Files” and choose to “open” your video file.

11. Fill in the Caption (Optional)
12. Fill in the Description – for compliance issues

January 2010                                                                                            Page 9
WordPress Training

13.   Insert a FULL URL to link the picture to another site/page: (http://www.)
14.   Choose your preferred alignment of the video
15.   Click “Insert into Post”
16.   Click on “Publish”
17.   Click on your name to view the site

**Compatible File Types: .avi, .mov, .wmv
More formats can be enabled if needed – Contact the Web team

Flash Files: (.swf)

1.    Click in the text editor where your want to
      insert your Flash video.

2.    Click on the last icon for Flash above the text editor
      3. Browse for a video on your computer or already in your Media Library
           * Click on “Select Files” and choose to “open” your video file.

3.    Fill in the Caption (Optional)
4.    Fill in the Description – for compliance issues
5.    Insert a FULL URL to link the picture to another site/page: (http://www.)
6.    Choose your preferred alignment of the video
7.    Click “Insert into Post”
8.    Click on “Publish”
9.    Click on your name to view the site

Documents:

1. Click in the text editor where your want to insert your document.
2. Click on the third icon for Documents above the text editor
3. Browse for a Document on your computer or already in your
Media Library
* Click on “Select Files” and choose to “open” your document file.

4.    Fill in the Caption (Optional)
5.    Fill in the Description – for Compliance issues
6.    Insert a FULL url to link the picture to another site/page
7.    Click “Insert into Post”
8.    Click “Save all Changes”
9.    Click on “Preview” to view the site

January 2010                                                                      Page 10
WordPress Training
10. To password protect your pages in the future, you can follow these instructions:
i. From the Edit Page View, click "edit" in the right column next to "Visibility"
ii. Select the "Password Protected" Option
iii. Click OK
iv. Enter the desired password in the password field
v. Click OK
vi. Click the Update Page button
Themes: Can be chosen/changed
1. To chose/change your theme, click on the name of the theme to search through the theme library.
* You can also click on the drop down on the Appearance area on the left‐hand side of your screen and choose
“Themes”
2. Click on the name of the new theme to Preview it.
3. Click on “Activate” in the top, right‐hand side of the screen to accept the changes.
January 2010 Page 11WordPress Training
Widgets:
A widget adds some content to that page that is not static. Widgets may be looked upon as downloadable
applications which look and act like traditional applications, such as a Search Engine and/or a Calendar.
Widgets are added to your pages on the right‐hand side below your contact information.
This determines where the
widget appears on your site
(top, right, and bottom)
To Add a Widget:
1. Click “Add” next to the Widget that you would like to use.
a. This Widget will appear on the right‐hand side of your site pages.
2. Click “Save Changes” to apply the
Widget
3. Click Edit next to the Widget name to
Edit or Delete the Widget
a. Widgets will appear in the
order that you choose them
b. Example: Search Engine,
Calendar, Archives & Meta
c. Must add META as a widget so
you will be able to login or get
back to your Dashboard
****If you get stuck here due to not adding the META widget to your site, go to
http://lonestar.edu/blogs/wp‐login.php and it will bring you back to your Dashboard.
January 2010 Page 12WordPress Training
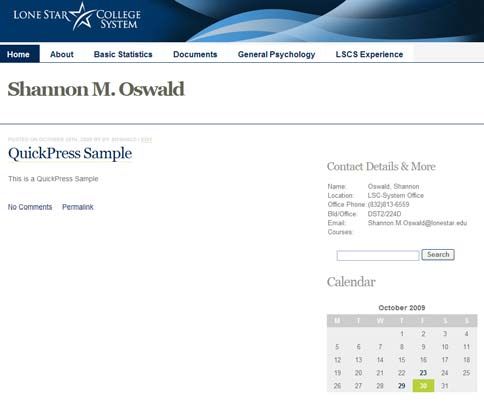
QuickPress:
QuickPress is a quick and easy way to type a post for your
home page. Add a Title, Media, Content and the click
“Publish”.
Recent Comments:
All recent comments to your posts will appear in this box
on your Dashboard.
How to Log Out:
After you Publish and Save all your changes, Log‐Out using the Log‐Out link at the top right‐hand side of your
Dashboard.
January 2010 Page 13You can also read