Elective Webinar 2020/2021 'Supporting Mechatronics in Engineering' - Name: _ - JCT
←
→
Page content transcription
If your browser does not render page correctly, please read the page content below
Name: _________________________

                    Elective Webinar
                       2020/2021
                       ‘Supporting
                      Mechatronics in
Specification
                       Engineering’

                1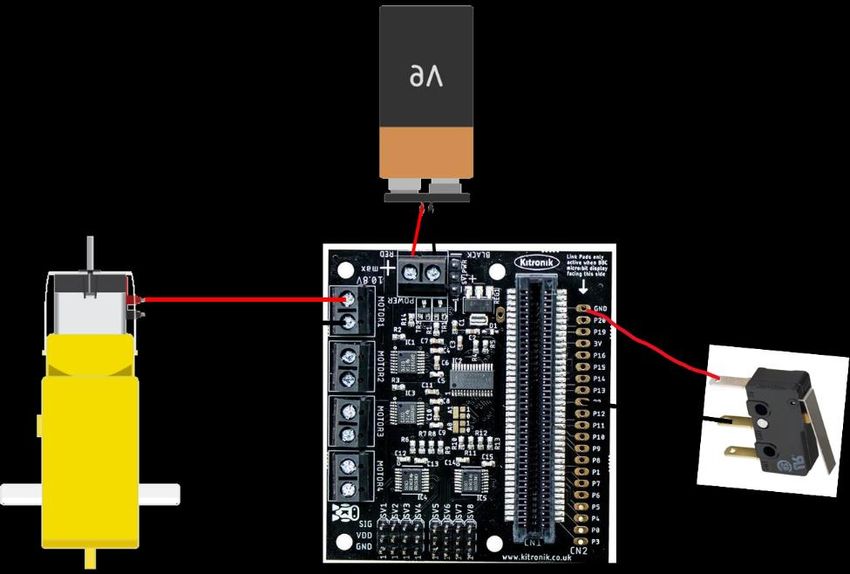
Micro:bit Microcontroller Board

                        What is it? Why would we use it?
                        • Stimulus to drive learning
                        • It is a pocket-sized computer
                        • Pre-populated and pre-soldered
                        • Multiple inputs/outputs
                        • Options for break-out boards and
                          additional soldering
                        • Free coding software
                        • Many students will have prior knowledge

     The new micro:bit (due November/December)

                         2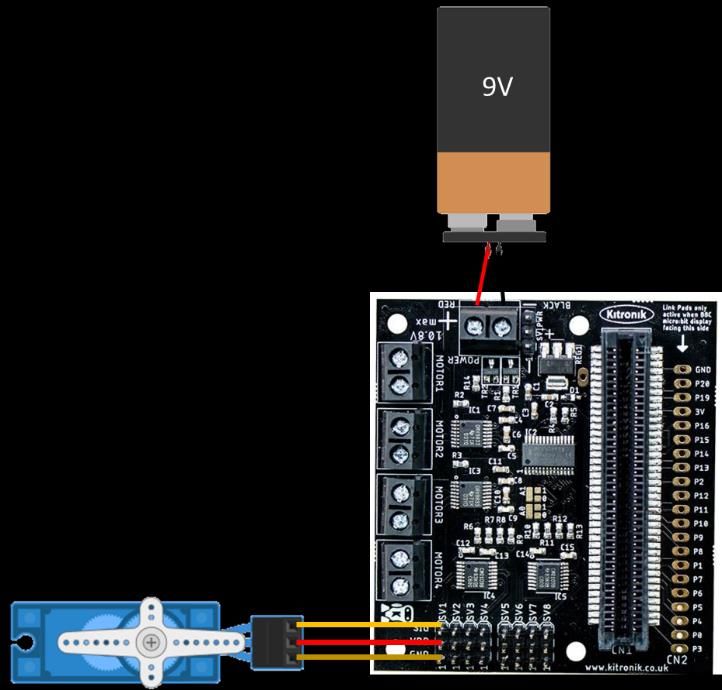
Edge Connector Pin Description

                         All-in-One Robotics Board
•     It can drive 4 motors (or 2 stepper motors)
      and 8 servos.
•     All the usable pins of the micro:bit are broken out to a
      2.54mm link header.
•     The 17 available I/O pins allow other input devices, such as
      sensors, or output devices, such as ZIP LEDs, to be added to
      the board.
•     Power is provided via either a terminal block or
      servo-style connector.

    Video: https://youtu.be/EVowN8RN8nU

                                                    3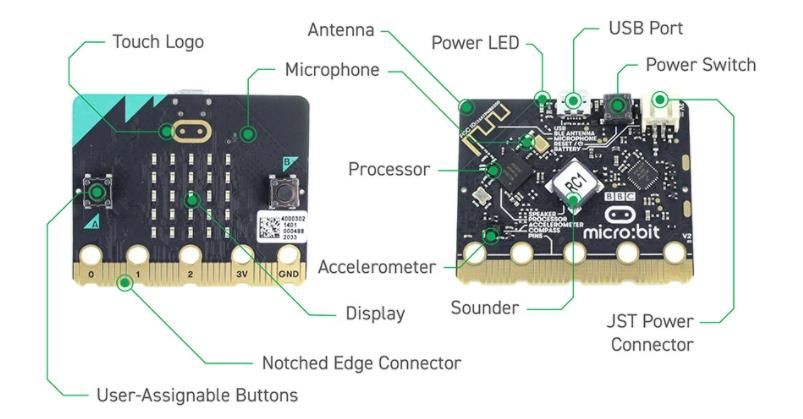
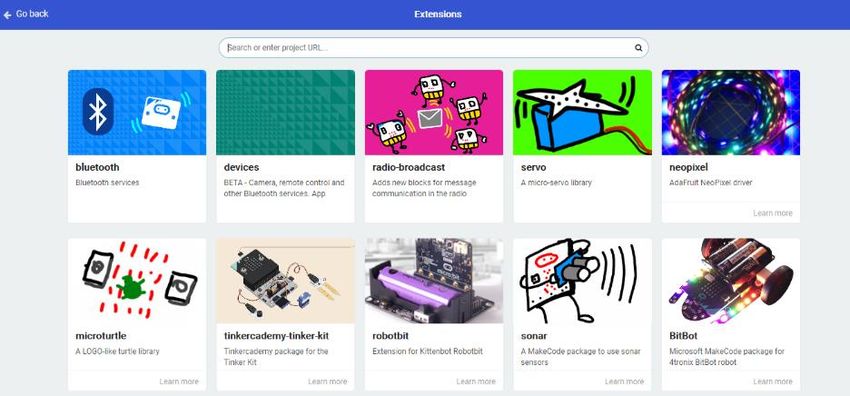
Adding Extensions
          Additional extensions can be added to use different breakout boards.
  Simply click on ‘advanced’ and select ‘extensions’ at the bottom of the coding branch.

Search for ‘All-in-one-robotics-board’
and click on the ‘Kitronik-robotics-
board’ to add it to the branch.

                                            4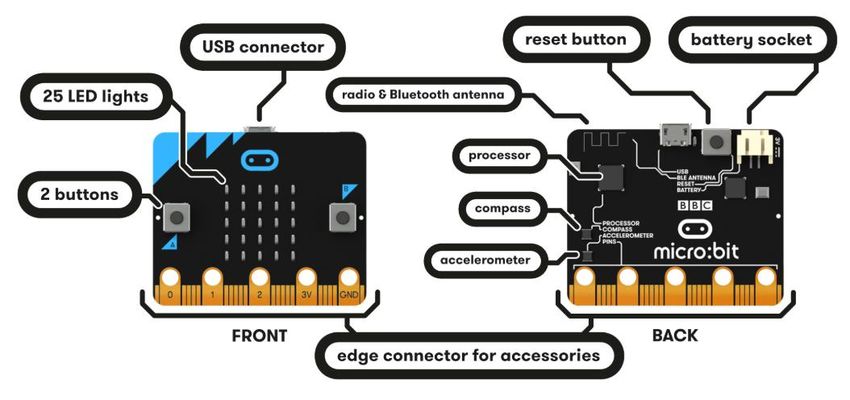
Using a Servo Motor
Why?
• Encourages creative thinking and problem solving
• Safe failure experience for students
• High level of control
• Continuous rotation or limited range- e.g. 0°-180°
+-
Signal
Angular Servo:
Set range, e.g. 0° to 180°
Angular Servo:
Set range, e.g. 0 to 180
Continuous Servo:
You cannot stop a continuous servo at a particular degree i.e. 256° but, the direction
and variable speed can be controlled, however, through trial and error you can stop it at a set
degree.
5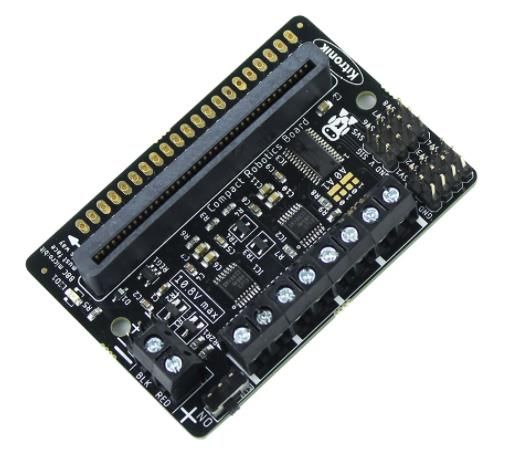
Coding an Angular Servo to any Degree

Micro:bit activity:
Introduction activity: moving a servo

All colour blocks refer to a specific command in make code
Blue is for Basic
Pink is for Input
Red is for Music
Green is for Robotics or Motor Driver

Steps
    1. Using the ‘Basic’ tab, select the ‘on start’ block in the coding section, and drop ‘set servo 1 to 0
        degrees’ in the gap to create a chain
    2. Using the ‘Basic’ tab, place an ‘on button pressed’ block and choose which input you want, A, B or
        A+B pressed
    3. Using the ‘Robotics’ tab, place the ‘set servo 1 to 0 degrees’ and change the number to 180 or any
        other number
    4. Using the ‘Basic’ tab, place ‘the pause (ms) 0’ block and change it to ‘4000’
    5. Using the ‘Robotics’ tab, place the ‘set servo 1 to 0 degrees’ and change the number to 0
    6. Using the ‘Basic’ tab. place ‘the pause (ms) 0’ block and change it to ‘200’

                                                       6
Coding an External Switch to Function

  The ‘limit switch’ is soldered into two
  connection points on the track pad:

  COM leg – GND
  NO leg - P2

  Why?

  From page 3 of the learning log we
  can see that P2 is an input but we
  could also use P0 or P1. If we have
  more than one switch, we could
  include them on those inputs.
  Connecting it to ‘GND’ completes the
  circuits like any simple circuit

All colour blocks refer to a specific
command in make code
Blue is for Basic
Pink is for Input
Red is for Music
Green is for Robotics or Motor Driver
Aqua is for Logic

    1. Using the ‘Basic’ tab, place ‘on start’ into the code screen and add ‘turn off all outputs’ to the
       middle of it.
    2. Using the ‘Basic’ tab, ‘forever’ loop button to be brought out, it means that this program will run
       always until a new one is put on the micro:bit
    3. From the ‘Logic’ tab, bring out the ‘if true then’ option
    4. From the ‘Input’ tab, bring out the ‘pin P0 is pressed’ option that looks like the diagram and drag it
       and place it over the true option on the ‘if true then’ block
    5. Using the drop-down button change P0 to P2 (where we soldered in the limit switch)
    6. From the ‘Robotics’ tab, bring ‘out motor 1 on direction forward speed 0’ you can use the drop
       down to change the direction of rotation of the motor and a value of 1-100 for the speed of the
       motor 100 being the fastest
    7. From the ‘Basic’ tab, bring out the ‘pause (ms) 0’ block, change the seconds to control the length of
       time the motor will run
    8. Finally, from the ‘Robotics’ tab, bring the ‘turn off motor 1’ to the chain

                                                      7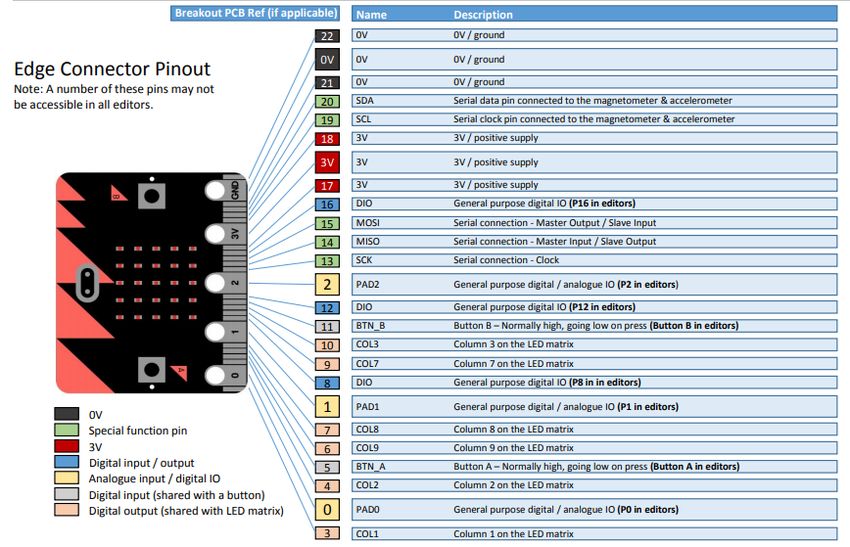
To Transfer the HEX File to the Micro:bit
Once the file is downloaded, ‘copy’ the file from the Downloads folder and ‘paste’ it into the micro:bit
drive.

                                          Copy

                                                                                            Paste

           Planning for Skills Development in Coding

      1. Plan               Understand the problem/challenge-
                            what information is needed to solve it?

                              Using code blocks, create the
      2. Code
                              sequence to solve the problem

                             Determine if the solution is effective.
      3. Test                Can it be better? If so, how?

     4. Apply                Download your code to bring your solution to life

                                                      8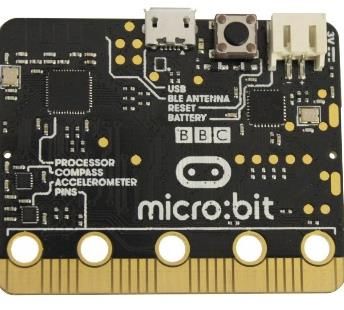
Create an electronically controlled model
of an adjustable shelving unit.
It should be used in order to minimise the
amount of reaching and lifting in an
Engineering room.

                         What is the problem?

                         What does the code have to do?

What components and code blocks would be useful here?

                                                9
Contact Details                        Director’s Office:
Administrative Office:                 LMETB,
Monaghan Ed. Centre,                   Chapel Street,
Armagh Road,                           Dundalk
Monaghan.
www.metc.ie
                                       Key websites:
For all queries please contact:        www.jct.ie
info@jct.ie                            www.curriculumonline.ie
                                       www.ncca.ie
Follow us on Twitter:
@JCforTeachers
@JCt4ed
     QR code - Feedback form

                                  10
You can also read