Integrating with SAML-Based Identity Providers - Supporting Multi-factor Authentication for your Leostream Environment Version 9.0.40 February 2021
←
→
Page content transcription
If your browser does not render page correctly, please read the page content below
Integrating with SAML-Based Identity Providers
Supporting Multi-factor Authentication for your Leostream Environment

Version 9.0.40
February 2021

About Leostream

Contacting Leostream

Leostream Corporation                                                      http://www.leostream.com
271 Waverley Oaks Rd.                                                      Telephone: +1 781 890 2019
Suite 204
Waltham, MA 02452
USA

To submit an enhancement request, email features@leostream.com.
To request product information or inquire about our future directions, email sales@leostream.com.

Copyright

© Copyright 2002-2021 by Leostream Corporation

This software program and documentation are copyrighted by Leostream. The software described in this
document is provided under a license agreement and may be used or copied only under the terms of this
agreement. No part of this manual may be copied or reproduced in any form without prior written consent
from Leostream.

Trademarks

The following are trademarks of Leostream Corporation.
  Leostream™
  The Leostream graphical logo™

The absence of a product name or logo from this list does not constitute a waiver of the trademark or other
intellectual property rights concerning that product, name, or logo by Leostream.

Microsoft, Active Directory, Windows, and the Windows logo are trademarks or registered trademarks of
Microsoft Corporation in the United States and/or other countries. The Duo logo is a registered trademark
of Duo Security, Inc. Other brand and product names are trademarks or registered trademarks of their
respective holders. Leostream claims no right to use of these marks.

Patents

Leostream software is protected by U.S. Patent 8,417,796.

                                                                                                            2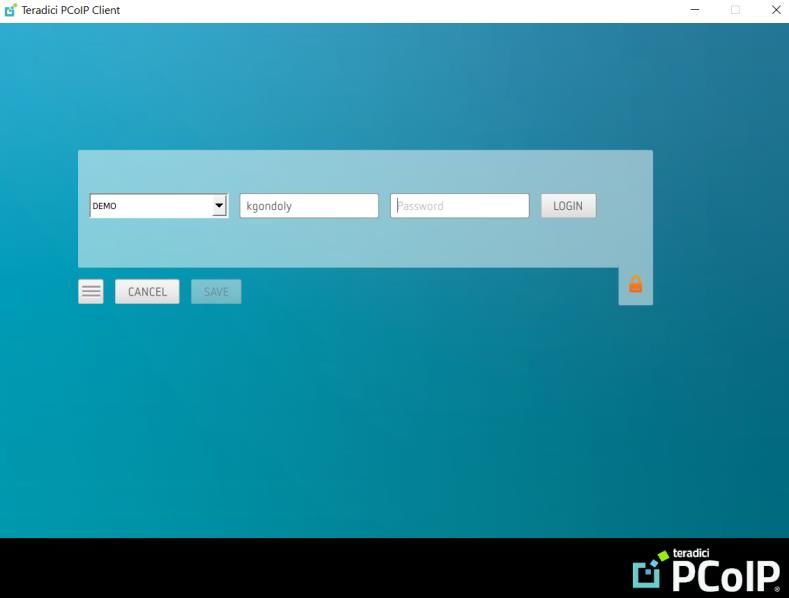
Integrating with SAML-based Identity Providers

Contents
 CONTENTS ...........................................................................................................................................................3
 OVERVIEW ............................................................................................................................................................4
 DETERMINING YOUR LEOSTREAM SINGLE SIGN-ON URL ........................................................................4
 PREPARING YOUR IDENTITY PROVIDER .......................................................................................................5
 ADDING YOUR SAML IDP TO LEOSTREAM ...................................................................................................5
    GENERATING SERVICE PROVIDER XML FOR YOUR LEOSTREAM ENVIRONMENT .................................................. 7
 ASSIGNING POLICIES FOR SAML LOGINS ....................................................................................................7
 LOGGING IN TO THE ADMINISTRATOR WEB INTERFACE ..........................................................................9
 ENABLING USERNAME AND PASSWORD LOGINS ......................................................................................9
 SPECIFYING A SIGN OUT URL ..........................................................................................................................10
 USING LOCATIONS TO CONTROL ACCESS...................................................................................................11
 EXAMPLE CONFIGURATION: USING LEOSTREAM WITH OKTA ................................................................14
 EXAMPLE: USING LEOSTREAM WITH GOOGLE ACCOUNTS ....................................................................19
    STEP 1: CREATING A CUSTOM ATTRIBUTE FOR POLICY ASSIGNMENT ................................................................... 19
    STEP 2: SETTING CUSTOM ATTRIBUTE VALUES FOR USERS ................................................................................. 20
    STEP 3: CREATING A CUSTOM SAML APP ............................................................................................................. 20
    STEP 4: ADDING THE GOOGLE AUTHENTICATION SERVER TO LEOSTREAM .......................................................... 23
    STEP 5: ASSIGNING POLICIES BASED ON CUSTOM GOOGLE ATTRIBUTES ............................................................ 24
 EXAMPLE: SAML-LOGINS WITH PCOIP CONNECTIONS.............................................................................25

                                                                                                                                                                          3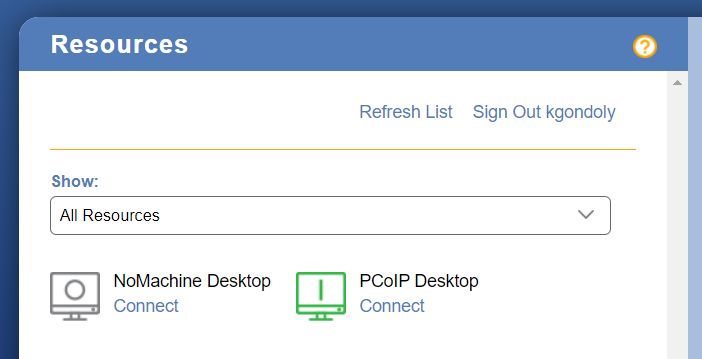
Integrating with SAML-based Identity Providers

Overview
  Leostream 9 allows you to leverage SAML-based Identity Providers (IdP) to provide single sign-on to the
  Leostream web client with multi-factor authentication. You can integrate Leostream with any
  authentication service, such as Azure AD, Okta, Duo, and Ping Identity, that acts as a SAML 2.0 Identity
  Provider.

  After enabling Leostream to work with your IdP, end users authenticate against the Identity Provider, which
  subsequently uses the SAML protocol to provide single sign-on for the user into your Leostream
  environment. In this scenario, the Leostream Connection Broker never processes the user’s credentials and
  knows only the information provided about the user by the SAML IdP.

      SAML logins are currently supported only for user’s logging in using the Leostream Web client.
  Leostream Connect, thin client, and zero client logins do not support SAML-based authentication.
  Leostream Web client logins can launch the following display protocols.

      •   Micosoft RDP
      •   NoMachine
      •   NICE DCV
      •   Scyld
      •   VNC
      •   HP ZCentral Remote Boost (RGS)
      •   Mechdyne TGX
      •   Teradici PCoIP to desktops running the Cloud Access Software

  When enabled, all domain users should authenticate against the IdP in order to gain access to your
  Leostream environment. You can optionally allow users to bypass SAML authentication, as described in
  Enabling Username and Password Logins.

Determining your Leostream Single Sign-On URL
  You typically require two key pieces of information to register Leostream with your SAML-based IdP.

      1. Your Leostream Entity ID – You specify this value in the SAML EntityID edit field when you create
         your SAML-based Authentication server in Leostream. This value should be unique across all your
         Leostream environments and the SAML applications in your IdP.

      2. Your Leostream single sign-on URL – This is the endpoint where your SAML IdP sends the SAML
         assertion to the log user into Leostream.

  The Leostream single sign-on URL is the URL that your SAML-based Identity Provider users to pass the SAML
  assertion to the Leostream Connection Broker after the user successfully authenticates. Generally, the URL
  takes the following form:

  https://leostream-login-address/saml

                                                                                                             4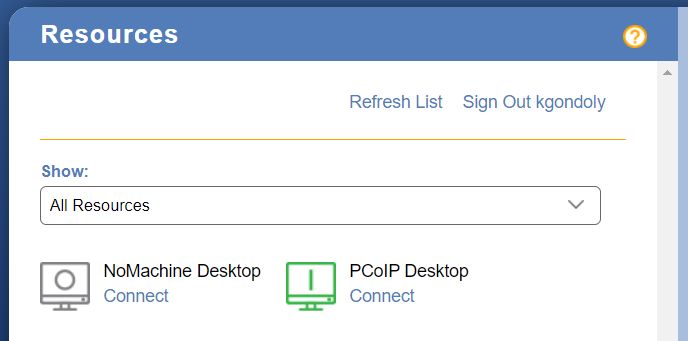
Integrating with SAML-based Identity Providers

  Where leostream-login-address is the address end users go to to access your Leostream
  environment. This could be any of the following.

      •   For a standalone Connection Broker, the IP address or hostname of that Connection Broker

      •   For a Connection Broker cluster, the VIP of the cluster, which may be the IP address or FQDN of the
          load balanacer in front of the cluster.

      •   For Leostream logins forwarded through the Leostream Gateway, the IP address or FQDN of the
          Leostream Gateway that is forwarding the Leostream login traffic, or the IP address or FQDN of the
          load balanacer in front of the Leostream Gateway.

  In some cases, your Identity Provider requires this information in XML format, which you can generate in
  Leostream after you create your SAML Authentication Server (see Generating Service Provider XML for
  your Leostream Environment).

Preparing Your Identity Provider
  When using a SAML IdP as the authentication method for your Leostream environment, Leostream assigns
  policies to users based on the attributes contained in the SAML assertion returned to Leostream by your
  IdP. Before integrating your IdP with Leostream, ensure that you configure your IdP to return appropriate
  user attributes.

  Then, obtain the following information from your SAML IdP:

      •   The IdP login URL

      •   The IdP Federation XML Metadata

  How you setup your identity provider to support Leostream as a SAML service provide and obtain the login
  URL and metadata depends on which IdP you use. See Example Configuration: Using Leostream with Okta
  or Example: Using Leostream with Google Accounts for examples.

Adding Your SAML IdP to Leostream
  In order to register your Leostream environment with your SAML IdP you must create an authentication
  server for your IdP in your Connection Broker, as follows.

      1. Go to the > Setup > Authentication Servers page.

      2. Click the Add Authentication Server link.

      3. Select SAML from the Type drop-down menu.

                                                                                                                5
Integrating with SAML-based Identity Providers
You can add a single SAML IdP to your Connection Broker. Therefore, you will not see the
SAML option in the Type drop-down menu if you already defined a SAML IdP. If you do not see the
SAML option in the Type drop-down menu and your Authentication Servers page does not already
list a SAML IdP, contact sales@leostream.com to enable SAML IdP integration in your Leostream
environment.
4. Enter a descriptive name in the Authentication Server Name field.
5. In the SAML EntityID edit field, enter the unique Entity ID to use for your Connection Broker in
your SAML-based Identity Provider.
6. The SAML Attribute Mappings section allows you to relate data returned in the SAML assertion to
fields used to define user records in the Connection Broker. Currently, you can map values for the
user’s name (shown in the Name column on the > Resources > Users page) and email address
(shown in the Email column on the > Resources > Users page).
Use the {SAML} dynamic tag to specify attributes returned in the SAML assertion. As a couple
examples:
• For Name, enter {SAML:LastName}, {SAML:FirstName} to display the user's last
name and first name separated by a comma. The attributes are case sensitive so
LastName and FirstName must be returned as attributes in the SAML assertion
• For Email address, enter
{SAML:http://schemas.xmlsoap.org/claims/email} if an attribute named
email is returned in the SAML assertion as a URI reference.
7. In the Connection Settings section, shown in the following figure, enter the Identity Provider
login URL and the Identity Provider XML Metadata obtained from your identity provider.
8. By default, after you created a SAML-based authentication server, the Connection Broker redirects
all users to the Identity Providers login URL when the user visits the Connection Broker login page.
To allow users to bypass the SAM-based authentication server, select the Enable user logins
without SAML check box. See Enabling Username and Password Logins for more information.
9. Click Save to save the form.
6Integrating with SAML-based Identity Providers
Generating Service Provider XML for your Leostream Environment
You can generate the Service Provider (SP) XML for your Leostream environment after you save your SAML-
based authentication server (see Preparing Leostream to Work with Your SAML IdP) as follows.
1. Go to the > Setup > Authentication Servers page.
2. Click the Edit link for your SAML authentication server.
3. Click the link to the right of the Edit Authentication Server form to download the SP XML needed
to setup your IdP, for example:
The SP XML downloads to a file named leostream.xml. This file contains two important parameters
• entityID = The value if you entered in the SAML EntityID edit field when you created your
SAML-based Authentication server the Leostream. This should be a unique value when compared
to any other service providers registered with your identity provider.
• Location = https:///saml – Where is the IP address of your
Connection Broker. In clustered environments, edit this value so it is the VIP of your Leostream
cluster. If you are using a Leostream Gateway to forward login traffic to your Connection Broker,
enter the IP address or hostname of the Leostream Gateway or the load balancer for your
Leostream Gateways, if applicable. See Determining your Leostream Single Sign-on URL for
complete instructions.
Follow the instructions provided by your IdP to register your Leostream environment using the SP XML.
Assigning Policies for SAML Logins
When you have an active SAML authentication server configured in your Leostream environment, policies
are assigned to users based on the list of attributes returned to Leostream by your SAML IdP upon
successful authentication.
To assign a policy to a user, Leostream matches those attributes against the assignment rules defined on
the > Configuration > Assignments page for your SAML IdP. You configure your assignment rules, as follows.
1. Go to the > Configuration > Assignments page in your Leostream Connection Broker.
7Integrating with SAML-based Identity Providers
2. Click Edit for your SAML IdP.
3. Enter the specific attribute Leostream to use for policy assignments into the Attribute edit field.
Your available attributes depend on the SAML assertion returned by your IdP.
4. Select the appropriate Conditional, typically Contains.
5. In the Attribute Value field, map values of the attribute to the appropriate roles and policies.
In the following figure, the assertion returns attributes as URIs so the Attribute field contains a full
URL. If the attributes are returned as text values, the Attribute field in this example would be
Group instead of http://schemas.xmlsoap.org/claim/Group.
6. Select the appropriate policy for the different groups of users from the User Policy drop-down
menus.
7. To block logins for any users that successfully authenticate with the SAML IdP but who should not
have access to your Leostream environment, select from the Default
Policy drop-down menu below the assignments table, as shown in the previous figure.
8Integrating with SAML-based Identity Providers
Logging in to the Administrator Web Interface
When you have an active SAML authentication server configured in your Leostream environment, the
following Connection Broker URLs automatically redirect all users to your IdP login page.
• https://leostream-address
• https://leostream-address/index.pl
Where leostream-address is the IP address or fully qualified host name of your Leostream
environment, which may be your Leostream Gateway or load balancer address.
To log into the administrator interface as the default admin user or as a domain user with an Administrator
role, go to:
https://leostream-address/admin
Users who do not have Role access to the Administrator Web interface receive an Invalid username
or password error when attempting to log into this URL. If you have users who should be able to log in
with their domain credentials, enable the end-user login URL, as described in the following section.
Enabling Username and Password Logins
By default, when a SAML-based authentication server is defined in Leostream, all end-user logins must
authenticate with your Identity Provider to gain access to your Leostream environment. If you have local
users or domain users who are allowed to bypass your Identity Provider and use their username and
password to log into Leostream, you can enable the end-user URL, as follows.
1. Go to the > Setup > Authentication Servers page.
2. Edit your SAML authentication server.
3. Select the Enable login without SAML checkbox.
The prompt uses your current Connection Broker address as an example of the end-user URL. The
actual address in your end-user URL depends on your Leostream architecture, and may be the
address of your Leostream Gateway or load balancer. The end-user URL is the user-facing hostname
or IP address of your Leostream environment appended with /login.
4. Click Save.
You can use Locations to restrict which Domain users are allowed to log in using their username and
password, as described in Using Locations to Control Access.
9Integrating with SAML-based Identity Providers
Specifying a Sign Out URL
The Leostream Web client contains a Sign Out link, shown in the following figure.
The Sign Out link signs the user out of their Leostream session.
The Sign Out link does not perform SAML Single Logout.
By default, the user is redirected to the Sign Out page shown in the following figure.
You can use the URL redirect on user logout field on the > System > Settings page to redirect the user to
your sign-out page of choice. For example, the following figure redirects the user to
https://www.leostream.com.
10Integrating with SAML-based Identity Providers
The URL must include the http:// or https:// prefix to send the user to a page outside of your
Leostream environment. Without the HTTP prefix, the URL takes the form:
http://leostream-address/URL-to-redirect
Where leostream-address is the end-user facing address of your Leostream environment and URL-
to-redirect is the text entered in the URL redirect on user logout field. This may be useful if you
uploaded a custom sign out page into your Leostream Connection Broker machine.
Using Locations to Control Access
Users can log into Leostream from a variety of client types, including Web browsers, thin clients, zero
clients, and Leostream Connect software clients. SAML-based authentication is available only for Web
browser logins.
For other client types, you can use Leostream locations and assignment rules to determine if users are
allowed to log in. You can also use Locations to allow and prevent username and password logins for groups
of users if you have enabled the end-user URL (see Enabling Username and Password Logins).
Example 1: Blocking Domain Users from Logging into the End-User URL
If you have a mixture of on-premises and remote users, you may want to require remote users to log in
using your SAML-based Identity Provider while allowing on-premises users to log in with their domain
credentials. To do this:
1) Create a location that includes your on-premises subnets, for example, the following figure creates
a location for all client devices on the 172 network.
11Integrating with SAML-based Identity Providers
2) Configure the Assignments table to assign a Role and policy for this location.
3) Deny access othewise, by setting the Default Policy to , for example:
12Integrating with SAML-based Identity Providers
In the figure above, all domain Administrators are allowed to log in with their Domain credentials and
access the Administrator Web interface. Domain users who log in from an on-premises client are allowed to
log into the Web client to access their desktops. All other users are blocked from logging in.
Example 2: Blocking end-user logins from non-Web browser clients types
SAML-based authentication is supported only for users logging in from the Leostream Web client. Other
client types, such as Leostream Connect or PCoIP clients allow username and password authentication
unless you specifically block those logins. To block user logins from other client types, you can create a
Leostream Location for all non-Web browser clients, for example:
Use the Assignments table to assign a policy to users logging in from this location, allow Administrator
access from the Web browser location, and block all other access, for example:
13Integrating with SAML-based Identity Providers
Example Configuration: Using Leostream with Okta
To use Okta as the authentication portal for your Leostream environment, you add Leostream as a SAML 2.0
application in your Okta account then create a SAML Authentication Server in your Connection Broker. The
following procedure describes how to add the SAML 2.0 application in your Okta account
1. Log into your Okta Admin portal.
2. From the top-level Applications menu, select Applications.
3. In the Applications page, click the Add Application button.
4. In the Add Application page, click the Create New App button located at the top right, indicated in
the following figure.
5. In the Create a New Application Integration form:
a. Select Web from the Platform drop-down menu.
b. Select SAML 2.0 in the set of Sign on method radio buttons.
c. Click Create.
6. In the first page of the Create SAML Integration form:
a. Provide a descriptive name in the App name edit field.
b. Optionally set the logo and app visibility.
c. Click Next.
7. Pay attention to the following fields on the second page of the Create SAML Integration form. Any
field that is not listed may be left at its default value.
a. The Single sign on URL for your Leostream environment is the IP address or hostname that
you currently use to log into your Leostream environment, followed by /saml. For
example:
• If you have a single Connection Broker with a DNS name of vdi-
portal.mycompany.net, the Single sign on URL is https://vdi-
portal.mycompany.net/saml.
14Integrating with SAML-based Identity Providers
• If you have a cluster of Connection Brokers behind a load balancer, the Single sign
on URL is the load balancer IP address or FQDN.
• If you use a Leostream Gateway to forward login traffic to your Connection Broker,
the Single sign on URL is the Leostream Gateway address or the address of the load
balancer used with multiple Leostream Gateways.
b. In the Audience URL (SP Entity ID) field, enter LeostreamBroker.
8. Enter the user attributes that Okta sends to Leostream in the SAML assertion that follows a
successful Okta login. The user and group attributes represent the values you can use to assign
policies in Leostream. The following table describes an example that sends the user’s login name,
email address, and first and last names.
Name Name format Value
login Unspecified user.login
email Unspecified user.email
firstname Unspecified user.firstName
lastname Unspecified user.lastName
9. Use the Group Attribute Statements section to send the user’s Okta groups to Leostream, to use
for policy assignments. To send a list of all the groups the user is member of, enter the following
values:
a. Name: Groups
b. Name format: Unspecified
c. Filter: Matches regex
d. Filter text: .*
The following figure shows an example setup.
15Integrating with SAML-based Identity Providers
10. Click Next in this page of the Create SAML Integration form
11. In the final page of the Create SAML Integration form, select the I’m an Okta customer adding an
internal app radio button and click Finish.
After creating your application, assign the appropriate users to this application in Okta. Only assigned users
can log into your Leostream environment.
After assigning users to your new Leostream application, click the Identity Provider metadata link to obtain
the information you need to add the SAML Authentication Server to your Leostream Connection Broker. You
can find the Identity Provider metadata link on the Sign On tab of your SAML 2.0 application, indicated in
the following figure.
16Integrating with SAML-based Identity Providers
Clicking the link opens the XML metadata in a new Web Browser tab. Use the browser’s option to view the
page source or copy the contents of this page to a text editor so you can copy the XML metadata without
any formatting and without the initial text line indicating the XML file does not contain style information.
After obtaining the XML metadata, log into your Connection Broker Administrator Web interface to add the
SAML Authentication Server, as follows.
1. In your Connection Broker Administrator Web interface, go to the > Setup > Authentication Servers
page.
2. Click the Add Authentication Server link at the top of the page.
3. In the Add Authentication Server form, select SAML from the Type drop-down menu.
4. Enter a descriptive name in the Authentication Server name edit field.
5. For the Identity Provider login URL, enter the full URL to the single sign on service for your new
SAML 2.0 application. You can find this URL near the end of the XML metadata. The URL takes a
form similar to the following:
https://mycompany.okta.com/app/mycompany _vdiportal_1/exk6h9lfjuhw2wzeP357/sso/saml
17Integrating with SAML-based Identity Providers
Your URL will differ based on the name of your company’s Okta portal, the name of your SAML 2.0
application, and the unique ID associated with that application.
6. In the Identity Provider XML metadata field, paste the entire, unformatted XML metadata
downloaded from your SAML 2.0 application in Okta.
7. Click Save.
After adding the Okta SAML Authentication Server to your Connection Broker, all user logins are redirected
to Okta. To access your Connection Broker Administrator web page, you must add /admin.html to your
Connection Broker login URL.
To assign policies to users based on their Okta group membership, go to the > Configuration > Assignments
page in your Connection Broker and edit the assignments table associated with your Okta SAML
authentication server.
For example, given the previous setup, to assign a policy to all the users in the Leostream group, the
Assignments table is configured as follows and shown in the subsequent figure.
• Attribute: Groups
• Conditional: Contains
• Attribute Value: Leostream
• User Policy: Default
18Integrating with SAML-based Identity Providers
Example: Using Leostream with Google Accounts
If your organization uses Google Workspace, you can authenticate users into your Leostream environment
with their Google account by creating a custom SAML app for your Leostream environment. After the user
authenticates with Google, your Leostream Connection Broker assigns policies to the users based on the
attributes returned by Google.
You can leverage Google Groups to indicate which users are allowed to log into Leostream. However, you
cannot return Google Group information in the SAML assertion sent to Leostream. Therefore, if you want to
assign policies to groups of users, you must create a custom attribute and set that attribute value
appropriate for each user.
Step 1: Creating a Custom Attribute for Policy Assignment
To create a custom attribute:
1. Log into your Google Admin console.
2. Go to Users.
3. At the top of Users list, click More and select Manage custom attributes.
4. Click Add Custom Attribute at the top-right.
5. In the Add custom field form, enter the Category and Description as desired.
6. In the Custom fields section:
a. Set the Name of the attribute to use in the Assignments table in Leostream
b. Select Text from the Info type drop-down menu.
c. Select Visible to organization from the Visibility drop-down menu.
d. Select Multi-value from the No. of values drop-down menu, for example:
7. Click Add.
19Integrating with SAML-based Identity Providers
Step 2: Setting Custom Attribute Values for Users
After creating the custom attribute, set the attribute value appropriately for each user who logs into your
Leostream environment.
1. Log into your Google Admin console.
2. Go to Users.
3. In the Users list, click the username to add to a Leostream group.
4. Expand the User information section.
5. Enter in every group that this user is a member of, for example:
6. Click Save.
Step 3: Creating a Custom SAML App
To connect your Leostream environment to your Google Workspace, create a custom SAML App on Google
Workspace, as follows.
1. Log into your Google Admin console.
2. Go to Apps > Web and mobile apps.
3. At the top of Apps list, click Add App and select Add custom SAML app.
4. In the App details form,
a. Specify the App name. This name cannot be changed after you create the custom SAML app.
b. Optionally enter an App icon, for example:
20Integrating with SAML-based Identity Providers
c. Click Continue.
5. On the form to configure SSO for SAML apps:
a. Download the IdP metadata
b. Copy the SSO URL, indicated in the following figure.
c. Click Continue.
6. In the Service provider details form:
a. Enter the Leostream single sign-on URL in the ACS URL field. See Determining your Leostream
Single Sign-On URL for more information on how to determine this URL.
b. Specify a unique Entity ID. Make note of this value as you will use it when creating the
authentication server in your Leostream Connection Broker.
c. Select Email from the Name ID format field.
d. Select Basic Information > Primary email from the Name ID drop-down menu.
21Integrating with SAML-based Identity Providers
e. Click Continue.
7. In the Attributes form, add all the attributes that Google should send to your Leostream Connection
Broker in the SAML assertion.
a. In the Google Directory attributes column, select the attribute from the Select field drop-down
menu. Your custom attributes are included at the bottom of this list. Ensure that you send your
custom attribute for policy assignment, along with any other attributes you want associated with
the user records in Leostream.
b. In the App attributes column, enter the parameter name to use in the SAML assertion. These are
the attribute names you reference in the SAML authentication server in your Leostream
environment, as described in the next section, for example:
8. Click Finish.
Google may try to log you into your Leostream environment when you finish configuring the custom SAML
app. This login fails until you complete the remainder of the setup procedure described in this example.
Please continue through step 5 to finalize the integration of Google with your Leostream environment.
By default, the custom SAML application is off for all users. To allow access to the application for some or all
of the users in your Google directory:
1. Log into your Google Admin console.
2. Go to Apps > Web and mobile apps page.
3. Select your new SAML application.
4. Expand the User access section of the page.
5. Select the scope of users to enable access and select On from the Service status.
6. Click Save.
22Integrating with SAML-based Identity Providers
Step 4: Adding the Google Authentication Server to Leostream
You add Google as a SAML-based authentication server in your Connection Broker, as follows.
1. Go to the > Setup > Authentication Servers page.
2. Click the Add Authentication Server link.
3. Select SAML from the Type drop-down menu.
4. Enter a descriptive name in the Authentication Server Name field.
5. In the SAML EntityID edit field, enter the Entity ID you specified for the custom SAML app in
Google.
6. The SAML Attribute Mappings section allows you to relate data returned by Google in the SAML
assertion to fields used to define the user records in the Connection Broker. Use the {SAML}
dynamic tag to specify attributes returned in the SAML assertion, for this example
1. For Name, enter {SAML:Last Name}, {SAML:First Name}
2. For Email address, enter {SAML:Email}
7. In the Connection Settings section:
1. Enter the SSO URL copied from your custom SAML app into the Identity Provider login URL
field.
2. Copy the content of the XML metadata file downloaded from your custom SAML app into
the Identity Provider XML Metadata field, for example.
23Integrating with SAML-based Identity Providers
8. Click Save to save the form
Step 5: Assigning Policies based on Custom Google Attributes
To assign policies to users based on the custom attributes you defined in your Google Workspace, go to the
> Configuration > Assignments page in your Connection Broker and edit the assignments table associated
with your Google authentication server.
For example, given the previous setup, to assign a policy to all the users in custom LeostreamGroups,
the Assignments table is configured as shown in the subsequent figure.
24Integrating with SAML-based Identity Providers
Example: SAML-logins with PCoIP Connections
The PCoIP Software Client version 21.01 introduces the feature to launch the client from a webpage using a
URI. Leostream leverages this feature to launch PCoIP connections to desktops running the PCoIP Cloud
Access Software from a Leostream Web client login.
This feature is not supported for PCoIP connections to Teradici Remote Workstation Cards unless the
host desktop is running the PCoIP Cloud Access Software.
When using this feature, the user workflow is as follows.
1. User authenticates with your SAML-based IdP, for example, Okta:
2. Successfully authenticated users are redirected to the Leostream Web client.
3. The Leostream Web client displays the list of offered desktops to the user, for example:
4. The user clicks Connect on their desired desktops.
5. The Leostream Web client uses a URI to launch the PCoIP Soft client. Depending on the Web
25Integrating with SAML-based Identity Providers
browser, the user may be prompted to accept the connection, for example:
6. The PCoIP Cloud Access Software Agent on the remote desktop requires a username and password
to authorize the connection. Therefore, the PCoIP Soft client launches and prompts for
username/password credentials.
7. Those credentials are used to connect and log the user into the remote destkop. The credentials
used to log into the remote desktop do not have to match those used to log into Leostream.
26Integrating with SAML-based Identity Providers
To enable this feature, configure your Protocol plan to launch the Teradici PCoIP Soft Client from a Web
browser login, for example:
Enter the following information into this form.
• Hostname or IP address of Teradici PCoIP Connection Manager – The PCoIP connection must be
established by your Teradici PCoIP Connection Manager. If the connection requires the Teradici
Security Gateway, create a separate Protocol Plan for each Security Gateway in your environment.
The Security Gateway entered in the Protocol Plan used in the user’s Policy determines which
Security Gateway manages the PCoIP traffic.
• Send user domain as: Enter the value to use as the default domain to display to the user in the
PCoIP Soft client. The user will be able to select from this domain as well as any domain registered
with your Connection Broker on the > Setup > Authentication Servers page.
• Send user login name as: Enter the value to use as the default username to display to the user in
the PCoIP Soft client. The {USER} dynamic tag is replaced with the current user’s login name
returned in the SAML assertion.
Use this protocol plan in the policy you will assign to users on the Assignments page for your SAML
authentication server.
27You can also read