Enabling SAML authentication with Okta SSO for web applications - Enabling SAML authentication with Okta SSO for web ...
←
→
Page content transcription
If your browser does not render page correctly, please read the page content below
Enabling SAML authentication
with Okta SSO for web
applications

© Copyright Informatica LLC 2021. Informatica and the Informatica logo are trademarks or registered trademarks of
Informatica LLC in the United States and many jurisdictions throughout the world. A current list of Informatica
trademarks is available on the web at https://www.informatica.com/trademarks.html.
Abstract
You can enable users to log into Informatica web applications using single sign-on. This article explains how to
configure single sign-on in an Informatica domain using Security Assertion Markup Language (SAML) v2.0 and the
Okta SSO identity provider.

Supported Versions
•   Informatica Data Engineering Integration 10.5
•   Informatica Enterprise Data Catalog 10.5
•   Informatica Enterprise Data Preparation 10.5
•   Informatica Metadata Manager 10.5

Table of Contents
    Overview . . . . . . . . . . . . . . . . . . . . . . . . . . . . . . . . . . . . . . . . . . . . . . . . . . . . . . . . . . . . . . . . . 2
    Prerequisites . . . . . . . . . . . . . . . . . . . . . . . . . . . . . . . . . . . . . . . . . . . . . . . . . . . . . . . . . . . . . . . 3
    Configure Okta SSO. . . . . . . . . . . . . . . . . . . . . . . . . . . . . . . . . . . . . . . . . . . . . . . . . . . . . . . . . . . 3
       Download and install the Active Directory agent. . . . . . . . . . . . . . . . . . . . . . . . . . . . . . . . . . . . . . . 3
       Import users from Active Directory. . . . . . . . . . . . . . . . . . . . . . . . . . . . . . . . . . . . . . . . . . . . . . . 4
       Create an application. . . . . . . . . . . . . . . . . . . . . . . . . . . . . . . . . . . . . . . . . . . . . . . . . . . . . . . . 4
       Assign users to the application . . . . . . . . . . . . . . . . . . . . . . . . . . . . . . . . . . . . . . . . . . . . . . . . . 6
       Download the truststore certificate. . . . . . . . . . . . . . . . . . . . . . . . . . . . . . . . . . . . . . . . . . . . . . . 7
    Enable Okta SSO for the Informatica domain. . . . . . . . . . . . . . . . . . . . . . . . . . . . . . . . . . . . . . . . . . . 7
       Import the truststore certificate. . . . . . . . . . . . . . . . . . . . . . . . . . . . . . . . . . . . . . . . . . . . . . . . . 7
       Update the domain SAML configuration. . . . . . . . . . . . . . . . . . . . . . . . . . . . . . . . . . . . . . . . . . . . 8
       Optional: Configure the certificate alias on gateway nodes. . . . . . . . . . . . . . . . . . . . . . . . . . . . . . . . 8
       Perform additional domain configuration tasks. . . . . . . . . . . . . . . . . . . . . . . . . . . . . . . . . . . . . . . 8
       Log In to the Administrator tool. . . . . . . . . . . . . . . . . . . . . . . . . . . . . . . . . . . . . . . . . . . . . . . . . 9

Overview
You can configure Security Assertion Markup Language (SAML) authentication for the Informatica domain using the
Okta SSO identity provider.

An identity provider is an entity that provides authentication as a consumable service by applications. Platforms like
Amazon Web Services (AWS) and Microsoft Azure support various third-party identity providers to authenticate
requests by applications on their platforms.

SAML is an XML-based data format for exchanging authentication information between a service provider and an
identity provider. In an Informatica domain, an Informatica web application is the service provider.

You can configure the following Informatica web applications to use SAML authentication:

•   Informatica Administrator
•   Informatica Analyst
•   Metadata Manager

2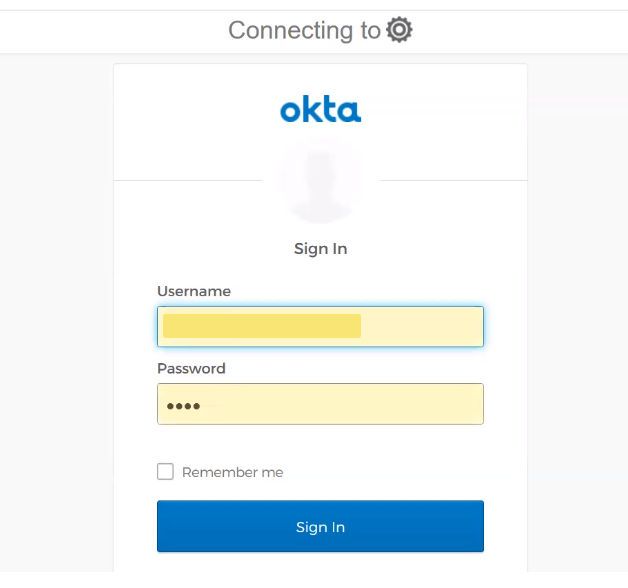
• Enterprise Data Catalog
• Enterprise Data Preparation
Informatica 10.5 supports Okta SSO version 2021.02.3.
Note: SAML authentication cannot be used in an Informatica domain configured to use Kerberos authentication.
Prerequisites
Verify the following prerequisites before you begin integrating Okta SSO with Informatica.
Verify that your installation of Okta SSO is version 2021.02.3 or higher.
Get the Okta dashboard URL that corresponds to your Okta user account. For example: https://-
admin.okta.com/admin/dashboard
Deploy Informatica in the same network as the Okta SSO deployment. Identify a machine where the Informatica
domain is deployed and note the host name and IP address.
Configure Okta SSO
Perform the steps in this section to integrate Okta SSO with Informatica.
Download and install the Active Directory agent
Download and install the Active Directory agent to enable application monitoring.
1. In the Okta dashboard, browse to Directory > Directory integrations.
2. Click Add Directory > Add Active Directory.
3. Click Set Up Active Directory.
4. Download and install the Active Directory agent to a directory on the Virtual Machine (VM) that runs the Okta
application agent:
a. Click Download Agent.
Okta downloads an .exe file to your computer.
b. Run the downloaded .exe file.
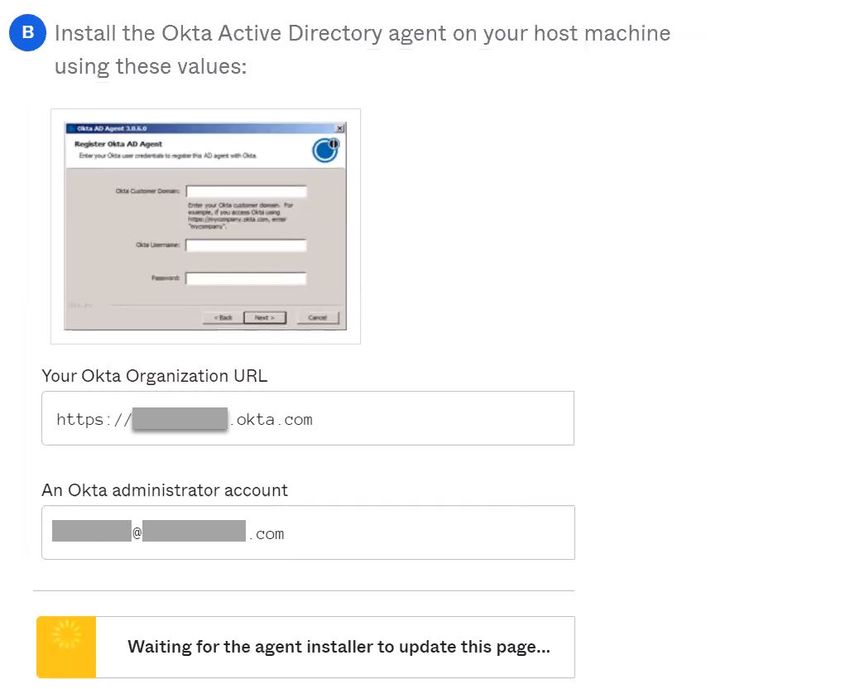
c. Follow the instructions under "B. Install the Okta Active Directory agent on your host machine using
these values."
Notice that values for the Register Okta AD Agent dialog box appear beneath the screenshot of the
dialog box. The following image shows the instructions:
3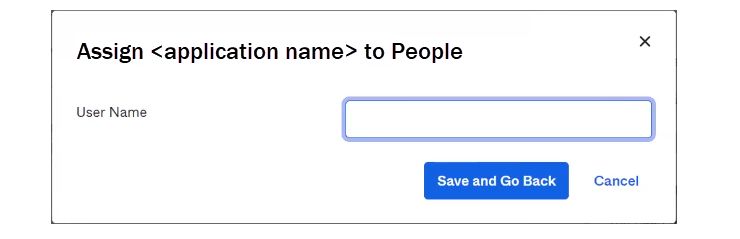
In the Register Okta AD Agent dialog box, configure the following properties and then click Next.

           Property                      Description

           Okta Customer Domain          Enter the value displayed under "Your Okta Organization URL."

           Okta Username                 Enter the value displayed under "An Okta administrator account."

           Password                      Enter the password for the Okta administrator account.

The agent is installed and registered.

Import users from Active Directory
Verify the agent and then import Active Directory users to Okta.

1.   Check the agent status.
     If the status is Active, proceed to import users.
2.   Import users from Active Directory. See the Okta documentation.

Create an application
Create a SAML application in the Okta portal.

1.   Log in to the Okta SSO administration console dashboard at the following URL: https:///
     admin/dashboard.

4
2. Browse to Applications > Admin.
3. Click Create new application.
4. Select SAML 2.0 and click Next.
5. Configure the following properties for the application:
Property Description
Appname Enter a name for the application.
Single Sign-On URL Enter the URL for the Informatica Administrator tool.
Requestable URLs: Enter the URL for the Informatica Administrator tool. If you want to enable additional
Index, Recipient, Informatica domains to use Okta SAML SSO, click Add Another and enter the Informatica
Destination Administrator URL for each domain.
Audience URI Identifier to use to represent the Informatica service provider. Okta uses the same value for
the Service Provider (SP) Entity URI property.
Enter a string to identify Informatica as the service provider. For example: Infa.
Default Relay State The URL that users will be directed to after a successful authentication through SAML. Do
not provide a value for this property.
Name ID format The username format that Okta uses in the SAML response. Accept the default value
Unspecified.
Application username Determines the default value for a user's application username. Okta uses this as the user
name in the authentication assertion statement.
Select AD SAM account name.
Response Enables Okta to sign authentication request responses from a service provider.
Note: Informatica does not support response signing for the Okta SSO identity provider.
Assertion signature Choose to require assertion signing. When you enable assertion signing, Okta signs
assertions of authenticity using a symmetric key.
Enabling this feature is recommended.
Assertion encryption Optionally choose to require encrypted assertions. When you enable encrypted assertions,
Okta signs assertions of authenticity using a symmetric key.
Enable Single Logout Enables end users to use a single action to sign out of the Okta session and a configured
application. Verify the property is not enabled. Default is not enabled.
Authentication The method that Okta uses to authenticate the user with a specific authentication
context class mechanism. Identifies the SAML authentication context class for the assertion's
authentication statement. Select PasswordProtectedTransport.
Honor Force Whether or not to require users to authenticate through the web app. Select Yes. Default is
Authentication No.
SAML Issuer ID Accept the default value: http://www.okta.com/${org.externalKey}
56. Configure at least one attribute statement. The attribute statement is included in SAML assertions from Otka.
Property Description
Name Username of an account imported from Active Directory. When you enter the literal string username,
Okta takes the user account name from the user that is assigned to the application in the Assignments
tab.
Name Choose Unspecified.
Format
Value Value for the attribute. Enter the following string:
String.substringBefore(user.login, "@")
The string takes the Active Directory (AD) account user name and filters the @ symbol and anything
that follows it. For example, if the Active Directory user is firstlastname@PLATFORMKRB.COM, the
value of the Name attribute is firstlastname.
7. Click Create app.
8. Click View Setup Instructions to get the Okta SSO URL for the application. Copy this URL to use later when
you configure the Informatica domain. Example:
https:///app///sso/saml
9. Click Next.
10. On the "Help Okta Support" page, select the statement that begins "I'm an Okta customer..." The remaining
questions are optional.
11. Scroll to the bottom and click Finish.
Assign users to the application
Assign the application that you created to an imported Active Directory user.
1. From the Application page, click the Assignments tab.
2. Click Assign > Assign to people.
The wizard displays the users that you imported from Active Directory.
3. Select a user to assign to the application. Optionally, use the Search control to find the user that you want to
assign to the application.
64. Click Assign for each user to assign.
Enter an alias for each user in the Assign to People dialog box and click Save and Go
Back.
Repeat this step for each user.
The following image shows the Assign to People dialog box:
The Assignments tab displays the list of users assigned to the application.
Download the truststore certificate
Download the truststore certificate from the Okta implementation for import to the Informatica domain.
1. In the Okta dashboard, browse to Admin > Applications > Applications and select the application you
created.
2. Click the Sign On tab.
The Okta portal opens to a page titled How to Configure SAML 2.0 for .
The page displays the following properties, with the value for each already populated:
Identity Provider Single Sign-On URL. URL that the service provider uses to connect with Okta.
Identity Provider Issuer. URL that Okta uses to furnish the truststore certificate when an app requests it.
X.509 Certificate. Encoded text of the truststore certificate.
3. Click Download certificate and save the .jks file to a temporary directory.
Enable Okta SSO for the Informatica domain
Configure elements on the domain to enable integration with Okta SSO.
Import the truststore certificate
The okta.cert file validates the SAML assertion signature. Import the file to the Informatica domain truststore.
Locate the okta.cert file in the location where you downloaded it, and then import it to the domain. Use the keytool
utility to import the file. For information about keytool, see
Import the Certificate into the Truststore Used for SAML Authentication.
1. Locate the okta.cert file that you downloaded previously. See “Download the truststore certificate” on page 7.
2. Use keytool to import the certificate file to the domain.
3. Restart the domain.
7The certificate is imported to the truststore in the following path: /source/services/
shared/security/
For information about using keytool to import the truststore certificate, see the Informatica Security Guide.
Update the domain SAML configuration
Use the infasetup updateDomainSAMLConfig command to enable SAML authentication on the domain and specify the
identity provider URL.
For example: infasetup updateDomainSamlConfig -saml true -iu https://:/idp/SSO.saml2
Note: The example does not contain all required options. See the information about infasetup
updateDomainSAMLConfig in the Informatica Command Reference. For example, the -spid option is required for
Informatica releases 10.2.2 and higher. The option specifies the relying party trust name.
Optional: Configure the certificate alias on gateway nodes
If you use the assertion signing feature, update gateway nodes with the Okta truststore certificate alias.
The certificate alias refers to the truststore certificate that enables signed assertion.
1. Run the following command to configure the certificate alias:
./infasetup.sh updateGatewayNode -saml true -asca
2. After the command runs, restart the Informatica domain.
Perform additional domain configuration tasks
Use infacmd to update the domain namespace and synchronize security domains.
Enable LDAP connectivity to synchronize Active Directory users
Use the addLDAPConnectivity command to synchronize Active Directory users.
The following example shows the command to synchronize Active Directory users.
infacmd.sh addLDAPConnectivity -dn ISPDomain -un Administrator -pd Administrator -sdn Native -la
:389 -lp -lc "" -lt MicrosoftActiveDirectory -ms 5000 -lcn LDAP2
Add the namespace for Active Directory users
Use the addNamespace command to add a namespace, creating a security domain in the Informatica domain.
A namespace on the Informatica domain contains a set of users imported from a user repository. When you create a
namespace, the Informatica Administrator tool can access all the Active Directory users that you imported. This
enables single sign-on for the Administrator tool.
The following example shows the command to add a namespace:
infacmd.sh addNameSpace -dn ISPDomain -un Administrator -pd Administrator -SecurityDomain Native -
usb cn=users,dc=platformkrb,dc=com -uf objectclass=user -gsb "cn=users,dc=platformkrb,dc=com" -gf
"objectCategory=group" -hp : -ns LDAP_NameSpace1 -lcn LDAP2
Synchronize security domains
Use the syncSecurityDomains command to synchronize the domain with the users that you imported from Active
Directory.
The following example shows the command to synchronzie security domains:
infacmd.sh SyncSecurityDomains -dn ISPDomain -un Administrator -pd Administrator -sdn Native -sn
LDAP_NameSpace1
8Assign the administrator role to a user
Use the assignRoleToUser command to assign the administrator role to an existing LDAP user.
The following example shows the command to assign the administrator role:
infacmd.sh assignRoleToUser -dn ISPDomain -un ispadmin -sdn Native -eu -esd
LDAP -rn Administrator -sn ISPDomain
Log In to the Administrator tool
Now you can log into the Informatica domain using Okta SSO.
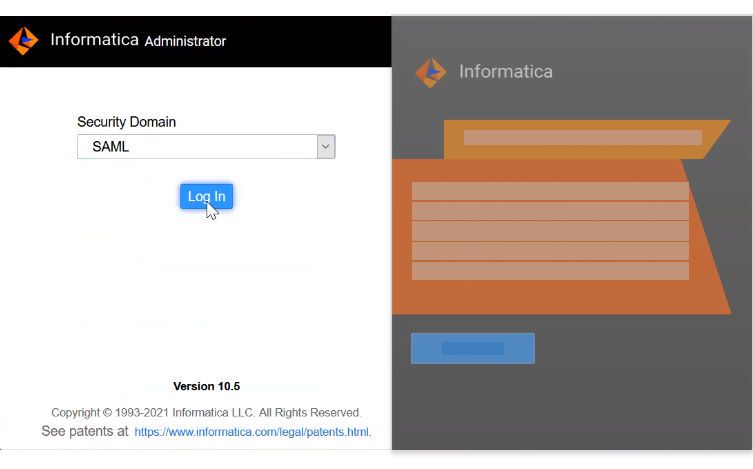
1. In a browser, go to the Administrator tool URL.
2. Log in using the security domain that you created for Okta SSO.
For example, you created a security domain for Okta SSO named "SAML." The following image shows the
Administrator tool login screen:
3. Click Log In.
The browser redirects you to the Okta SSO login page.
94. Log in to Okta using the administrator login that you designated with the AssignRoleToUser command.
The following image shows the Okta login screen:
The Administrator tool opens.
Author
Mark Pritchard
10You can also read