User Guide: Notability (App)
←
→
Page content transcription
If your browser does not render page correctly, please read the page content below
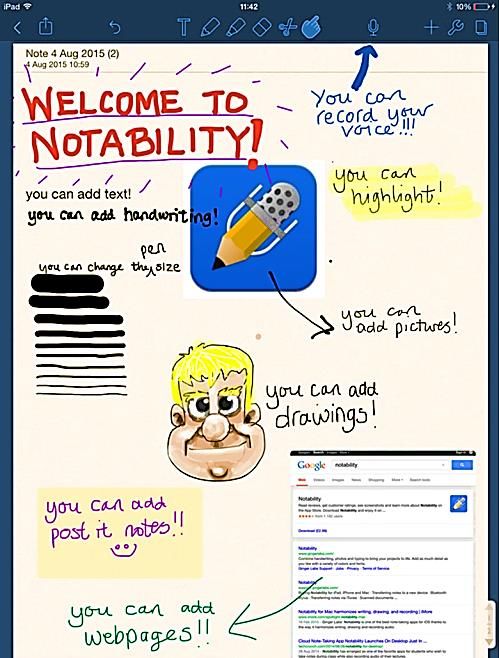
User Guide:
  Notability
   (App)
Notability is an app that lets
you record information in a wide
variety of formats - photos,
drawings, text, handwriting,
recording. It has a wide variety
of functions and could be a great
option for students looking for a
more accessible way of recording.
INDEX
   3 – 6:    Getting Started
   7 – 11:   Text and Typing Tool
 12 – 15:    Freehand Pen Tool
 16 – 17:    Highlighter Tool
 18 – 19:    Eraser Tool
20 – 22:     Cutting Tool
23 – 25:     Recording Tool
26 – 27:     Insert Menu
28 – 31:     Inserting Photos
32 – 33:     Inserting Shapes and Drawings
34 – 35:     Inserting Web Pages
36 – 37:     Inserting ‘Stickies’
38 – 40:     Document Overview and Exporting
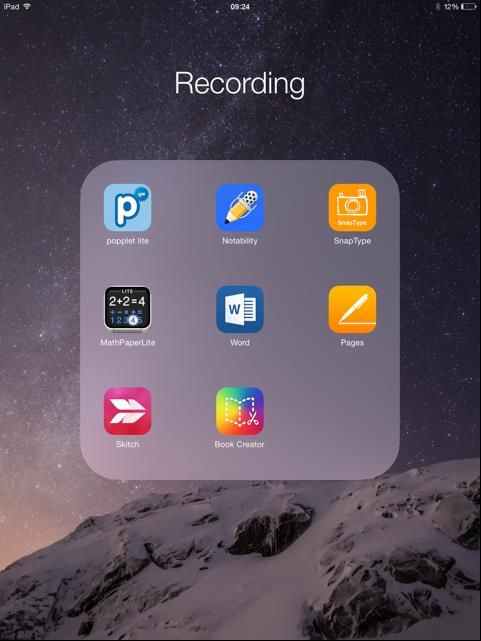
Locate the Notability icon and click it
to launch the app.

 You will then see the screen below
Use the icon to start a new
     document

This where your documents will be
displayed when you have created
them

This is where you can organise your
documents into folders and sub-
folders. For example, students could
list them by year, term and school
subject.

Settings

       Help/Guide

              Info and website links
This is the first page you see when you open
a new document.

To enter the settings menu, click     If you select the ‘paper’ option, you will see the
the       icon and you will see the   above menu. You can select the colour/pattern for
above options. The help menu          the page.
will give you a user guide.           You can also select whether the page is blank, has
                                      lines or has grids. This could be useful for a variety of
                                      different activities such as handwriting practice or in
                                      a maths session.
This is the toolbar. On the right you will see
the different icons explained.                   Undo

                                                 Text

                                                 Freehand Pen

                                                 Highlighter

                                                 Eraser

                                                 Cut

                                                 Move/Scroll

                                                 Voice Recording

                                                 Insert

                                                 Settings

                                                 Pages Overviews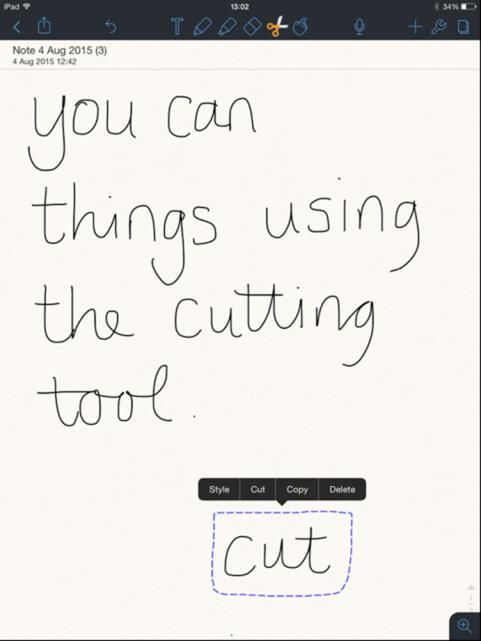
Text Entry
To begin typing, select the ‘text’ icon. Click anywhere on the
page and the keyboard will appear, ready to type.

                                                                 There are a number
                                                                 of keyboard options,
                                                                 explained on the
                                                                 next page.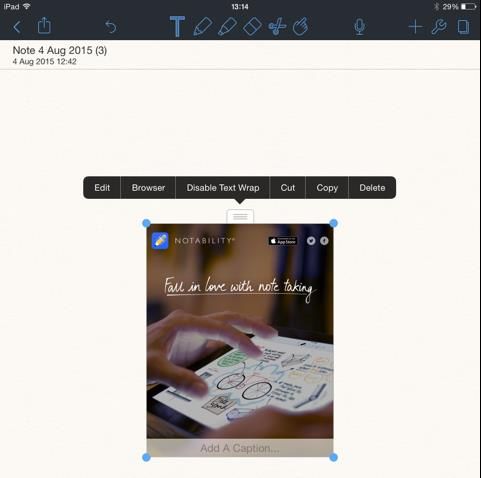
Text Colour
Move
cursor                Font size
                                                          Favourites

         Font style                       Style options                Bullet
                                                                       points
You can also create text boxes – this gives more control when arranging the page (you can move the text box wherever you need to). Select the text tool. Press and hold on the screen and a pop up will appear: Click this pop up and a text box will appear. Then simply type whatever you wish.
Once you have created the text box, there are a
number of options. You can ‘cut’, ‘copy’, ‘delete’
or change the ‘paper’.

Selecting the ‘paper’ option allows you to change
the background of the text box. You will see this
menu.

Click on any of the options and it will change the
background, You can select lines, grids or
colour/texture.
Freehand Pen
To write or draw on the page, select the   icon. You will see a pop up menu
displayed (as pictured below)

 You can select the pen style and            You can select the pen colour in
 size in this section.                       this section.
Once you have selected the pen tool and options,
simply write/draw straight onto the page.

If you want to change the style or colour again, just
click the pen icon in the menu bar.

Notability also offers the ability to zoom in to enable
you to hand write with more accuracy.

When you have selected the pen tool choose where
you want put the writing – click and hold in this area.

The box (as pictured to the left) will appear. You can
click and drag the box around the page. You can also
increase or decrease the size by clicking and dragging
on the bottom right hand corner.

At the bottom of the page you will see a zoomed in
view of the box. Here, you can write and it will
appear on the page
Whilst in this mode, you can select the highlighter, eraser and
                                                                  Move box right
cutting tools (as pictured above). There is also an undo
option.
                                                                  Move box left
As you write, the box will move across. When your writing
enters the blue area on the right hand side, the box will         New line
automatically move across to allow you to continue writing.
                                                                  Close box
Once completed, click on the ‘close box’ option and select
your next tool.                                                   Minimize box
Highlighter Pen
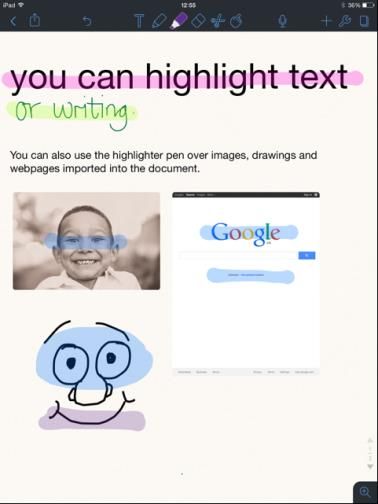
To use the highlighter, select the highlighter
option in the menu bar.

You will see a number of options. You can select
the style/size of the pen and the colour.

The highlighter can be used on anything in the
document – pictures, web pages, writing,
drawings and text.

If you want to change the pen, simply click on the
highlighter option in the menu again and select a
different colour/style/size.
Eraser
The eraser tool will erase anything produced
             with the ‘pen’ tool. To begin using, simply
             select it from the menu bar.

              You do not have to be accurate with deleting.
              The eraser will detect anything that was
              written as a continuous line – you can delete
              a whole word just by touching it.

You can delete single letters as long as they are written
separately (i.e. not written in joined up writing). Here you
can see I have touched the letter ‘d’ to delete it as it is
separated from the other letters.

If I touched the ‘e’ it would delete everything attached to
it – ‘ele’.
Cutting Tool
With the cutting tool, you can cut out a
section of writing/drawing.

Select the tool and draw around the area
you want to cut.

You can then click and drag to move it
around the page.

When you click the selected item, you
will see 4 options – ‘style’, ‘cut’, ‘copy’
and ‘delete’.
You will then see this
                                    menu displayed.

                                    You can change the size of
                                    the pen

                                    You can change the colour
Select the ‘style’ option to edit   of the pen
the selected text.
Recording voice and drawing/writing
Recording in Notability is simple. When
                             you are ready to record your voice, click
                             on the microphone icon:

                             It will start recording immediately (so
                             make sure you’re ready!). To stop,
                             simply click on the microphone symbol
                             again. Click on the down arrow next to
                             the microphone.

                               You will then see a menu appear
                               below.

                 Rewind 10            Settings
Playback speed
                 seconds

Play             Volume
Click on the settings menu and you will see two options: Manage Recordings and Note Replay. Click on the ‘Manage Recordings’ option and you will see a list of the recordings you have made in that document. Click on ‘Edit’ and you will be able to delete recordings from the list. Note Replay allows you to record drawings/writing and then play them back (like an animation). Try pressing record, doing a drawing and then playing back.
Insert Menu

This menu will allow you to add pictures, web pages, drawings, shapes and post it
notes.

NOTE: To select any of the inserted images and edit them/move them you need to
select the TEXT option:
Insert photo from Camera Roll

Take a photo with IPad Camera

Insert a drawing/shape

Insert a screen capture of a web page

Insert a ‘post-it’ note
To Insert a photo, select the ‘photo’ option.   Click on ‘add a caption’ and you can type
You will the be taken to your camera roll.      into the box. You can click and drag to
Select ‘all photos’ and then scroll through     move the image around. You can also
to find the photo you wish to use. Click on     change the size by clicking and dragging
it and it will be embedded into the             the blue dots in the corners.
document.
Click on the photo and you will see
the editing menu where you can cut,
copy or delete. Click on the ‘edit’
option and you will be taken to a
separate screen.
Undo Crop
Pen Size Pen colour
Once you’ve edited the picture, click
on ‘Done’ in top right hand corner.
The picture will be embedded into
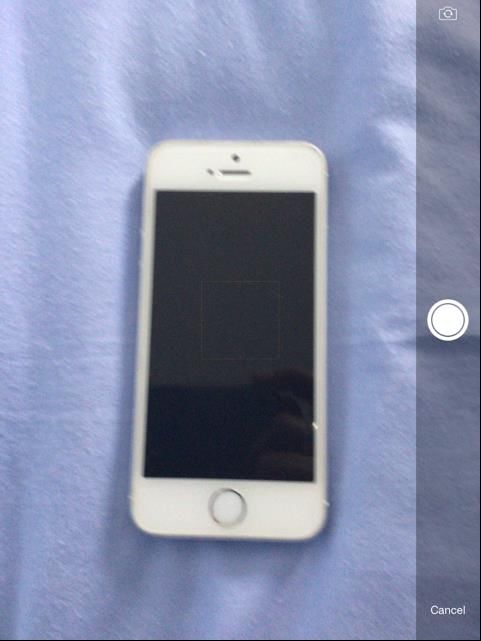
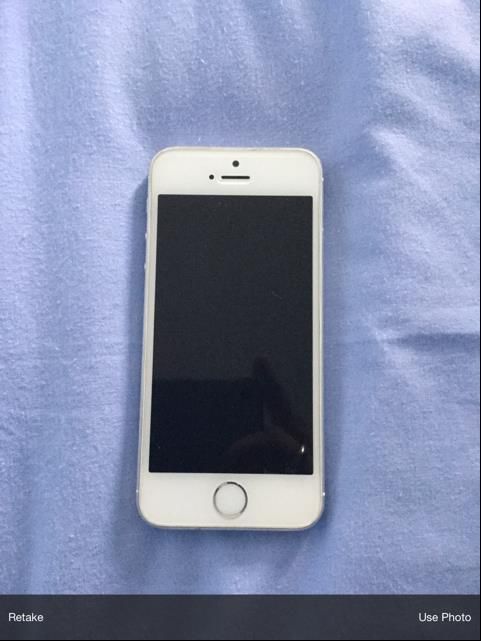
the document. Insert shapeLine up the photo
and click on the
white circular
button on the right
hand side to take
If you see this the photo. Once you have taken the photo, click
message, click on on ‘use photo’ to embed it into the
OK. document. If you’re not happy with
the photo, click on ‘Retake’.You will see the same menu above the photo as when you inserted and image from the camera role. You can move the image around by clicking and dragging. You can change the size clicking and dragging the blue dots in the corner. You can ‘add a caption’ at the bottom of the photo. You can also ‘edit’ the photo – add drawings, shapes, writing and text.
You will see a number of tools if
                                   you click on this symbol.
Clicking on the ‘figure’ option,
brings you to the screen below.
                                   Move Tool

                                   Freehand Tool

                                   Line Tool

                                   Square/Oblong Tool

                                   Circle Tool

                                   Triangle Tool

                                   Text Tool
Click and drag to add in different shapes. You can change colours using the icon. Click and drag to move the picture. You can change line width using the Resize by clicking and dragging the blue icon. dots in the corners. Once completed, click on ‘done’. Add a caption at the bottom if you wish.
Click on the ‘Web Clip’ options and you
will be taken to an Internet Browser page.
Go to Google and search or type in a web
page.

Open your chosen web page.
Once you have your web
page displayed, click on
‘Done’ in the top right hand
corner.
                               You can edit in the same way as editing pictures.
The page will then be          You will see a ‘browser’ option in the menu bar –
inserted into the document.    this will take you back to the Internet Browser so
                               you can change/replace the inserted page.
Select the ‘stickies’ I have selected the blank
option and you will stickie. Once inserted you
see the above can write/draw on it.
menu. You can Once you have selected,
select which kind of it will be inserted into the You can still resize the
‘stickie’ you want – document. As with other stickie and move it around
blank, lines, grid or objects, you can resize after you have written on
typing. using the blue dots and it.
move around by clicking
and dragging.Using the menu above the stickie, you can do all of the same things that you can do to pictures. You can also select the ‘paper’ option to change the background of the stickie.
Document Overview and
     Exporting.
The document overview ( ) allows you to view and scroll between all of the pages in the document. You can also add pages, delete pages and clear pages (as shown below). Click on the page to select and then choose the action you want to use.
Select the ‘export’ button in the top left hand side (      ) and you will see a number of
options. If you have ‘air-printing’ set up then you could select the ‘print’ option.
Otherwise, you can either email the document as a PDF OR ‘share’ by saving it as a PDF in
the IPad’s ‘iBooks’ app. If saving in iBooks, it can be printed or emailed at a later date.
You can also read